AGCO LAWN OP A & GARDEN EQUIPMENT A'I'O UAL Broadmoor / 300 / 1 600 / 2600 20HP Hydro Tractors Mfg. No. Description 2690651 Broadmoor, 20HP & 44" Mower (CE) 2690653 Broadmoor, 20HP & 40" Mower (CE) 2690652 2620H, 20HP & 44" Mower (CE) 2690655 LT2040, 20HP & 40" Mower (CE) Series 38" Mower Decks Mfg. No. Description 1694453 38" Mower Deck (CE) 40" Mower Decks Mfg. No. Description 1695030 40" Mower Deck (CE) 1695034 40" Mower Deck (CE) 1695052 40" Mower Deck (CE) 44" Mower Decks Mfg. No.
[ahJeof Contents Safety Rules & information ................................. identification Numbers ........................................ 2 7 Safety Decals ....................................................... Safety icons ......................................................... Features & Controls .......................................... Control Functions .................................................. Parking Brake Function ......................................... Hourmeter ................
SafetyRules& information OperatingSafety Congratulations on purchasing a superior-quality piece of lawn and garden equipment. Our products are designed and manufactured to meet or exceed all industry standards for safety. Power equipment is only as safe as the operator. If it is misused, or not properly maintained, it can be dangerous! Remember, you are responsible for your safety and that of those around you. Use common sense, and think through what you are doing.
SafetyRulesandinformation, SlopeOperatm You could be seriously injured or even killed if you use this unit on too steep an incline. Using the unit on a slope that is too steep or where you don't have adequate traction can cause you to lose control or roll over. 3.5 2O A good rule of thumb is to not operate on any slope you cannot back up (in 2-wheel drive mode). You should not operate on inclines with a slope greater than a 3.5 foot rise over a 20 foot length.
SafetyRules& lflfomatm Read these safety rules and follow them closely. Failure to obey these rules could result in loss of control of unit, severe personal injury or death to you, or bystanders, or damage to property or equipment. This mowing deck is capable of amputating hands and feet and throwing obiects. The triangle _, in text signifies important cautions or warnings which must be followed. GENERAL OPERATION 1.
SafetyRulesaridiflformtm SLOPE OPERATION WARNING Slopes are a major factor related to loss-of-control and tipover accidents, which can result in severe injury or death. Operation on all slopes requires extra caution. If you cannot back up the slope or if you feel uneasy on it, do not operate on it. Control of a walk-behind or ride-on machine sliding on a slope will not be regained by the application of the brake.
SafetyRules& information SERVICE AND MAINTENANCE Safe Handling of Gasoline 1. Extinguish all cigarettes, cigars, pipes, and other sources of ignition. 2. Use only approved gasoline containers. 3. Never remove the gas cap or add fuel with the engine running. Allow the engine to cool before refueling. 4. Never fuel the machine indoors. 5. Never store the machine or fuel container where there is an open flame, spark, or pilot light such as near a water heater or other appliance. 6.
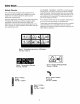
idefltifJcatiofl Numbers I kW: Engine -_ RPM _?/X [ _"'l s,°.°,.°,o,°° Port Washington, WI LISA Mower JDTag Tracto When contacting your authorized dealer for replacement parts, service, or information you MUST have these numbers. Model Description Name/Number Record your model name/number, manufacturer's identification numbers, and engine serial numbers in the space provided for easy access. These numbers can be found in the locations shown.
SafetyDecals Safety Decals This unit has been designed and manufactured to provide you with the safety and reliability you would expect from an industry leader in outdoor power equipment manufacturing. Although reading this manual and the safety instructions it contains will provide you with the necessary basic knowledge to operate this equipment safely and effectively, we have placed several safety labels on the unit to remind you of this important information while you are operating your unit.
CESafetyicons Safety icons Danger: Machine Rollover. Warning: Read Operator's Manual. Do not use this machine on slopes greater than 10 °. Read and understand the Operator's Manual before using this machine. Danger: Thrown Objects. Danger: Dismemberment. This machine is capable of throwing objects and debris, Keep bystanders away. This machine can amputate limbs. Keep bystanders and children away when engine is running. Warning: Remove Key Before Servicing. Danger: Dismemberment.
Features& Controls Control Figure 1. Controls Functions The information below briefly describes the function of individual controls. Starting, stopping, driving, and mowing require the combined use of several controls applied in specific sequences. To learn what combination and sequence of controls to use for various tasks see the OPERA TION section, _JI!_=!__ Throttle Control _J Headlights The throttle controls engine speed.
Features& Cofltrols, _PTO Switch Cutting The PTO (Power Take-Off) switch engages and disengages attachments that use the PTO. To engage the PTO, pull UP on the switch. Push DOWN to disengage. Note that the operator must be seated firmly in the tractor seat for the PTO to function. [!_)"!] Ignition (40" OFF RUN Allows the engine to run and powers the electrical system. W START Cranks the engine for starting.
Features& Cefltrols Parking Brake Function Applying the Parking Brake - See Figure 2. To lock the parking brake, release the ground speed pedals (A), fully depress the brake pedal (B), pull UP on the parking brake knob (C), and then release brake pedal. Releasing the Parking Brake - See Figure 2. To release the parking brake, fully depress the brake pedal (B) and push the parking brake knob (C) DOWN. Hourmeter The hour meter measures the number of hours the key has been in the RUN position.
OperatJflg the Tractor SAFETY iNTERLOCK SYSTEM TESTS This unit is equipped with safety interlock switches and other safety devices. These safety systems are present for your safety: do not attempt to bypass safety switches, and never tamper with safety devices. Check their operation regularly. OperationaJ SAFETY Checks Your unit is equipped with a seat switch safety system. Check the seat switch operation every fall and spring with the following tests.
Operatiflg theTractor Starting the Engine Driving The Tractor 1. While sitting in the operator's seat, fully depress the brake pedal or set the parking brake. 1. Sit in the seat and adjust the seat so that you can comfortably reach all the controls and see the dashboard display. 2. Make sure that your feet are not depressing the ground speed control pedals and that the cruise control lever is in neutral. 2. Engage the parking brake. 3. Disengage the PTO clutch. 4.
Operatiflg theTractor WARNING Pushing the Tractor by Hand The engine will shut off if the reverse ground speed pedal is depressed while the PTO is on and the RMO has not been activated. The operator should always turn the PTO off prior to driving across on roads, paths or any area that maybe used by other vehicles. Sudden loss of drive could create a hazard. 1. Disengage the PTO and turn the engine off. 2.
Operatiflg theTractor Adjusting Mower Cutting & 44" Mower Decks Height - 38" The cutting height adjustment knob (B, Figure 5) controls the mower cutting height. The cutting height is infinitely adjustable between approximately 1" and 3-5/8" (2,59,2cm). Turn the knob clockwise to raise the deck and counterclockwise to lower it. Adjusting Mower Cutting Mower Decks Height Figure 5. Raising & Lowering Mower - 38"& 44" Mowers A. Mower Lift Lever B.
Operatiflg theTractor Lift Variations Attachments When Using Snowthrower & Dozer Applications When a front-mounted attachment such as a snowthrower or dozer blade is used with the tractor, the lift mechanism must be locked to provide downward force. When the mower is reinstalled the downward pressure lock must be released so that the mower can float. Manual Lift Models NOTE: These instructions apply to Broadmoor / 300 / 1600/2600 Series tractors equipped with a rift lever kit.
Operatiflg theTractor Mower Deck Removal Simplicity, Models Massey & installation Ferguson or AGCO -% WARNING Figure 10. Lift Arms (Viewed from underneath right side of tractor) A. Mower Lift Arm C. Fiat Washer B. Tractor Lift Arm D. Safety Clip Engage parking brake, disengage PTO, stop engine and remove key before attempting to install or remove the mower. Removing the Mower Deck 1. Park tractor on a hard, level surface such as a concrete floor.
Operatiflg theTractor Mower Deck Removal Snapper A & installation Models WARNING Figure 13. Lift Arms (Viewed from underneath A. Safety Clip B. Upper Hanger C. Lift Hook D. Lift Chain Engage parking brake, disengage PTO, stop engine and remove key before attempting to install or remove the mower. Removing the Mower Deck 1. Park tractor on a hard, level surface such as a concrete floor. Turn off PTO switch and engine, remove the key and apply parking brake. left side of tractor) E. Lower Hanger F.
Operatiflg theTractor WARNING Never store the unit (with fuel) in an enclosed, poorly ventilated structure. Fuel vapors can travel to an ignition source (such as a furnace, water heater, etc.) and cause an e×plosion. Fue! vapor is also toxic to humans and animals. Storage Before you store your unit for the off-season, read the Maintenance and Storage instructions in the Safety Rules section, then perform the following steps: • Disengage the PTO, set the parking brake, & remove the key.
& Mowinginformation HOW TO WATER YOUR LAWN How and When to Water, Fertilize & Aerate The best method of watering a lawn is to imitate a slow, soaking rain, applying about 1 inch of water. HOW TO FERTILIZE YOUR LAWN Most lawns are watered too often, but with too little water. However too much water can allow development of diseases with your lawn. It is best to water the lawn only when necessary, and then to water it slowly, evenly, and deeply--imitating a slow, soaking rain.
LawnCape& MowingInfopmation When and How Often to Mow The time of day and condition of the grass greatly affect the results you'll get when mowing. For the best results, follow these guidelines: • Mow when the grass is between 3"-4" (7,5-10 cm) high. • Mow with sharp blades. Short clippings of grass one inch or shorter decompose more quickly than longer blades. Sharp mower blades cut grass cleanly and efficiently, preventing frayed edges which harm the grass.
LawnCape& MowingInfopmation Using a Mulching Mower Benefits of Proper Mulching Mulching consists of a mower deck which cuts and recuts clippings into tiny particles and then blows them down into the lawn. These tiny particles decompose rapidly into by-products that your lawn can use. Under proper conditions your mulching mower virtually eliminate noticeable clippings on the lawn surface.
MAINTENANCE SCHEDULE & PROCEDURES The following schedule should be followed for normal care of your tractor and mower.
RegularMaintenance Safety interlock System Check Service Interval: Every Fall & Spring Check the function of the safety interlock system using the test procedure found on page 12 of this manual. If the tractor fails any of the tests, see your dealer. Blade Brake Check Service interval: Every 100 Hours or Fall & Spring Mower blades and mower drive belt should come to a complete stop within five seconds after electric PTO switch is turned off. Size PSi bar 1.
RegWPMaiflteflaflce Battery Maintenance WARNING When removing or installing battery cables, disconnect the negative cable FIRST and reconnect it LAST. if not done in this order, the positive terminal can be shorted to the frame by a tool Cleaning the Battery and Cables Service intervaL: Every 100 Hours 1 Disconnect the cables from the battery, negative cable first (A, Figure 17) 2 Remove the battery hold-down (C) and battery 3 Clean the battery compartment with a solution of baking soda and water.
RegularMaintenance Lubrication Service interval: Every 25 Hours Lubricate the unit at the locations shown in Figures 1923 as well as the lubrication points listed. Generally, all moving metal parts should be oiled where contact is made with other parts. Keep oil and grease off belts and pulleys. Wipe surfaces clean before and after lubrication. Grease: \ Figure 20.
RegWPMaintenance WARNING For your personal safety, do not handle the sharp mower blades with bare hands. Careless or improper handling of blades may result in serious injury. WARNING For your personal safety, blade mounting capscrews must each be installed with a hex/spline washer and spring washer, then securely tightened. Torque blade mounting capscrew to 45 - 55 ft. Ibs, (61 - 75 N.m.) LOOSEN Figure 24. Blade Removal Servicing the Mower Blades .......................... J ....
RegularMaintenance Check Mower Blade Timing - 40" Mowers Service interval: Yearly 1. Turn the PTO OFF, engage the parking brake, turn the engine off, and remove the key. Remove the mower deck (see "Mower deck removal"). 2. Turn the mower deck over and check the position of the blades. The blades must be positioned perpendicular to each other as shown in Figure 28. If not, proceed to step 3. 3. Use a block of wood (B, Figure 24) to prevent blade rotation while loosening the capscrew. 4.
RegWPMaiflteflaflce Transmission identification Several service procedures within this book are identified by, and vary by, transmission type. To determine what transmission is in your tractor, check the identification tag attached to the axle of the transmission (Figure 29), or check your tractor's parts book. Transmission ® Maintenance / Do not allow dirt, water, or other debris to enter the expansion chamber or transmission. Even a small amount of dirt can damage the transmission Figure 29.
RegularlVlaifltenance Maintenance 31 Records
Troubleshooting, Adjustment, & Service Trou bleshooti ng A While normal care and regular maintenance will extend the life of your equipment, prolonged or constant use may eventually require that service be performed to allow it to continue operating properly. To avoid serious injury, perform maintenance on the tractor or mower only when the engine is stopped and the parking brake engaged.
Troubleshooting, Adjustment, & Service Tractor Troubleshooting Tractor Cont. drive belt slips. Brake will not hold. Tractor steers hard or handles poorly. 1. 2. 3, 4. 1. 2. 1. 2. 3. TROUBLESHOOTING Clutch/brake is out of adjustment. Pulleys or belt greasy or oily. Belt stretched or worn. idler pulley pivot bracket "frozen" in declutched position. Brake is incorrectly adjusted. Internal brake worn. See Adjustments Section. Clean as required. Replace with new belt.
Troubleshooting, Adjustment, & Service Seat Adjustment Pitch Adjustment The pitch of the seat can be adjusted to one of three positions. To adjust, remove the carriage bolts, spacers, washers, and nuts (B, Figure 30) from the hinge and reinstall them in the desired holes. Seat Slide Adjustment The seat can also be adjusted forward and back. Move the lever (A, Figure 30), position the seat as desired, and release the lever to lock the seat into position.
Troubleshooting, Adjustment, & Service Steering Wheel Adjustment NOTE. The steering wheel on Snapper models is not adjustable. 1. Use a suitable punch to remove the roll pin at the base of the steering wheel (B, Figure 31). 2. Pull down on the rubber boot to expose the two holes in the steering shaft (A). Thicker Spoke Faces Seat 3. Align the hole in the steering wheel with the appropriate steering shaft hole and install the roll pin. NOTE.
Troubleshooting, Adjustment, & Service PTO clutch adjustment WARNING To avoid serious injury, perform adjustments only with engine stopped, key removed and tractor on level ground. Check the PTO clutch adjustment after every 250 hours of operation. Also perform the following procedure if the clutch is slipping or will not engage, or if a new clutch has been installed. 1.
Troubleshooting, Adjustment, & Service WARNING Before checking mower, shut off PTO and engine, remove the key, and allow all moving parts to stop. CAUTION DO NOT remove the mower deck baffles. The baffles help prevent grass clippings from becoming airborne and plugging up the engine cooling fins. Mower Adjustments Gauge Wheels (Select Figure 36. Fixed Bracket Gauge Wheel Adjustment A. Gauge Wheel Bracket D. Washers B. Locknut E. Shoulder Bolt C.
Troubleshooting, Adjustment, & Service Leveling The Mower If the cut is uneven, the mower may need leveling. Unequal or improper tire pressure may also cause an uneven cut. Make sure tire pressure is correct as specified in Checking Tire Pressure. SIDE-TO-SIDE LEVELING 1. With the mower installed, place the tractor on a smooth, level surface such as a concrete floor. Turn the front wheels straight forward. 2. Check for bent blades and replace if necessary. 3. Place the mower in mid-cut position.
Troubleshooting, Adjustment, & Service Mower Belt Replacement Q cD BELTS OVER PULLEYS. o avoid damaging belts, DO NOT PRY 44" PTO Belt Replacement 1. Park the tractor on a smooth, level surface such as a concrete floor. Disengage the PTO, turn off the engine and lock the parking brake. Remove the key. Remove the mower or place in the lowest cutting position. FRONT 2. Move the idler arm (A, Figure 41) to relieve belt tension. Drop the belt from the PTO (electric clutch) pulley. Figure 41.
Troubleshooting, Adjustment, & Service Arbor Drive Belt Replacement 44" Mowers = NOTE." Be sure to use only genuine Simplicity replacement parts. 1. Park the tractor on a smooth, level surface such as a concrete floor. Disengage the PTO, turn off the engine and lock the parking brake. Remove the key. 2. Remove the mower from the tractor. See Mower Removal in the Operation section. 3. Remove the capscrews securing the right-hand arbor cover (B, Figure 43).
Troubleshooting, Adjustment, & Service 40" Mower PTO Belt Replacement 1. With the mower deck installed, park the tractor on a smooth, level surface such as a concrete floor. Disengage the PTO, engage the parking brake, shut the engine off, and remove the key. 2. Remove the mower deck (see "Mower deck removal"). Remove the belt covers. 3. Note the position of the idler pulley belt guides (E & F, Figure 45) when installed. Loosen the idler pulley capscrews and remove the belt from the idler pulleys (D & G).
Troubleshooting, Adjustment, & Service Figure 47. Release Cogged Belt Tension A. 3/8" Ratchet and Extension Figure 46. Mulching Deck (Belt Covers Removed) A. idler Assembly Capscrew B. Spring-Loaded idler Assembly C. Belt D. Square Hole 40" Mower Arbor Drive BeJt Replacement 1. With the mower deck installed, park the tractor on a smooth, level surface such as a concrete floor. Disengage the PTO, engage the parking brake, shut the engine off, and remove the key. 2.
Troubleshooting, Adjustment, & Service, 38" Mower Drive Belt Replacement NOTE." Be sure to use only genuine Simplicity replacement parts. Check the back of this manual or the decal under the hood for common replacement part numbers. 1/8" Gap 1/8" Gap Note: It is not necessary to remove the mower to instafl a new belt. However, for easier access mower can be removed. See Mower Removal in the Operation section. 1. Park the tractor on a smooth, level surface such as a concrete floor.
SpecHicaBons NOTE: Specifications are correct at time of printing and are subject to change without notice. ** The power ratings for an individual engine model are initially developed by starting with SAE (Society of Automotive Engineers) code J1940 (Small Engine Power & Torque Rating Procedure) (Revision 2002-05).
Accessories Replacement Technical Parts Replacement parts are available from your authorized dealer. Always use genuine Simplicity Service Parts. Additional copies of this manual are available, as well as fully illustrated parts lists. These manuals show all of the product's components in exploded views (3D illustrations which show the relationship of parts and how they go together) as well as part numbers and quantities used. Important assembly notes and and torque values are also included.
0 Bimplicilq MANUFACTURING, INC. 500 N Spring Street / PO Box 997 Port Washington, Wl 53074-0997 PRODUCTS 535 Macon Street McDonough, GA 30253 www.SimplicityMfg.com www.Snapper.com MASSEY FERGUSON AWN & GARDEN EQUIPMENT AGCO LAWN & GARDEN EQUIPMENT 500 N Spring Street / PO Box 997 Port Washington, Wl 53074-0997 500 N Spring Street / PO Box 997 Port Washington, Wl 53074-0997 www.MasseyLawn.com AGCOLawn.