USER MANUAL How to Use and Care for your Washing Machine
CONTENTS Page SECTION A: Knowing your washing machine Parts of the washing machine Saving water and energy The difference between the deep rinse and eco rinse options Cantrol panel About your machine 3 3 4 4 5 SECTION B: Washing instructions So r t y o u r w ash in g in t o sep ar at e w ash lo ad s Ch eck y o u r clo t h es t o av o id d am ag e Pr e-t r eat m en t sp r ay s / st ain r em o v er s Lo ad t h e w ash in g m ach in e A d d t h e d et er g en t A d d in g fab r ic so f t en er A d d in g b
SECTION A: Knowing your washing machine PART OF THE MACHINE This booklet talks about different parts of your washing machine. The main ones you need to know are shown on the diagrams below. Outlet Hose / Drain Hose Wash bowl Control Panel Lid See installation instructions to fit & position drain hose Agitator Lint filter Fabric softener dispenser SAVING WATER AND ENERGY This washing machine features water and energy saving options.
THE DIFFERENCE BETWEEN THE DEEP RINSE AND ECO RINSE OPTIONS. (See page 13 for rinse option instructions) Eco rinse option When Eco rinse is used, rinse water is sprayed into the wash bowl in pulses. After each pulse the wash bowl will spin to remove detergent laden water from the clothes. The machine will go through a series of six pulse spray and short spin cycles in this manner, followed by the final long spin that removes the water from the clothes to complete the wash.
ABOUT YOUR WASHING MACHINE Out of balance interruption The washing machine can stop during the spin stage of a wash because of an out of balance condition. All three WATER TEMP lights will be flashing rapidly to tell you an out of balance interruption has happened. Out of balance during spin is caused by an uneven distribution of clothes in the wash bowl. To rectify the out of balance condition, open the lid and redistribute the clothes evenly in the space between the agitator and wall of the wash bowl.
SECTION B: Washing instructions Follow the instructions in this section for the best washing results. SORT YOUR WASHING INTO SEPARATE WASH LOADS Each load of washing should contain clothing which needs the same washing conditions. For example, you should not wash delicate clothes with very dirty work clothes. Some fabrics are lint collectors and can pick up lint, dirt and colour from other fabrics, which are lint producers. Some examples are listed below.
ADD THE DETERGENT 1. Measure the correct amount of powder or liquid detergent by following the recommendations on the package. 2. Mix detergent in one litre of hot or warm water. 3. Add the pre-mixed detergent to the wash load. Don’t do these things: * Use too little detergent because you will get a poor wash. * Use too much detergent as this will give you too many suds and may cause overloading of the motor during the spin stage of the wash cycle.
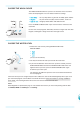
START YOUR WASHING MACHINE AS FOLLOWS 1. Turn on the taps 2. Close the lid 3. Press the POWER button The machine will ‘beep’ twice and show a pattern of lights. Wait for this to happen before attempting to operate the machine. Your washing machine is now in pause mode and ready to wash your clothes. If the settings shown on the control panel are what you want to use and the PROGRAM SELECTOR is set to the correct wash program for your clothes load, press the START/PAUSE button to start your wash.
YOUR PROGRAM GUIDE Recommended Program Select this Program Heavy Duty * for a heavily soiled cotton wash load. Normal / Heavy Wash Water Temp Wash Choice Rinse*** Option Hot or Warm Extra Eco or Deep for a full load of normally soiled cottons. Hot or Warm Regular Eco or Deep Normal for an average domestic load of mixed fabrics. Hot, Warm or Cold Regular Eco or Deep Delicates for lingerie, lace, trimmed and embroidered items.
CHOOSE THE WASH CHOICE The WASH CHOICE button lets you have an influence on the wash time of the selected programe. You can choose from three settings: - for very dirty clothes eg overalls or muddy sports clothes. - for your normal everyday wash of cottons, sheets etc. - for lightly soiled clothes and delicate items. Press the WASH CHOICE button if you want to increase or decrease the wash time.
TO START THE WASH CYCLE / PROGRAM Press the START/PAUSE button. START/PAUSE is used to Start, Stop and Continue the wash. If you have started your wash and you wish to stop it for some reason, press the START/PAUSE button to enter the pause mode. NOTE: Do not hold the button down as this will advance the cycle, refer page 13 Advancing The Wash Progress. MACHINE IN PAUSE MODE You can tell when your washing machine is in pause mode. A PROGRESS INDICATOR light is ‘FLASHING’ and the IN PROGRESS light is ‘OFF’.
SECTION C: Features of your washing machine Additional features on your washing machine are described in this section. INFORMATION AND GUIDANCE FEATURE The washing machine will give you information by using the control panel lights and the ‘beeping’ function.
TO SWITCH OFF THE END OF CYCLE BEEP The washing machine is factory set to ‘beep’ when your wash is finished. It will also 'beep' when the machine has paused at completion of the Drip Dry wash program, to alert you to remove the drip dry clothes from the wash bowl. To change the ‘beeping’ selection, proceed as follows: Light ON 'beep' ON 1. Press and hold the WASH CHOICE button for 3 seconds to enter programming mode.
SECTION D: Caring for your washing machine Your washing machine will give you long and trouble-free service, if you follow the instructions in this section. These instructions show you how to care for your washing machine. WHAT TO DO AFTER YOU HAVE FINISHED YOUR WASHING 1. Press the power button to switch off the machine. 2. Switch off the electricity at the power point. 3. Turn off the water taps. 4. Leave lid open for a while to allow moisture inside the washing 4. machine to evaporate.
CLEANING STAINS IN THE WASH BOWL Stains in the wash bowl can be caused by: metal objects such as bobby pins, dressmaking pins and nails. salt IMPORTANT: Check all pockets before loading clothes into your washing machine. Don’t leave wet clothing (especially swimwear) in the bowl for too long before you wash it. How to clean the stainless steel wash bowl Wipe with a cleaning product which is marked suitable for stainless steel. IMPORTANT: Never use bleach cleaners or steel wool.
SECTION E: Handy washing hints This section gives you some help in dealing with washing problems. Chemicals referred to on pages 16 and 17 are available from your local supermarket, hardware store or the chemist.
A GUIDE TO STAIN REMOVAL Treat stains as soon as possible. The longer they are left the harder they are to remove. The following information may assist you in stain removal. W hit e cot t on and Linens W ashable Coloured Fabrics BALL POINT PEN INK Sponge with methylated spirit. Bleach if necessary. Same as for whites but omit bleach. BLOOD, MEAT JUICE, EGG (dry stain) Cover area with meat tenderiser (MSG). Apply warm water to make a p aste. Wait 15–30 m inutes.
SECTION F: Don’t call for service until you’ve checked these points IMPORTANT: If you call for service and there is nothing wrong with your washing machine, you will have to pay for the service call. You will have to pay even when your washing machine is under warranty. Before you call for service, check the points in the table below.
OTHER DIAGNOSTIC HELP AND A GUIDE FOR WHEN YOU SHOULD CALL FOR SERVICE If you are having a problem with your washing machine, make sure you have followed ALL of the instructions on page 18 in the “What to do” column before calling for service. Description Diagnostic Help given by Machine using control panel Customer action (Summary) lights accompanied by ‘beeping’ Light(s) flashing Not filling with water Make sure both wall taps are on and hose filters are not blocked.
Warranty FOR SALES IN AUSTRALIA AND NEW ZEALAND APPLIANCE: SIMPSON WASHING MACHINE This document sets out the terms and conditions of product warranties for Electrolux branded appliances. It is an important document. Please keep it with your proof of purchase documents in a safe place for future reference should you require service for your Electrolux appliance. General Terms and Conditions 1.