Back to Start Page Nera F55 Getting Started
GETTING STARTED CONTENTS INTRODUCTION........................................ 5 General................................................................ 5 Antenna Unit ...................................................... 5 Main Communication Unit - MCU........................ 5 Communication services..................................... 6 SIM card.............................................................. 9 OPERATION FROM HANDSET............... 10 Switching ON.......................................
GETTING STARTED APPENDIX A - INSTALLATION ............. A-1 Location of Antenna Unit ................................ A-2 Coax cable ..................................................... A-3 Optional antenna cable ................................... A-3 Power source ................................................. A-3 Connecting up ................................................ A-4 Outline dimensions ......................................... A-5 Mounting handset holder/cradle ......................
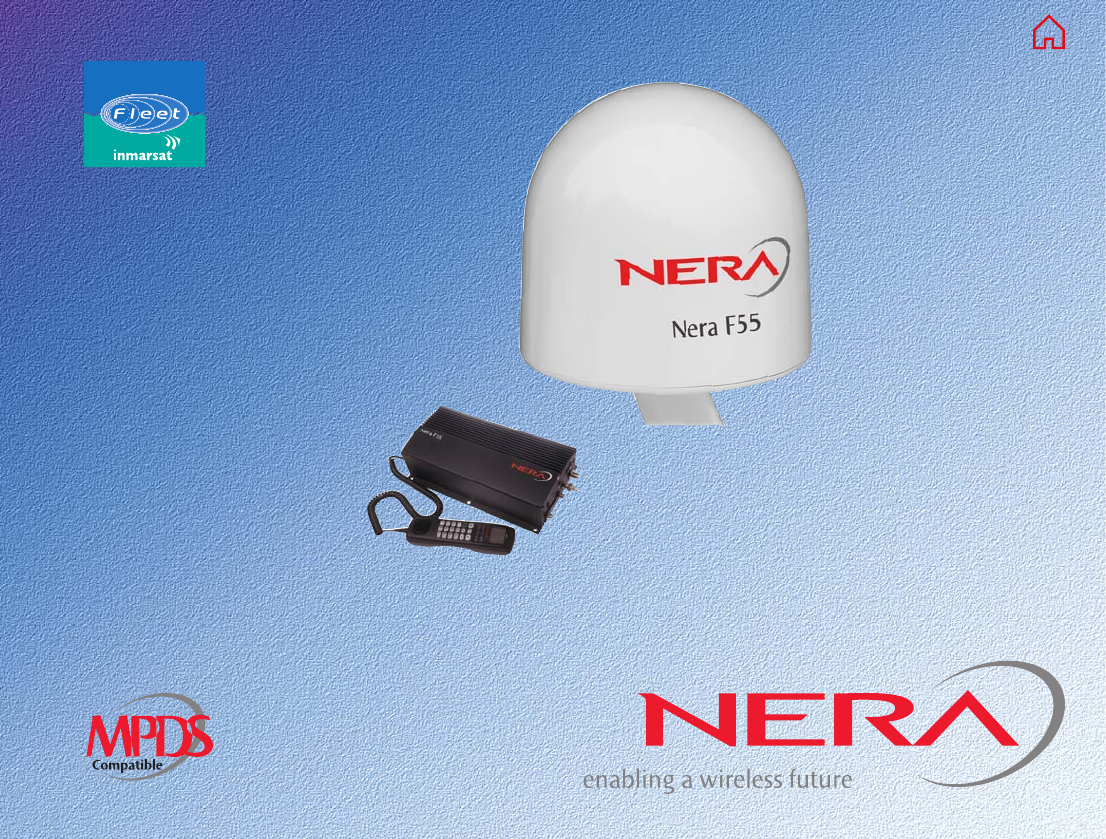
GETTING STARTED General The Nera F55 satellite terminal provides 4.8 kbps global speech service via the Inmarsat satellite system. Nera F55 offers 64 kbps speech, telefax, data service and MPDS (Mobile Packet Data Service) within the Inmarsat spot beam coverage, see Satellite Coverage Map.
GETTING STARTED INTRODUCTION CONT’D Communication services Control interface The RS-232/RS-422 or USB port allows connection of a PC for configuration of the Nera F55 MCU. A PC program (vtLite Marine) that provides the software to operate and configure the MCU is supplied on the enclosed CD (requires at least Windows 98). Global beam service • Speech: - 4.8 kbps Spot beam services • Speech: - 64 kbps / 4.
GETTING STARTED INTRODUCTION CONT’D Radome (cutaway view) Antenna Dish GPS Receiver RF-Transceiver Servo Stabilized Pedestal Figure 3 Nera F55 - Antenna Unit parts.
GETTING STARTED INTRODUCTION CONT’D Figure 4 Examples of preprogrammed Terminal Ids and MSN numbers. Allows direct connection without prior configuration. See also Routing of incoming calls and MSN configuration in the User Guide. DIAL 00+INTL TEL.NO.
GETTING STARTED SIM card The SIM card carries subscription information from your Net service provider on an integrated circuit. The Nera F55 used with the SIM card assumes the identity of the SIM card. The SIM card has its own set of Inmarsat Mobile Numbers (IMN) on which the user can be contacted irrespective of the Nera F55 used. All outgoing calls will be billed to the owner of the SIM card. The SIM card is protected by a SIM PIN (Personal Identification Number).
GETTING STARTED OPERATION FROM HANDSET Handsfree microphone Display indicators: appears at hook OFF flashes when receiving a call Net provider&Ocean Region appears when loudspeaker is ON ALPHA appears when selecting letters on the keypad, e.g.
GETTING STARTED OPERATION FROM HANDSET CONT’D Switching ON The ON/OFF switch located on the rear panel of the Main Communication Unit switches all basic units of the Nera F55 terminal on/off: • the Nera ISDN Handset • the Main Communication Unit (MCU), and • the Antenna Unit. See figure 6 for location of the power ON/OFF switch and indicator.
GETTING STARTED OPERATION FROM HANDSET CONT’D Nera F55 starts up Making a call Nera F55 automatically initializes the system and searches for the satellite (handset in Nera Fleet Mode): • Dial 00, country code and subscriber number, e.g.: 0 0 4 abc 7pqrs 6mno 7pqrs 2 abc 4 abc 4 abc 7pqrs 0 Nera Fleet Euro-ISDN # See Satellite search later in this manual to restart a search manually.
GETTING STARTED OPERATION FROM HANDSET CONT’D Redialing The Redial Memory stores the last 30 called and received numbers (incoming IMN numbers are not conveyed from "ashore"). The data are erased when disconnecting the handset or Nera F55 is switched off.
GETTING STARTED OPERATION FROM HANDSET CONT’D Incoming calls to handset Call hold and transfer The handset rings when receiving a call. The ringing symbol flashes until the call is answered. Pressing R during a conversation will put the current call on hold. Another internal call may now be made. 4.8 Speech • Answer the call by pressing hook ON/OFF: handsfree: or • End the call by pressing hook ON/OFF replacing the handset in the cradle.
GETTING STARTED OPERATION FROM HANDSET CONT’D Internal communication Various call procedures Nera F55 allows calls to be made internally between the connected ISDN and analogue telephones. Call from a standard telephone Internal calls: Short number dialing from Phone Book (prefix 23) 2 3 1 5 fetches and sends the telephone number stored in the Phone Book under short number 15.
GETTING STARTED OPERATION FROM HANDSET CONT’D To call Nera F55 Phone book entry Dial the international prefix (normally 00) followed by 870 and the IMN number, e.g. 00 870 762420510. The common Ocean Region access no. 870 connects the call to the dialed Nera F55 terminal regardless of the Ocean Region the terminal user currently communicates through. The entries in the Nera F55 phone book may consist of maximum 100 numbers. The number/name list is stored in the Main Communication Unit.
GETTING STARTED OPERATION FROM HANDSET CONT’D 3 Enter the telephone number e.g.: 0 0 Phone book editing 4 abc 7pqrs Number: 004767244700 Open phone book menu and scroll down to the required function. Saving If "Sort by ShrtNo" is selected, the function switches to "Sort by Name".
GETTING STARTED HANDSET FUNCTIONS Overview »Sat. Search Phone setup Set Network Serial Ports Information Opening Search »Find Any AOR-W AOR-E POR IOR Region 4 Region 5 Region 6 Region 7 Not in use MENU »Active MSN Keyclick Ringer Answer beep Backlight Protocol SW version 18 reverts to idle Tuning to IOR Elevation 17 Telenor IOR Ready for call Elevation: 0...90º »#1: 4.8 Speech #2: 64 Speech »On Off »Tone Volume 1.3.
GETTING STARTED HANDSET FUNCTIONS CONT’D Overview cont'd MENU »Sat. Search Phone setup Set Network Serial Ports Information »Speed Format Flow control »Port A Port B COM defaults NMEA port »On Off »Driver switch Speed Format Flow control »RS-232 RS-422 »Dump trf.
GETTING STARTED HANDSET FUNCTIONS CONT’D Satellite search To select another Ocean Region: Some geographic locations allow contact with more than one Ocean Region satellite. It is recommended to choose an Ocean Region providing good signal quality and cost-effective communication.
GETTING STARTED HANDSET FUNCTIONS CONT’D Satellite Coverage Map Global beam (circles) LONGITUDE 180 W 160 W 140 W 120 W 100 W 80 W 60 W 40 W 20 W 0 20 E 40 E 60 E 80 E 100 E 120 E Spot beam 140 E 160 E 180E 60 N 60 N 30 N 30 N POR 178 E Equator AOR-W 54 W AOR-E 15.5 W IOR 64.
HANDSET FUNCTIONS CONT’D GETTING STARTED Coverage map for each Ocean Region IOR AOR-W AOR-E 22 POR Nera F55
GETTING STARTED Phone setup (Nera ISDN Handset) Active MSN (Multiple Subscriber Number) When making a call, the device connected to Nera F55 identifies itself locally by its MSN number. The first Nera ISDN Handset connected has the following MSN numbers: Terminal Id MSN number Speech quality 01 20 4.8 Speech 91 30 64 K Speech HANDSET FUNCTIONS CONT’D Keyclick When activated, a click is heard when pressing a key.
GETTING STARTED HANDSET FUNCTIONS CONT’D Ringer The tone sound and level heard when the phone rings may be selected as follows: Sat. Search »Phone setup Set Network Serial Ports Information 1 Open the MENU and select Phone setup > Ringer: 2 Press to select the Tone function: OK OK OK 3 Press OK again and scroll down to required tone: OK Press OK to store the selected one.
GETTING STARTED HANDSET FUNCTIONS CONT’D Backlight On/Off The display and keypad backlight can be set to: • On, permanently ON • Off, permanently OFF • 30 seconds ON when pressing a key or receiving a call, and stays ON 30 secs after last event. • Dimmer, intensity adjustable in 10 steps. Changing the setting: 1 Open the MENU: scroll down to Phone setup, Sat. Search »Phone setup Set Network Serial Ports Information The check for current protocol: 1 Open the MENU: Sat.
GETTING STARTED HANDSET FUNCTIONS CONT’D Software version This function displays the Nera ISDN Handset software version: 1 Open the MENU: Sat. Search »Phone setup Set Network Serial Ports Information scroll down to Phone setup, and OK select the SW version function: 3 Press »Active MSN Keyclick Protocol »SW version Selecting default Net service provider The default Net service provider for a satellite (Ocean Region) is automatically used when dialing ship-to-shore.
GETTING STARTED HANDSET FUNCTIONS CONT’D Setting serial ports The data speed, format and flow control for the RS-232 serial ports A and B are set up as follows: 1 Open the MENU and Sat. Search Phone setup Set Network »Serial Ports Information scroll down to Serial Ports: See Overview for available choices.
GETTING STARTED HANDSET FUNCTIONS CONT’D Information available »Sat.
GETTING STARTED TELEFAX SERVICE superfine or halftone resolution will double the transmission time. To save time, avoid using a separate cover page. If a call failure should occur while sending a multipage document, re-send only the failed pages. Installation For installation of the Nera Terminal Adapter, see Appendix B.
GETTING STARTED DATA SERVICE For connecting up and configuration, see Applications > Mobile Data Service via RS232 or via USB on the CD.
GETTING STARTED Mobile Packet Data Service The MPDS service can be efficient for applications such as: • E-mail • Internet/intranet • Navigational updates • Vessel telemetry transmission • Database queries • E-commerce Nera F55 The user only pays for the amount of data sent over the network, and not for the time connected. Ports supporting MPDS: • RS232A • RS232B / RS422 • USB No configuration is needed! Dial number **94# to set up an MPDS call. See the MPDS application on the Nera F55 CD.
GETTING STARTED OPERATION FROM PC Installing the PC program The vtLite Marine program allows Nera F55 to be operated or configured from a PC, including functions such as: • Phone book • Traffic log • Configuration of ports (ISDN/USB/RS-232/RS422) • Configuration of the MCU Connect the PC as indicated on the previous page. The vtLite Marine program is available on the enclosed CD and must be installed on the PC hard disk. For an explanation of the functions, see the User Guide on the CD.
GETTING STARTED Procedure: 1 Insert the CD : The Start Page opens automatically in a few seconds. OPERATION FROM PC CONT’D 6 Click Configure > Port to check the port settings. (Alternatively, open the Acrobat file “Nera F55_StartPage” on the CD. If necessary, install Acrobat Reader by clicking “Ar505enu.exe” in the “SW Installation” folder.) 2 Click “Software Installation” and then “vtLite Marine”. Allow files to load on to the PC hard disk.
MAINTENANCE GETTING STARTED General No regular maintenance is required of the Nera F55 satellite terminal. It is recommended, however, to clean the antenna radome every once in a while. The realtime clock is automatically updated by the built-in GPS.
GETTING STARTED Problem TROUBLESHOOTING Probable cause Action 1. The Nera F55 MCU power ON indicator does not light up: The Main Communication Unit is not switched ON Set the ON/OFF switch to ON (rear panel). Switch OFF, wait 10 secs and switch back ON Check that the power cord is properly connected to 24 VDC power source. Diode info: ON=DC-in OK (>18VDC), 48VDC=Internal DC Power output 48V OK 2.
GETTING STARTED TROUBLESHOOTING CONT’D Problem 6. Unsuccessful call: Probable cause Nera F55 is not commissioned. The following messages appear in the vtLite display: No response from net. (HS: Disconnected) 7. Problems with telefax: 36 The called party is busy. Subscriber busy appears in HS display Incomplete dialing Action Check clear cause Call the Net Service Provider. Check that the correct Net service provider is shown in the display. The Nera F55 terminal is not commissioned.
GETTING STARTED Problem TROUBLESHOOTING CONT’D Probable cause Action 8. No GPS: "Beam selection failed" "Not ready for call" GPS alarm, or GPS not received Wait up to 15 minutes. The GPS may use up 15 minutes if Nera F55 has switched off for more than 6 hours. If not the case, GPS will report position to vtLite Marine and handset display when GPS sync. GPS is needed to select satellite beam! 9.
LIST OF TERMS AC Alternating Current AOR-E Atlantic Ocean Region East. AOR-W Atlantic Ocean Region West. Azimuth horizontal direction angle between north and, e.g. the direction to the satellite. Bit rate the number of bits transmitted per second (bps). Byte = 8 bits CHV2 higher access level on the SIM card, corresponding to Nera F55 "owner" level. DC Direct Current. DID Destination terminal IDentification. DSP Digital Signal Processor. DTE Data Terminal Equipment.
GETTING STARTED APPENDIX A - INSTALLATION Safety Warnings, Cautions and Warranty General Cables and connections To avoid interference, do not run cables parallel to AC wiring, or near fluorescent lights or other high magnetic or electrical fields. Interference from this kind of sources causing equipment to be faulty or fail working properly will automatically void warranty conditions. Access to the interior of the equipment shall be made by a Nera qualified technician only.
APPENDIX A - INSTALLATION CONT’D Location of Antenna Unit Avoiding obstructions The antenna has a beamwidth of ±5O at 3 dB and ideally requires a free line of sight in all directions. Any obstruction will cause blind sectors, resulting in signal degradation or even loss of communication with the satellite. Degradation of the satellite signal can only be completely avoided by placing the antenna higher than any obstructions.
USER MANUAL GETTING STARTED APPENDIX A - INSTALLATION cont’d Coax cable A 25 metre coaxial cable type RG-223 (103154) is supplied as standard. For greater lengths, see the table below which lists suitable double screened coax cables. The coax cable should be secured by laying the cable in a tube and/or by fastening the cable to avoid damage. Optional antenna cable Double screened 50 ohm coaxial cable must be used for connection between the MCU and Antenna Unit.
GETTING STARTED APPENDIX A - INSTALLATION cont’d Connecting up �� ������ ���� ��� ��� ����� ����� �������� ����� ������ ��� �� ��� ��� ��� �������� �� ��� �������� �������� �������� ���� ������������� ������������� ����� �������� ����� ��� ���� ��� ������� ���� ���� ������ ��������� ������������������ �������� ���������������� ���������� �� ������������ ��� ��������������� ������������������������ ������������ ��������������������� ��� � �� ������ ���� ��� ��� ��� ��
USER MANUAL GETTING STARTED APPENDIX A - INSTALLATION CONT’D Outline dimensions Radome 103145 605 MM 630 MM M4x24 SOCKET HEAD UNBRAKO SCREWS (RADOME TOP FASTENERS) M10 SOCKETS (4) Screw entrance: - max 20 mm - min 13 mm 130 MM 130 MM COAXIAL CONNECTOR Weight: 15 kg Nera F55 SEEN FROM BELOW A-5
GETTING STARTED APPENDIX A - INSTALLATION CONT’D Main Communication Unit (MCU) Nera ISDN Handset 103138 101654 56 mm 30 9.
USER MANUAL GETTING STARTED APPENDIX A - INSTALLATION CONT’D Mounting handset holder/cradle ISDN wall socket (option) 102176 82 m m 30 mm 70 mm Hook ON magnet Nera Terminal Adapter Analogue-to-ISDN TA with 2 analogue lines (option) 142 m click! m QDGY911914 m 30 mm TE 8m L1 PO WER TE 14 L2 Weight: 0.1 kg BCS iTA Terminal Adapter Analogue-to-ISDN TA with 2 analogue lines (option) 142 QDGY911912 mm 43 m 14 0m m m Weight: 0.
GETTING STARTED APPENDIX A - INSTALLATION cont’d MCU connectors Rear connector panel ������ ���������������� ���������� �� �������� ������������ ������� ���������� ���������������� ������������� ��������������� ������������������������ ������������ ��������������������� ������������� ����������������� �������� A- ����������������� Nera F55
USER MANUAL GETTING STARTED APPENDIX A - INSTALLATION CONT’D Front connector panel RS-232: 9-pin serial data ports for: operation and configuration from PC. software download (RS-232A) 64 kbps data service MPDS Serial printer (traffic logging) Nera F55 RX- RX+ TX- TX+ ISDN ISDN ALARM USB: serial data port for: operation and configuration from PC.
GETTING STARTED APPENDIX A - INSTALLATION CONT’D Connecting up - examples MCU - Main Communication Unit ON 48V DC SYNC RX- RX+ TX- TX+ ISDN ISDN ALARM Nera ISDN ISDN wall sockets RX+ NMEA- 1 8 RX- 9 8 7 6 USB TX+ 9 8 7 6 5 4 3 2 1 TX- RS-232 B 5 4 3 2 1 NMEA+ RS-232 A 8 1 ISDN RS-422 Nera ISDN Terminal Adapter TEL 1 POW ER TEL 2 ISDN ISDN Telenor IOR Ready for call Telenor IOR Ready for call OK OK DEL DEL 1 2 4 ghi 7 pqrs abc 3 1 def 5 ghi 6 4 jkl mn
USER MANUAL GETTING STARTED APPENDIX A - INSTALLATION CONT’D ISDN telephones/equipment ON 48V DC SYNC RX+ TX- ISDN TX+ 321B RS-2 4 3 2 NMEA+ 6 9 8 7 ISDN 1 8 RX+ RX- TX+ 6 9 8 7 ISDN bus: max 100m 8 1 USB 5 5 TX- A NMEA- ALARM 321 RS-2 4 3 2 RX- Screen ISDN RS-422 Local equipment ISDN wall socket Ma Ma Nera ISDN Nera ISDN x5 x1 m 0m wit ho ut cre sc Remote equipment ree n 5m en ax hs Nera ISDN M wit The last ISDN wall socket must be terminated, see next pa
GETTING STARTED APPENDIX A - INSTALLATION CONT’D ISDN cable lengths Total length of ISDN bus: 100m Only one bus from the MCU The last ISDN wall socket must terminated, see next page Single cables: max 5m Up to 8 ISDN devices can be operated with Nera F55. ISDN bus termination When longer than 10 metres, the end of the ISDN bus must be terminated by two resistors as shown below. Only one bus/termination per MCU. Be aware that only one ISDN cable is permitted to be longer than 10 metres.
USER MANUAL GETTING STARTED APPENDIX A - INSTALLATION CONT’D ISDN connectors ISDN ON 48V DC SYNC RX- RX+ TX- TX+ ISDN USB 5 4 3 2 1 1 8 8 1 a2 a1 b1 b2 12345678 ISDN equipment 1 2 3 4 5 6 7 8 RX+ TX+ TXRX- 123 456 78 RX+ RX- TX+ 9 8 7 6 NMEA- 9 8 7 6 RS-232 B TX- 5 4 3 2 1 NMEA+ RS-232 A 1 2 3 4 5 6 7 8 ISDN ALARM ISDN connector ISDN RS-422 RJ45 MCU connector panel ISDN wall socket ISDN bus from the MCU To next ISDN wall socket via junction box, if required.
GETTING STARTED APPENDIX A - INSTALLATION CONT’D Cable pinouts 9-pin to 9-pin RS-232 cable (3 m) R 906 686 ISDN cable Pin no. QRPM 911 111-3000 (3 m) -10000 (10 m) 9-pin DSUB Twisted RJ45 123 456 Twisted Pin no. 1 3 4 123 456 78 5 6 4 5 6 7 8 9 To RS-232 on MCU Male 7 8 Twisted 3 RJ45 1 2 78 2 Twisted To ISDN on MCU 4 9 RJ11 (6/4) 1 2 123 3 8 2 7 1 6 To RS-232 on PC Female TX RXRX+ TXTX+ RS-422 Pin no.
USER MANUAL GETTING STARTED APPENDIX A - INSTALLATION CONT’D Serial printer settings Switch bank 1 Switch no. OFF 1 Even 2 3 4 5 6 With 7 X-on/X-off Monitor Test 7 8 ON Odd * No * 8* Ready/Busy * Circuit * Print * ON * Off * FUNCTION Parity Parity Databits Protocol Test Select Mode Select Busy line RTS (-9V) pin 4 OFF ON 1 2 3 4 5 6 7 8 SW 1 * Correct setting Switch bank 2 Switch no. OFF 1 2 3 4 5 6 7 ON ON * Off * ON * Invalid 512 Bytes 1 sec.
GETTING STARTED APPENDIX A - INSTALLATION CONT’D NMEA-0183 input sources (complies with IEC 61162-1) Recognized GPS time, position and fix data format: RX- RX+ TX- ISDN TX+ Intended for backup GPS. The internal GPS located in the antenna will always be used as the primary source. If the primary source is not receiving GPS signals, the external GPS input will be used (if enabled). NMEA-0183 input is not required for operation of Nera F55. The NMEA-0183 (ver. 3.
Nera F55 B B C D E A A A F B A C B A E F Push prepared cable into connector body F and tighten nut A. Do not rotate cable in connector body. Fold back braid over clamp C and trim overlapping braid. Slide clamp D underneath the braid. Check dimension of 0.8mm. Heat inner contact E using a soldering iron (approx. 40 W) and flow small amount of tin into bore. Push cable inner conductor into bore, immediately remove soldering iron to prevent melting of the dielectric.
Tools and materials required: • Stanley blade • Scissors A-18 Insert connector body. Screw in and tighten nut A with wrenches of 16 mm, type 74Z 0-0-3, until rubber gasket C is split. Do not distort cable and connector body. Armoured cable: Finally, screw on and tighten armour clamp. Fold back braid over clamp D and cut it off in front of the clamp rim. Check dimension of 1.5 mm. Tin centre conductor of cable. Heat contact pin or bush E with a soldering iron of approx. 250 W. Tin bore hole sufficiently.
Nera F55 jacket Tools and materials required: • Stanley blade • File • Spanners (18, 20, 22 mm) • Sand paper (300 or 400) • Scissors braid 6.5 12.5 1.5-2 Open jacket CAREFULLY and push sleeve of body C between foil and braid. Slide clamp ring B to sleeve C. Observe the distance 1.5-2 mm. Cut braid along sleeve C. Cut jacket lengthwise 6-8 times. Cut off protruding foil to front of sleeve C. Push body A over clamp ring B. Screw body D onto body A and tighten with spanner. Torque 19 Nm.
A-20 Shield trough Dielectric Centre Conductor 12Nm A A Cut Correctly prepared cable ~37mm Tools and materials required: Spanners, Screwdriver 22mm and 24mm Measure Abrasive paper Metal saw File Knife Outer Jacket crest 30Nm B Cut the Cable in a trough perpendicularly to the cable axis. Remove approx. 37mm of Outer Jacket. IMPORTANT: Do not damage shield. Connector Head B Saw off the cable carefully along the cable entry as indicated.
USER MANUAL GETTING STARTED APPENDIX B - CONNECTING UP NERA TA ISDN port on Nera satellite terminal RJ45 The adapter is powered via the ISDN connector when used with the Nera satellite terminal. No external power is then required. Nera Terminal Adapter TEL1 POWER TEL2 POWER RJ11 Analogue telephone (DTMF) Valid MSNs: 20 series RJ11 REAR PANEL FRONT PANEL ISDN RJ45 The Nera Terminal Adapter has two 2-wire analogue connectors which provide speech and 9.6 fax services.
APPENDIX B - CONNECTING UP NERA TA CONT’D GETTING STARTED Comments: Assigning MSN to current port 1 2 3 4 5 6 7 8 9 * 0 # * 9 0 * * 9 0 * < MSN > # Assigns MSN into current port Deletes MSN programmed into current port # Assigning service to a port 1 2 3 4 5 6 7 8 9 * 0 # * Resets the service to default factory setting on both ports (the programmed MSN is not reset). * 9 3 * # * * 9 3 # 3 * * 2 9 1 # Assigns 4.8 kbps speech to the current port. Assigns 9.
USER MANUAL GETTING STARTED APPENDIX B - CONNECTING UP BCS iTA ISDN port on Nera satellite terminal QDGY911912 BCS iTA/2TR Box 1 2 ANALOG ISDN + Analogue telephone (DTMF) 12VDC All programming of the BCS.iTA/2TR box is done with an analogue telephone/fax connected to the one to be programmed (except PIN code which can be programmed from any port). PIN code: To allow programming, the default 5-digit PIN code 00000 must first be changed using the 90 command. To enter e.g.
USER MANUAL GETTING STARTED APPENDIX C - TERMINAL IDENTITIES Term. Id Service Inmarsat services 01 - 0F Voice B: 16.8, M: 4.8, Mini-M: 4.8, F77, F33, F55: 4.8 11 - 1F Fax B: 9.6, M: 2.4, Mini-M: 2.4, F77, F33, F55: 9.6 21 - 2F ASD B: 9.6, M: 2.4, Mini-M: 2.4, F33: 9.6 31 - 3F Telex B 41 - 4F HSD B 51 - 5F 64k Data (UDI) GAN / F77/F55 61 - 6F 3.1kHz Audio GAN / F77/F55 71 - 7F 56K Data GAN / F77/F55 N.C.
Back to Start Page Nera ASA Nera SatCom AS Bergerveien 12, PO Box 91 N-1375 Billingstad, Norway Tel: +47 67 24 47 00 Fax: +47 67 24 46 21 www.nera.