
Instruction Manual
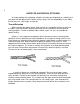
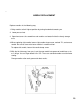
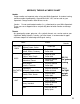
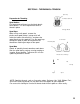
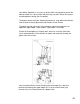
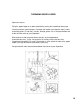

Table Of Contents
- TABLE OF CONTENTS
- tNTRODUCTtON
- SECTION I
- KNOW YOUR MACHINE - MODEL 2000 ATS
- SUPERLOCK SET UP & MAINTENANCE
- HINTS FOR SUCCESSFUL STITCHING
- Thread Selection
- NEEDLE REPLACEMENT
- NEEDLES, THREAD & FABRIC CHART
- SECTION II - THREADING & TENSION
- )
- NEEDLE THREADER
- HELPFUL HINTS - CHANGING THREAD
- TESTING STITCH
- THREAD TENSIONS
- ADJUSTING THREAD TENSION
- SUPERLOCK SEAMS & SEAM FINISH
- ADJUSTING STITCH LENGTH
- ADJUSTING CUTTING WIDTH & BALANCE OF STITCH
- ADJUSTING CUTTING WIDTH
- SECURING BEGINNING & END OF SEAM
- OUTSIDE CORNERS
- INSIDE CORNERS
- CORDED OVERLOOK
- RIBBING
- CASING OR HEM FOLD
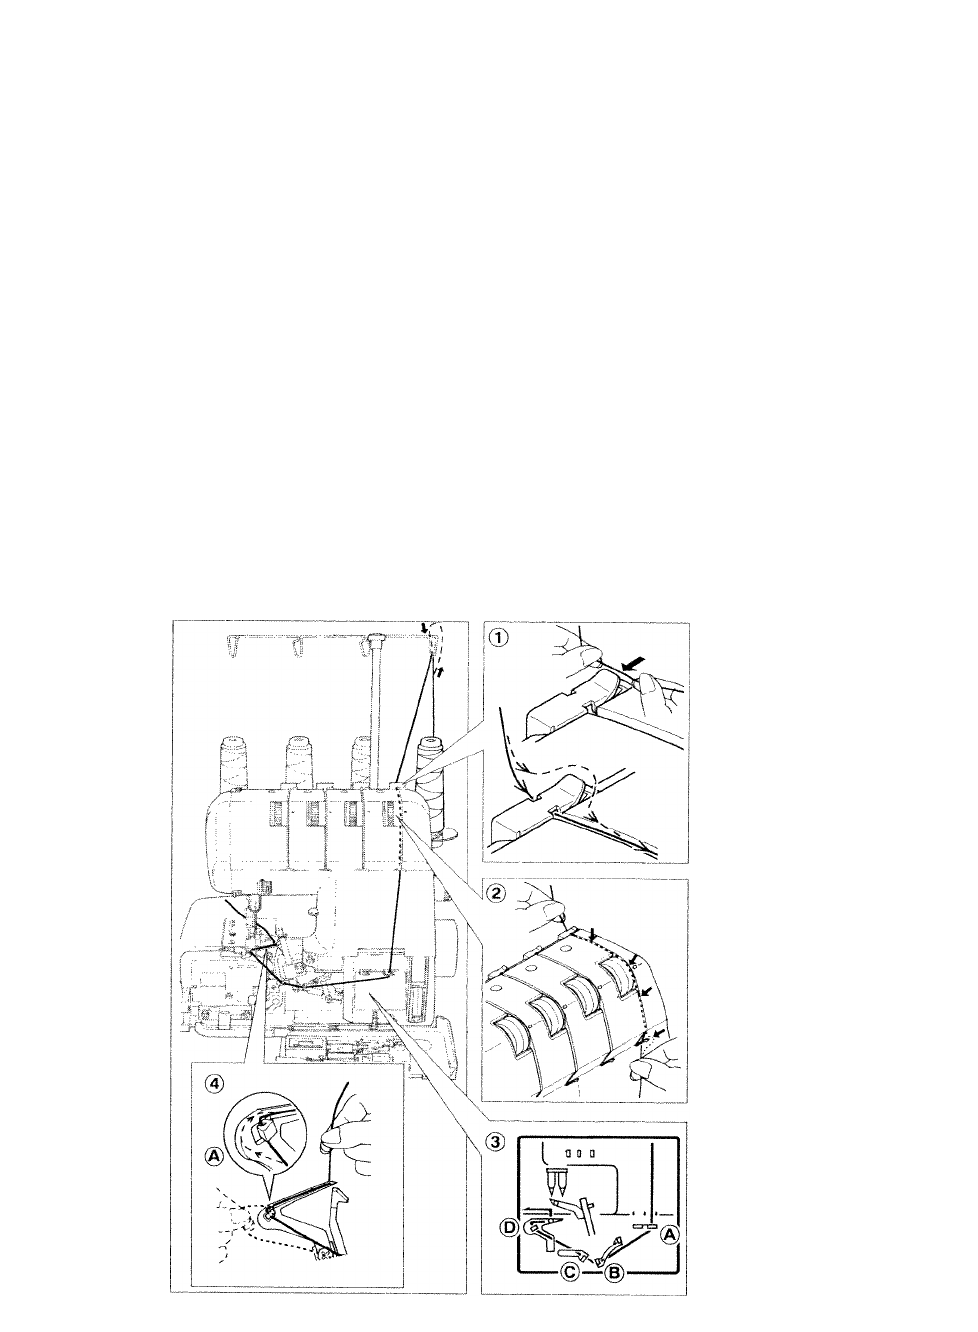
THREADING LOWER LOOPER
Bring the thread from the spool through thread guide back to front of the thread stand
under (1) and then, in order, through guides 2-4 as illustrated below and inside front
cover of your Superlock.
With the presser foot raised to release tension, lay thread between thread
tension discs. Be sure thread is seeded all the way into the tension discs.
Bring the lower looper to the far left position by turning the handwheel toward you.
Snap thread into thread guides A, B, and C (illustration 3), then hook the thread guide
onto the lower looper thread guide D (Figure 3).
Then move the lower looper slightly to the right by turning the handwheel toward you.
Thread the eye of the lower looper D (Illustration 3). You may wish to use the tweezers
provided.
Bring thread tail under foot and toward the back left corner of the Superlock.
15