
Instruction Manual
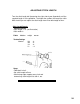
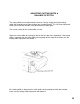
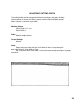


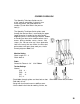

Table Of Contents
- TABLE OF CONTENTS
- tNTRODUCTtON
- SECTION I
- KNOW YOUR MACHINE - MODEL 2000 ATS
- SUPERLOCK SET UP & MAINTENANCE
- HINTS FOR SUCCESSFUL STITCHING
- Thread Selection
- NEEDLE REPLACEMENT
- NEEDLES, THREAD & FABRIC CHART
- SECTION II - THREADING & TENSION
- )
- NEEDLE THREADER
- HELPFUL HINTS - CHANGING THREAD
- TESTING STITCH
- THREAD TENSIONS
- ADJUSTING THREAD TENSION
- SUPERLOCK SEAMS & SEAM FINISH
- ADJUSTING STITCH LENGTH
- ADJUSTING CUTTING WIDTH & BALANCE OF STITCH
- ADJUSTING CUTTING WIDTH
- SECURING BEGINNING & END OF SEAM
- OUTSIDE CORNERS
- INSIDE CORNERS
- CORDED OVERLOOK
- RIBBING
- CASING OR HEM FOLD
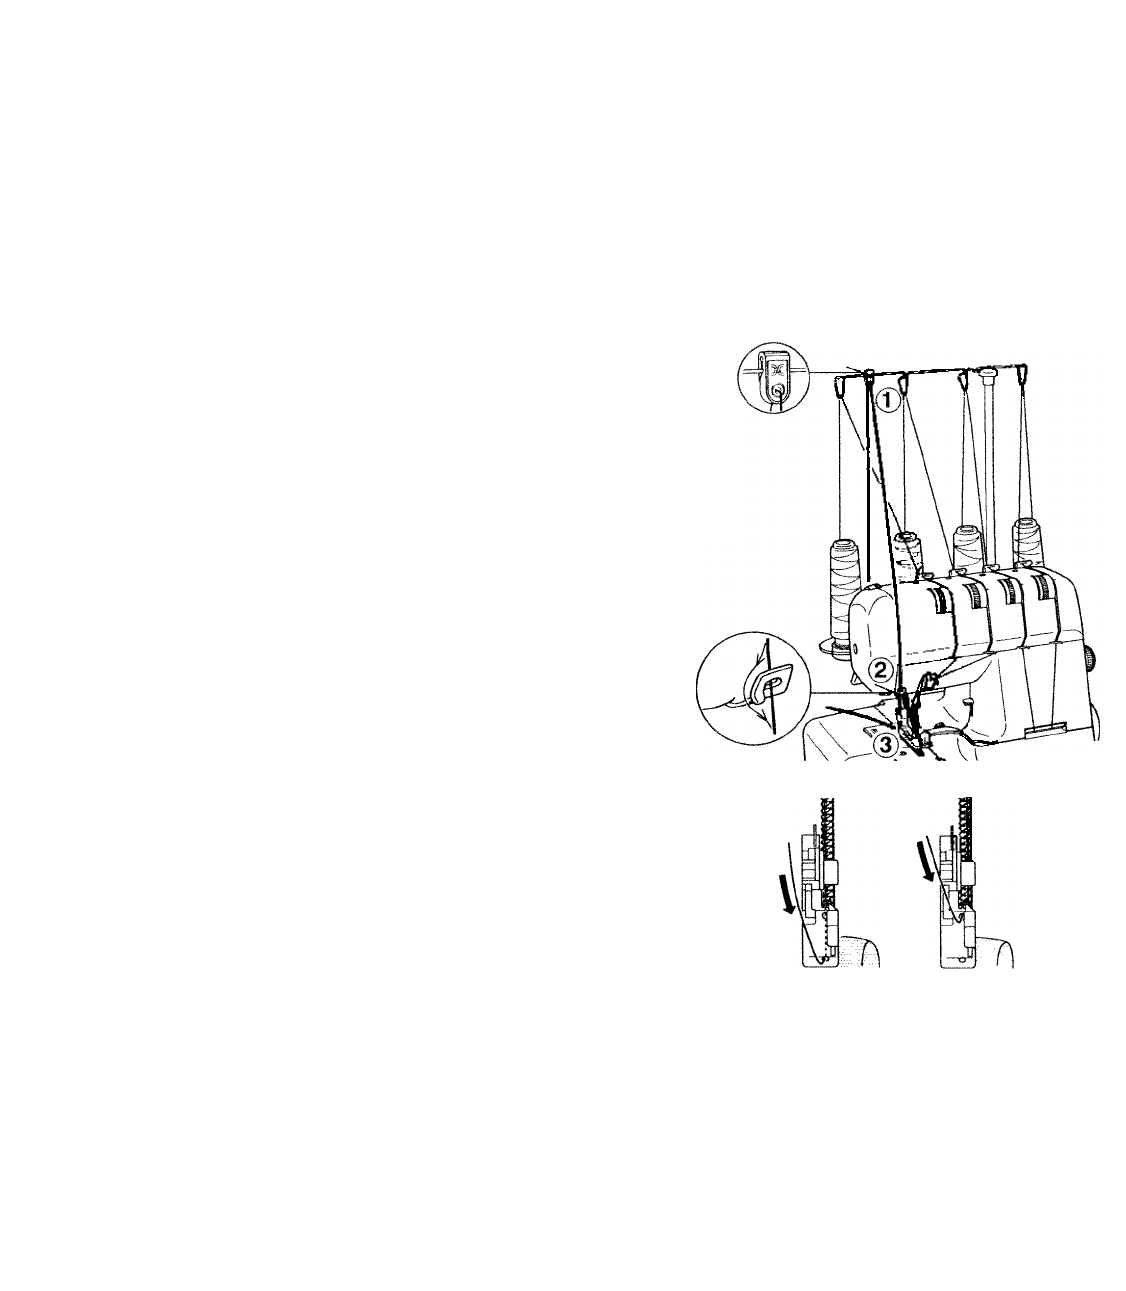
CORDED OVERLOOK
The Specialty Technique Guide consists
of the snap on cord guide (1) found in your
accessory pouch, the guide above the
needles (2) and either hole in the presser
foot (3).
The Specialty Technique Guide guides cord
through the foot and then is covered by the upper
looper thread or is caught by the right needle,
depending on the size of cord you choose. Ribbon
or Cording can be used to stabilize where stress
occurs: joining shoulder seams, sleeves, side
seams, etc. You can also use it for a decorative
look in the areas that are visible. Use filler cord,
perle cotton, twill tape, gimp, wool yarn, elastic
thread, polyester ribbon, etc.
Machine Setting
Stitch Length: 2.5 - 3
Stitch width: 6
3/16' Ribbon
Fabric
Sweatshirt Fleece & 1/8*
Tension Settings
Normal
(LN) - 4 -
(RN) -4-
(UL) -4-
(LL) -4-
•Feed ribbon through guides and front hole on foot.
•Fold fabric in half.
•Serge with four thread seam to stabilize seam.
•Use the back hole in foot for cording, fishline, etc.
Slide ribbon under foot to needles.
30