
Instruction Manual


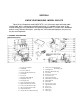

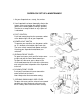

Table Of Contents
- TABLE OF CONTENTS
- tNTRODUCTtON
- SECTION I
- KNOW YOUR MACHINE - MODEL 2000 ATS
- SUPERLOCK SET UP & MAINTENANCE
- HINTS FOR SUCCESSFUL STITCHING
- Thread Selection
- NEEDLE REPLACEMENT
- NEEDLES, THREAD & FABRIC CHART
- SECTION II - THREADING & TENSION
- )
- NEEDLE THREADER
- HELPFUL HINTS - CHANGING THREAD
- TESTING STITCH
- THREAD TENSIONS
- ADJUSTING THREAD TENSION
- SUPERLOCK SEAMS & SEAM FINISH
- ADJUSTING STITCH LENGTH
- ADJUSTING CUTTING WIDTH & BALANCE OF STITCH
- ADJUSTING CUTTING WIDTH
- SECURING BEGINNING & END OF SEAM
- OUTSIDE CORNERS
- INSIDE CORNERS
- CORDED OVERLOOK
- RIBBING
- CASING OR HEM FOLD
SUPERLOCK SET UP & MAINTENANCE
1. Set your Superlock on a sturdy, flat surface.
2. Your Superlock has been thoroughly oiled at the
factory so be sure to wipe the needle and bed
plate areas carefully before sewing a garment.
Practice on a scrap of fabric so any surplus oil
is absorbed.
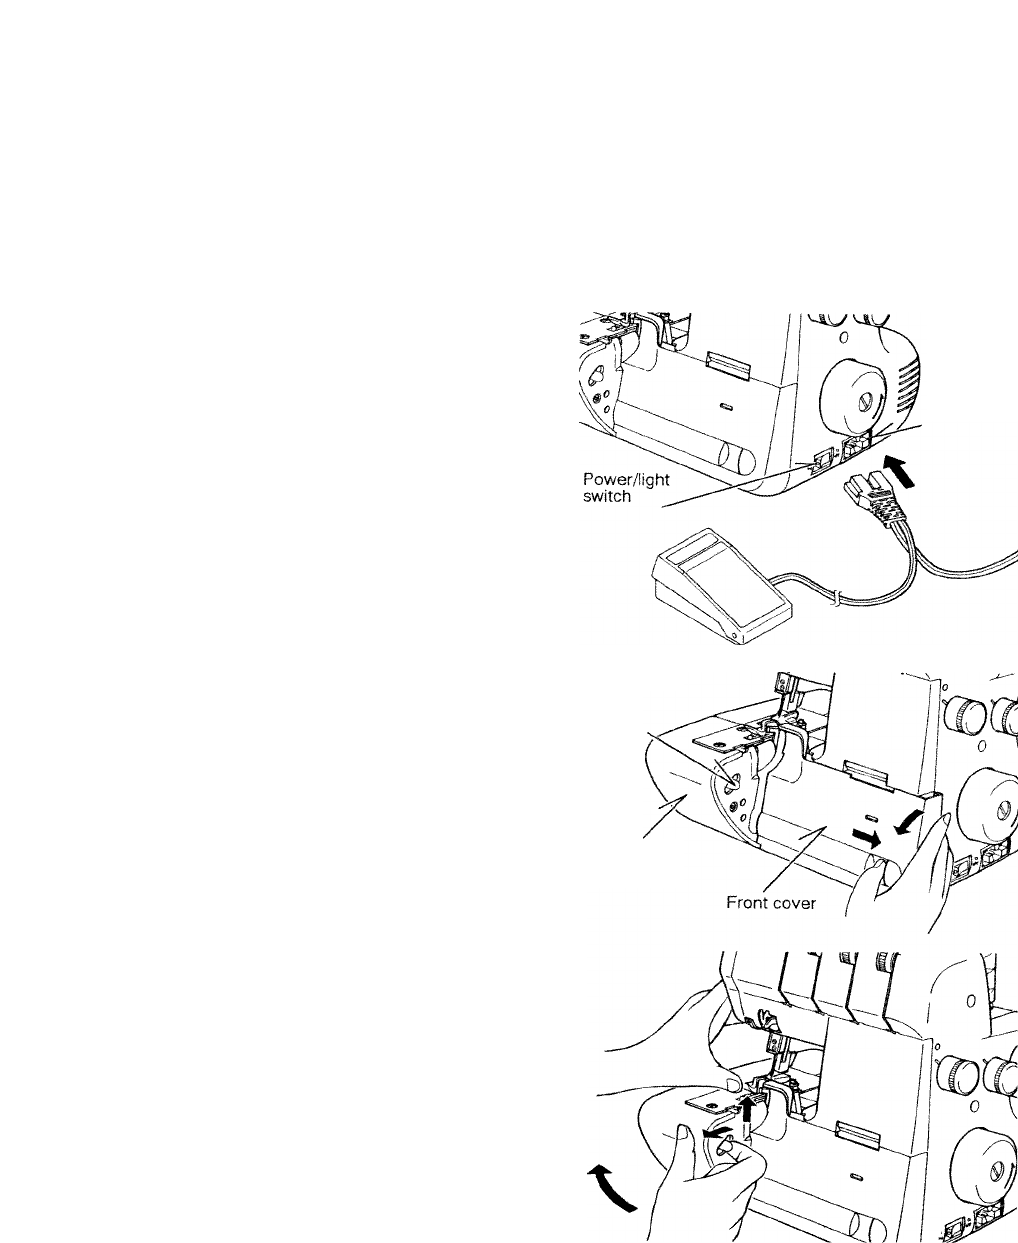
3. FOOT CONTROL
Push foot control plug into the connector socket
at the bottom right side of your Superlock.
4. POWER/LIGHT SWITCH
To operate your machine, turn the power switch
on. It is located at the bottom right hand side.
The same switch controls both power and light.
If leaving your Superlock unattended, turn
switch off.
5. OPENING FRONT COVER
To open front cover, push part B of cutter cover
to right and pull the cover down toward you.
To open the side cover, press down on the
silver knob located to the inside of the side cover,
and swing the lower left portion of the Superlock
to the left.
6. CLOSING FRONT COVER
Push part B and lower left cover toward the
center of the front to close it.
Note: Always close front cover when sewing.
7. OPENING SWING-AWAY SIDE COVER
To open side cover, pull the release lever toward
you with your right hand and swing out to left.
NOTE: Always close side cover when sewing.
Connector
socket
Release lever
Swing away
side cover