INSTALLATION Caution: All installation types need to allow room for faucet installation. Ensure adequate clearance behind the basin for your faucet and backsplash, as well as the full range of motion for faucet handles and spouts. All basins, especially under mount and apron front installations, should be installed by professional installers.
BATH – DROP-IN INSTALLATION Step 1. Flip sink upside down and trace outside edge onto craft paper or card- board. Add second line that is 1/2” inside that line. Cut out the center of the traced template using the second line. Step 2. Position the template flat on the countertop to align with cabinet and plumbing connections. Mark opening on countertop. Drill a 1/2” hole on the inside of the scribed line to start cutout, then use a jigsaw to cut the countertop. Step 3.
BATH – UNDER-MOUNT INSTALLATION Step 1. Flip sink upside down and trace outside edge, noting where the rim is located, on craft paper or cardboard. Add second line that is inside that line at the desired offset. Cut out the center of the traced template using the second line. Step 2. Place the template on to the countertop, trace the edge with a pencil, and cut the hole into the countertop. Step 3.
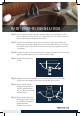
BATH – VESSEL INSTALLATION Step 1. Flip sink upside down and trace outside edge onto craft paper or cardboard. Outline faucet to ensure necessary clearance. Cut out template and place on the countertop. Step 2. Find and mark the center of the sink based on the template. Remove template from countertop. Drill a 2 3/4” diameter hole in the center and chamfer the top edge of the hole by 1/8”. 1/8” 1/8” Counter Top Counter Top 2-3/4” Diameter Hole Step 3.
KITCHEN – DROP-IN INSTALLATION Step 1. Flip sink upside down and trace the inside edge onto craft paper or cardboard by placing arm through the drain hole. Add second line that is 3/8” outside that line. Cut out the center of the traced template using the second line. Step 2. Position the template flat on the countertop to align with cabinet and plumbing connections. Mark opening on countertop. Drill a 1/2” hole on the inside of the scribed line to start cutout, then use a jigsaw to cut the countertop.
KITCHEN – UNDER-MOUNT INSTALLATION Step 1. Flip sink basin upside down on countertop and mark countertop by tracing the edge of the basin. Measure the distance between the edge of the basin and the inside edge of the lip. Add a second line inside the first according to this measurement. Step 2. Cut countertop based on the inside, second line. Step 3. Apply silicone around hole in the underside of the countertop and position the basin. Step 4.
KITCHEN – APRON FRONT INSTALLATION Step 1. Flip sink upside down and mark the countertop by tracing the inside edge of the basin by placing your arm through the drain hole. ote: We recommend a ¼” reveal on 3 sides when using the N under-mount style. For flush or built-up mount, cut countertop along the outside line of basin profile. Apron fronts are designed to be installed ¾” extended out beyond the front of the countertop. Step 2. Cut the countertop based on the installation type. Step 3.