
Installation Guide


Step 1. Flip sink upside down and trace the inside edge onto craft paper or
cardboard by placing arm through the drain hole. Add second line that is
3/8” outside that line. Cut out the center of the traced template using the
second line.
Step 2. Position the template at on the countertop to align with cabinet and
plumbing connections. Mark opening on countertop. Drill a 1/2” hole
on the inside of the scribed line to start cutout, then use a jigsaw to cut
the countertop.
Step 3. Use the sink as a template for the faucet holes. Center the sink in the
cutout. Use a pencil to mark the faucet holes. Remove the sink and use
a 1 1/2” hole saw to cut out the necessary faucet holes.
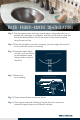
Step 4. Install clamps. Place notched end of bolt into the keyhole slot. Lower the
sink carefully into the countertop so the bolts enter without interference.
(Illustration 4A) Turn the claws out 90° so they grasp the underside of the
countertop. (Illustration 5A). Tighten the clamps gradually (Illustration
5B), in a sequence similar to that shown. (Illustration 5C). Please note that
some kitchen sinks are designed to mount either as an undermount or
drop-in. These sinks will not have install clamps and need to be installed
using 100% silicone.
CAUTION: Tighten claws only until sink rim is ush with counter top.
Do not over tighten.
Step 5. Treat copper sinks with Sinkology Copper Armor for maximum protection
(apply based on directions on bottle).
KITCHEN – DROP-IN INSTALLATION