
Operation Manual


Please follow the user manual of the USB device to install its driver. For
example, you may put the driver CD of the USB device in the CD-ROM player
to install the driver.
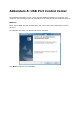
When you are asked to plug in the USB device into PC’s USB port, click the
desired USB device in the Control Center and then click the “Auto-Connect
Printer” button to do the connect operation and get the ownership of the USB
device. The computer name of the device owner will be shown at the end of
the device.
PC will automatically detect that the USB device is plugged-in. On the right
side of the Windows Task Bar, you can see the information of the new device.
Continue to follow the user manual of the USB device to do the rest jobs of
installation, until the driver installation has finished.
After the installation, you can see the newly created devices on the PC. If the USB device
is a MFP, you can see a new printer and a new scanner from the “Control Panel”.