
Operating Manual


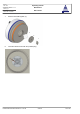
Table Of Contents
- Table of contents
- 1 Service and information address
- 2 Information for your safety
- 2.1 Residual risks
- 2.2 Minimum qualifications for machine operators, maintenance and service personnel
- 2.3 Regular maintenance of the device
- 2.4 Operating and maintenance work on device components of other manufacturers
- 2.5 Troubleshooting
- 2.6 Maintenance work on live device components
- 2.7 System modifications, add-ons and conversions
- 2.8 Protecting against electrostatic discharge
- 2.9 Exchanging device components
- 2.10 Revision mode / Revision operation (manual modification of function parameters)
- 2.11 Using cleaning and disinfection agents
- 2.12 Disposal and recycling
- 3 Device conformity
- 4 Scope of delivery
- 5 Transport and installation information
- 6 Device identification
- 7 Technical data
- 8 Information on device use
- 9 Layout
- 10 System overview
- 11 Operational concept
- 12 Commissioning
- 13 Battery pack charger / AC/DC adapter
- 14 Trolley
- 15 Network extender
- 16 Access control and user administration
- 17 Data display
- 18 Database for test parameters
- 19 Settings and configuration
- 20 Data storage
- 21 Start-up
- 22 Glove test using the WirelessGT
- 22.1 Preparation
- 22.2 Login
- 22.3 Test with "Auto start"
- 22.4 Test without "Auto start"
- 22.5 Stop test manually
- 22.6 Retest glove port
- 22.7 Finish test on the current glove port
- 22.8 Test list
- 22.9 Glove test in campaign
- 22.10 End of tests
- 22.11 Negative pressure device (option)
- 22.12 Print files
- 23 Data recovery
- 24 Exemplary process parameters
- 25 Messages
- 26 Cleaning and disinfection agents
- 27 Maintenance plan
- 28 Maintenance activities
- 29 Trouble shooting
- Index

Operating manual
WirelessGT
Glove tester
Document No._Version:
341174_D
CMS ID
14f8b65f920839adc0a8203200539573-13-en-GB
Print Date
29.04.2021
Document Status
released
Page No.
107 / 122
Revision Date
29.04.2021 / schwla1
4.
Click the specific icon for the used port on the main screen.
🡆 The "Port status" screen of the selected specific port appears.
5.
Click the [Revision] button.
🡆 The extended "Port status" screen of the selected specific port appears.
With the extended screen all actors of the specific test cover can be switched via
remote control.
Additionally, sensor adjustment can be performed, parameter of the pneumatic gasket
can be set and status information about the battery can be read out.