
User guide

I-FAA281 Pg 2
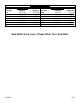
Component Box Breakdown:
Part #: FAA281
Hardware Bag Breakdown:
Part # HB-PR5A
Item # Description Qty
PA810 POL RGR LWR ARM BUSHING 8
Item # Description Qty Item # Description Qty
PR5FCA-L POL RGR LEFT LWR ARM 1 HB-PR5SS HDW BG: PR5 STRUT SPACERS 1
PR5FCA-R POL RGR RIGHT LWR ARM 1 I-FAA281 INSTRUCTION SHEET: FAA281 1
HB-PR5A HDW BG: PR5 LWR ARMS 1
Part # HB-PR5SS
Item # Description Qty Item # Description Qty
PR5FCS-S POL RGR FRT COIL SPACER 2 PR5FSS-S POL RGR FRT STR BODY SPCR 2
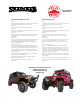
Installation:
1. With the vehicle on flat level ground, set the emergency brake, &
block the rear tires / wheels.
2. Raise the front of the vehicle & support the vehicle with jack stands.
Note: Pay close attention to the inner plunge socket depth of the
cv-shafts & do not disengage.
3. Remove the front tires / wheels using a 19mm socket.
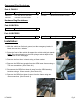
4. Remove the OEM boot guards from the OEM lower A-arms using a
T25 torx screwdriver. (See Photo # 1)
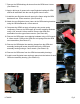
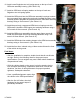
5. Disconnect the OEM front lower A-arms from the OEM steering
knuckles using a 15mm wrench. (See Photo # 2)
6. Remove the OEM front lower A-arms from the frame using two
15mm wrenches. (See Photo # 3)
Photo # 1
Photo # 2
Photo # 3