Luminar 4 — Last update: Jul 16, 2020 Skylum ©2020 Skylum
Table of Contents 1. Welcome to Luminar 4 .................................................................................................................... 4 2. Benefits of Luminar 4 ..................................................................................................................... 6 2.1. New & Improved features in Luminar 4 .................................................................................................. 8 3. Installing & Activating Luminar.............................
7.2. Adding a Folder with Images ............................................................................................................... 90 7.3. Importing from a Memory Card ............................................................................................................ 96 8. Working with the Essential Tools ................................................................................................. 100 8.1. Light Tool ................................................................
12.3. Clone & Stamp Tool ..........................................................................................................................172 12.4. Lens & Geometry Tool.......................................................................................................................175 13. Luminar Looks ......................................................................................................................... 178 13.1. Working With Luminar Looks ...................................
18.4. Syncing Adjustments ........................................................................................................................266 18.5. Revealing Original Images ................................................................................................................269 18.6. Working with the Trash folder...........................................................................................................271 18.7. Reconnecting Lost Edits ......................................
Skylum Luminar - 4 1. Welcome to Luminar 4 Conveniently browse, rate, group your photos and much more… With Luminar 4, your photos are the center of attention. Automatically group your photos by year, month, and even day. Easily navigate between images and make sure that the perfect image you’re looking for is always at hand. Luminar 4 is an all-in-one photo app designed to offer everything a modern photographer needs for photo editing. Give all your photos a look you want in seconds.
Skylum Luminar - 4 advanced photo editing possibilities.
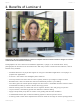
Skylum Luminar - 4 2. Benefits of Luminar 4 Luminar 4 is for every photographer. It offers a complete toolset to edit and enhance images. It unlocks hidden details and unleashes creativity. Photographers can use Luminar as a standalone application, a plugin, or an external editor. Every photographer can benefit from its innovative tools. With easy-to-learn controls and rich features, Luminar benefits every workflow.
Skylum Luminar - 4 multiple undos. • RAW, JPEG, TIFF and other popular files support for the greatest flexibility. • Batch processing of photos to quickly improve multiple images. With Luminar 4, your photos are the center of attention. The beautiful interface offers a sleek canvas to enjoy and edit all your images without distractions. Automatically group your photos by year, month, and even day. Easily navigate between images and know that the perfect shot you’re looking for is always at hand.
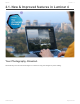
Skylum Luminar - 4 2.1. New & Improved features in Luminar 4 Your Photography. Elevated. Revolutionary tools and AI technologies in Luminar 4 bring new heights to photo editing.
Skylum Luminar - 4 AI Structure Boosting details with traditional Clarity and Structure tools often make parts of a photo look horrible. Luminar 4 automatically identifies objects (including people and faces, clouds, water, buildings and more) and improves them in an intelligent, content-aware way. The AI Structure tool automatically detects people in a photo and doesn’t over-process them. As a result – faces and skin look natural, while the objects around them look deeper and richer.
Skylum Luminar - 4 AI Skin Enhancer AI Skin Enhancer’s unique human-aware technology finds all the skin in your picture (not just the face), smooths it out, and removes blemishes while preserving pores, texture, and hair. All in one click and with adjustable strength. Works for any age and skin type.
Skylum Luminar - 4 Portrait Enhancer Portrait Enhancer’s revolutionary new technology helps you create the perfect portrait in 15 to 60 seconds. Makes face, eyes, and mouth picture-perfect. Twelve tools give photographers of any level absolute precision and control.
Skylum Luminar - 4 AI Sky Replacement The AI Sky Replacement tool in Luminar 4 doesn’t just change the sky – it relights the entire photo so the lighting and colors of the original image match the lighting and colors of the sky. Intelligent selection algorithms in Luminar 4 work perfectly even with tiny details like little birds, leaves, grass or hair. They also remove halos, artifacts, and hard edges. You can even fine-tune foreground brightness and contrast.
Skylum Luminar - 4 Smart Contrast The new Smart Contrast tool is more careful and accurate than traditional Contrast. It preserves colors and details for a more realistic image. Be sure to try both positive and negative values to enhance a variety of images.
Skylum Luminar - 4 Significant overall User Experience (UX) improvements Luminar 4 is the biggest update in Luminar’s history. After the release of Luminar 3, we spent a lot of time studying why and how people use Luminar in order to make it better. Based on this research, we’ve significantly improved and simplified Luminar to meet our customers’ needs.
Skylum Luminar - 4 Completely redesigned Edit module In Luminar 4, we’ve combined tools into groups based on their intended purpose. This makes all tools more convenient to use. Each tool is designed to solve a specific problem or achieve a creative goal. No more time-consuming searches for one exact filter among dozens. The new organization will help you get the results you want faster than before. All tools are organized into five tabs.
Skylum Luminar - 4 Improved quality of the Denoise tool Flawlessly remove digital noise from any type of photo. Get perfect images no matter the camera or shooting conditions.
Skylum Luminar - 4 Default Color Styles (LUTs) library extended with many new styles Remap the colors in an image for creative new options. LUTs can be used for color grading, B&W conversion, or digital film stocks.
Skylum Luminar - 4 3. Installing & Activating Luminar Your copy of Luminar can be installed and activated on your computer as both an application and a plug-in. Before installing your software we suggest the following. 1. Make sure your computer operating system and drivers are up to date. 2. Disable any firewall or antivirus software which may interfere. 3. Make sure you are connected to the Internet to activate your software. 4.
Skylum Luminar - 4 3.1. Installing & Activating Luminar for Windows If you purchase software from our website, you’ll need to download and install your software. Follow these steps. 1. Click the download link in your activation email (sent after purchase). You can also download the software installer here. 2. Locate the installer in your Downloads folder. 3. Double-click Luminar4Setup.exe to launch the installer application and begin the installation process. 4.
Skylum Luminar - 4 7. Start to use and enjoy Luminar. 8. On the second launch, you can activate your software. To complete registration, in the top bar click Activate and enter the email address and your activation key (from your activation email) to complete installation and registration. * ! Tip If you are looking to try Luminar first, be sure to visit Skylum.com and click on the Luminar menu. There you’ll find a link to download a Trial version.
Skylum Luminar - 4 3.2. Installing & Activating Luminar for macOS If you purchase software from our website, you’ll need to download and install your software. Follow these steps. 1. Click the download link in your activation email (sent after purchase). You can also download the software installer here . 2. Locate the installer in your Downloads folder. 3. Double-click Luminar4_Installer.zip to launch the installer application and begin the installation process. 4.
Skylum Luminar - 4 6. When the installation is complete, enter your email address and click Launch Luminar 4. 7. Start to use and enjoy Luminar. 8. On the second launch, you can activate your software. To complete registration, in the top bar click Activate and enter the email address and your activation key (from your activation email) to complete installation and registration. ! Note If you need to manage your software licenses, please visit https://skylum.com/account/mysoftware.
Skylum Luminar - 4 3.2.1. Installing Luminar from the Mac App Store If you choose to purchase Luminar from the Mac App Store, please follow these steps. 1. Launch the Mac App Store. 2. In the Search field type Luminar. 3. Locate Luminar and click the Get button. 4. The Mac App Store may ask you to verify your Apple ID and password. 5. Luminar is downloaded to your Applications folder. 6. In the Finder, choose Go > Applications and locate the Luminar application. 7.
Skylum Luminar - 4 3.3. Upgrading from Luminar 3 Upgrading Luminar from an earlier version is easy. • Follow the same steps to install as a new user. • Luminar 4 will automatically detect a previous version and will copy user Looks and installed Look packs. • It will also convert your current Luminar catalog to a new Luminar 4 catalog while keeping the older version safe. * If you’re receiving “Unable to Update your Luminar 3 Catalog” error, simply choose to Create a New Catalog.
Skylum Luminar - 4 4. Technical Requirements System Requirements for Microsoft® Windows®: recommended: Processor Intel® Core™ i7 7th generation or better, AMD Ryzen™ 7 2nd generation or better Graphics Discrete GPU with 4GB+ of RAM Memory 16+ GB of RAM System Windows 7® (only 64-bit OS), Windows 8.
Skylum Luminar - 4 System Requirements for Apple® macOS®: recommended: Processor Intel® Core™ i7 7th generation or better Graphics Discrete GPU with 4GB+ of RAM Memory 16+ GB of RAM System macOS 10.12 or higher Disk space 10 GB free space with SSD as primary drive Monitor Calibrated monitor with at least 1920×1200 resolution minimum: Processor Intel® Core™ i5 generation or better Graphics Integrated graphics card Memory 8 GB of RAM System macOS 10.
Skylum ©2020 Skylum Luminar - 4 Page 27 of 309
Skylum Luminar - 4 5. How Can You Use Luminar? Luminar is designed to help every photographer. The goal is to help you make your photos look their best and to enable you to express yourself creatively. This means Luminar should be able to work in many different ways to support you.
Skylum Luminar - 4 5.1. Supported File Types Luminar is designed to open a wide range of file formats. This ensures compatibility with most cameras as well as common graphic formats. Supported file types include: Supported Graphic Formats • PNG • JPEG • TIFF (8-bit and 16-bit) • Apple HEIC files (Mac only) • PSD (Mac only) Supported RAW formats • .CR2 • .CR3 • .NEF • .ORF • .
Skylum Luminar - 4 • .ERF • .ARW • .RW2 • .DNG • .PEF • .PPM • and more To see a full list of supported camera click here. Working with an unsupported Raw Format If you are trying to open an image from a camera that is not officially supported by Luminar, the best workaround is to convert the images to a DNG file. Shooting DNG may be possible in-camera. Additionally, you can install the free DNG Converter from Adobe. Luminar fully supports DNG files. This includes DNG files created by a camera.
Skylum Luminar - 4 5.2. Using Luminar as a Single Image editor You can use Luminar to edit single images at a time. You can choose to open one or multiple images into a session and work with those images for basic or creative editing. The edit history of these files can be stored in a Luminar catalog, but this is optional. 1. Create a new catalog or use your existing catalog. To create a new catalog choose File > Catalog > New…. 2.
Skylum Luminar - 4 4. Apply any adjustments or tools you want to the photo. Your edits are automatically saved to the Catalog file. 5. Choose File > Export… or File > Share to create a new file with all of the Luminar tools applied. 6. Repeat the process and open up the next image you want to work with. 7. You can find your single images by switching to the Library. Just click on the Single Image Edits shortcut.
Skylum * ! Luminar - 4 TIP You can drag several images onto the application icon to open them at once. Try using the Filmstrip (View > Show Filmstrip) to easily switch between multiple images opened at once. NOTE Image edits are automatically saved in the catalog. If you no longer want to store them for a photo, just select the image in the Single Image Edits collection and press the Delete key.
Skylum Luminar - 4 5.3. Using Luminar with other software While Luminar is a full-featured stand-alone application, some users choose to install and run it as a plug-in for other popular photo editing software. If you installed after downloading from our website, you should be prompted to install the plug-ins for detected software you already have installed.
Skylum Luminar - 4 5.3.1. Installing Plug-ins The option to install Luminar 4 as a plug-in is presented when you run the installer. You can also choose to install as a plug-in at a later time. 1. Quit any host applications you are installing for. 2. Make sure Luminar 4 is open. 3. Choose Luminar 4 > Install Plugins… to start (on a macOS) or File > Install Plugins (on PC). 4.
Skylum Luminar - 4 5.3.2. Using Luminar with Adobe Photoshop Luminar is a powerful addition to Adobe Photoshop. To apply Luminar 4 as a filter, follow these steps: 1. Make sure Adobe Photoshop is open. 2. Open an image you’d like to enhance. 3. Choose Filter > Skylum Software > Luminar 4… A new dialog appears to indicate that Luminar is running.
Skylum Luminar - 4 4. Luminar should automatically open the image you were editing. If needed, click the Luminar icon in your Dock or Taskbar to switch to Luminar. 5. Make any edits or adjustments as needed in Luminar. Use Luminar Looks to speed up your editing workflow. 6. When done, click the Apply button to send the adjusted image back to Photoshop.
Skylum * Luminar - 4 TIP Luminar can operate as a Smart Filter in Photoshop. If you designate a Photoshop layer as a Smart Object, then launch the Luminar plug-in as normal to make edits. When you return to Photoshop you can always double-click on the layer and return to Luminar with all edits intact.
Skylum Luminar - 4 5.3.3. Using Luminar with Adobe Lightroom Classic Images in Adobe Lightroom Classic (or Lightroom 6) can be easily handed off for editing in Luminar. To exchange a file from Lightroom Classic CC to Luminar, follow these steps: 1. Make sure Adobe Photoshop Lightroom Classic is open. 2. Choose your image in Lightroom Classic from the Library or Develop modules that you want to work on with Luminar. 3. Choose one of the following methods to send to Luminar 4 Photo menu 1.
Skylum Luminar - 4 • Edit a Copy with Lightroom Adjustments – this option sends a high-quality file based on the edits you’ve made in Lightroom. You can choose options for this exported file at the bottom of the window. • Edit a copy – this option sends a high-quality file based on the original image. This option does not work for raw files. • Edit Original – this option modifies the original file on your hard drive and ignores Lightroom adjustments. This option does not work for raw files. 3.
Skylum Luminar - 4 Editing in the Luminar Plug-in Once the file is sent, you’re ready to edit. 1. If needed, click the Luminar icon in your Dock or Taskbar to switch to Luminar. 2. Make any edits or adjustments as needed in Luminar. Use Luminar Looks to speed up your editing workflow. 3. When done, click the Apply button to send the adjusted image back to Lightroom.
Skylum Luminar - 4 5.3.4. Using Luminar with Adobe Photoshop Elements Luminar works with Adobe Photoshop Elements. To apply Luminar as a filter, follow these steps: 1. Make sure Adobe Photoshop Elements is open. 2. Open an image you’d like to enhance in the Photo Editor module. 3. Choose Filter > Skylum Software > Luminar 4… A new dialog appears to indicate that Luminar is running.
Skylum Luminar - 4 4. Luminar should automatically open the image you were editing. If needed, click the Luminar icon in your Dock or Taskbar to switch to Luminar. 5. Make any edits or adjustments as needed in Luminar. Use Luminar Looks to speed up your editing workflow. 6. When done, click the Apply button to send the adjusted image back to Photoshop Elements.
Skylum Luminar - 4 5.3.5. Using Luminar as a Photos for macOS Extension If the version of the macOS system on your Mac is newer than 10.11 you can use Luminar as an extension to Photos for Mac. Here’s how to activate the Extension. 1. Choose > System Preferences. 2. Choose Extensions. 3. Choose Photos. 4. Select the extensions that you’d like to use. Be sure to mark Luminar 4. 5. Launch Photos for macOS from your Applications folder. 6. Choose an image to edit in your Photos library. 7.
Skylum Luminar - 4 8. Click the Extensions button and choose Luminar 4. 9. Make any edits or adjustments as needed in Luminar. Use Luminar Looks to speed up your editing workflow.
Skylum Luminar - 4 10. When done, click the Save Changes button to send the adjusted image back to Photos for macOS.
Skylum Luminar - 4 5.3.6. Using Luminar with Apple Aperture Working with Luminar through Aperture is very similar to the way it behaves with Lightroom. To exchange a file from Aperture to Luminar, follow these steps: 1. Make sure Apple Aperture is open. 2. Choose your image(s) in Aperture from the Library that you want to work on with Luminar. 3. Choose Photo > Edit In > Luminar 4 or right-click on the image and select Edit In > Luminar 4. 4. A new image is created and sent to Luminar. 5.
Skylum Luminar - 4 5.4. Using Luminar as an external editor Several other imaging editors, especially digital asset managers, let you send a file to another application for processing. This workflow allows you to integrate Luminar 4 into your imaging pipeline.
Skylum Luminar - 4 5.4.1. How to User Skylum’s Luminar 4 with Capture One Users of Capture One software can easily access Luminar 4 as part of their imaging workflow. This option works well for all photographers but is best suited for a raw workflow. By using the Edit With… command, images are sent from Capture One to Luminar. You can then edit the photo and export it next to the original file. It is then imported back in the Capture One as a new variant file.
Skylum Luminar - 4 5. Close the preferences window. Sending a Raw file to Luminar You can easily exchange your Raw files from Capture One to Luminar. This is useful if you want to access all the data in the raw file for advanced image processing. 1. Select the image in the browser that you want to edit. 2. Choose Image > Open with Luminar 4 if you’d like to send the Raw file (or the unaltered image directly to Luminar 4). 3. Edit the image using the Luminar 4 tools. 4.
Skylum Luminar - 4 7. Give the file a descriptive name and select an appropriate file format and color space. The settings shown above are recommended for most users. 8. Click Save. 9. You can leave Luminar 4 running in the background and return to Capture One. 10. The image is automatically added to your Capture One session or Catalog.
Skylum Luminar - 4 Sending an edited image to Luminar As you work in Capture One, Luminar is just a click away. 1. Select the image in the browser that you want to edit. 2. Make any desired adjustments in Capture One first. You can now send it to Luminar as a processed file.
Skylum Luminar - 4 3. Choose Image > Edit with Luminar 4 if you’d like to send a processed file to Luminar 4. You can choose several options. 4. Choose an Image Format from the Basic tab of Edit Recipe dialog. 5. Set the appropriate bit depth with the Depth menu (16-bit is recommended).
Skylum Luminar - 4 6. Choose other options as needed such as compression and Color Space. Adobe RGB or ProPhotoRGB is recommended. Leave the Resolution and Scale options untouched (unless you want to resize the photo). 7. Click the Adjustments tab and adjust the Disable Sharpening and Ignore Crop options as you’d like them to perform . 8. When ready, click the Edit Variants button. Luminar launches and the file is handed off in the converted format.
Skylum Luminar - 4 9. Edit the image using the Luminar 4 tools. 10. Choose File > Export to open the Save dialog for Luminar. 11. Choose to create a new file and add modify the file’s name. 12. Navigate to the location of your Capture One session or Library (this location will be remembered for the next export). If you are unsure of this location, you can select the image in Capture One and choose Image > Show in Finder (Mac) or Image Show in Explorer (PC). 13.
Skylum Luminar - 4 14. Click Save. 15. You can leave Luminar 4 running in the background and return to Capture One. 16. The image is automatically added to your Capture One session or Catalog. 17. Continue working in Capture One on the image or go to your next photo. Note: This workflow works best when working with a Capture One session. This allows you to easily see the images in use and view the folder structure in the Finder/Explorer.
Skylum Luminar - 4 6. User Interface Overview Working with Luminar, you’ll access controls from two primary areas. • The Library view is for browsing and navigating your photos • The Edit view is for enhancing your images. The interface is designed to be intuitive and easy to navigate.
Skylum Luminar - 4 6.1. Library View The Library View is where you explore your images. This canvas is designed to be enjoyable for browsing. It also makes it easy to rate and sort your images. Use the Library View to organize your images or to select photos for further editing.
Skylum Luminar - 4 6.1.1. Library Toolbar As you work with an image, the Top Toolbar contains many commands that you’ll frequently use. These are grouped logically for easier use. Open The first button controls how files are added to Luminar. Clicking the Open button reveals two choices. • Add Folder with images. Add an existing folder on your computer to your Luminar library. • Edit Single Image. Bring individual images into Luminar for editing.
Skylum Luminar - 4 These next three buttons are used for changing your view of the image size in the Gallery View. • Thumbnail Size. A list of preset magnification levels for image thumbnails when navigating in the Gallery View. • Zoom Out. This option reduces the view size of the displayed thumbnails. You can see the current zoom level in the thumbnail size field. • Zoom In. This option increases the view size of the displayed thumbnails.
Skylum Luminar - 4 Parameters that are not able to be searched: • IPTC • Keywords • Tags • Ratings • Picks • Date (day, year) * Save Time with Search Press Cmd+F Search (macOS) or Ctrl+F Search (Windows) to bring up the search field. This only works in Gallery images mode. After a search is completed, a collection of images that satisfies your search query is displayed as a gallery in the Library view. The last five searches are shown in the search window as Recent Searches.
Skylum Luminar - 4 Additionally, in the Shortcuts section of the Library, the last search request will be stored as Recently Searched. Share Image The next button in the top Toolbar is used to share an image from the application to other applications. The same image can also be shared with other editing software from Skylum (and others) or uploaded directly to social networks and other online services. • Export to Image. Creates a new file in a common image format. • Services.
Skylum Luminar - 4 Mode Select Choose which mode your images are viewed in. • Gallery images mode. View a gallery of multiple images. This is useful for browsing and organizing. • Single image mode. Inspect a single image. This is best for checking file details or editing. Layout The next three buttons control the layout of the Luminar application window. You will switch depending on the task at hand. • Library. Browse image folders and albums. • Edit.
Skylum Luminar - 4 • Info. View a selected image’s metadata to learn more about a file.
Skylum Luminar - 4 6.1.2. Library Sidebar The Side Panel gives you access to important controls for browsing and navigating your photo library. Shortcuts give you quick access to your images based on predetermined criteria. Use Albums to organize images with a virtual collection, images can be added from multiple folders or removed without any effect on master files. However, Folders are the way to control the images on your hard drives and work with your data directly.
Skylum Luminar - 4 Albums Place your photos into virtual collections. You can choose images from any location or folder. Adding and removing has no effect on your actual files on the hard drive, rather use an album like you would a playlist to organize music. Folders Folders tie directly to folders on your hard drive. Luminar works with the real-world folder structure of your hard drive(s). • Master Folder. When you select a folder, it will be added as a top-level folder to your folder collection.
Skylum Luminar - 4 6.2. Edit View The Edit view is where you enhance your images. You’ll access controls from three primary areas. The Toolbar contains general-purpose and frequently used functions of the software. The Side Panel is located to the right of the main image display; all adjustment tools, layers, and the histogram can be found here. You can also save time with the Luminar Looks Panel at the bottom of the screen, which offers one-click presets.
Skylum Luminar - 4 6.2.1. Edit Toolbar As you work with an image, the Edit Toolbar contains many commands that you’ll frequently use. These are grouped logically for easier use. Here are the buttons from left to right. Open The first button controls how files are added to Luminar. Clicking the Open button reveals two choices. • Add Folder with images. Add an existing folder on your computer to your Luminar library. • Edit Single Image. Bring individual images into Luminar for editing.
Skylum Luminar - 4 The Luminar Looks Panel is where you’ll find all of your presets. These include those created by the Luminar team as well as your own custom Looks. To view the Luminar Looks Panel, just click the button to toggle visibility or use the Tab key to hide both the Side and Looks Panels. Magnification These next three buttons are used for changing your view of the image size in the Gallery View. • Magnification Level. The first menu controls the zoom level.
Skylum Luminar - 4 These buttons allow you to compare the current image with the original image, so you can easily compare how your enhancements change the photograph. • Quick Preview. The eyeball icon can quickly toggle between the original image and the enhanced version. Another way to see this change is to use the keyboard shortcut \ (backslash). This allows you to quickly compare the current image with the original. This is the fastest and most convenient mode of comparison. • Compare.
Skylum Luminar - 4 horizon in an image if it’s not horizontal. Share Image The last button in the top Toolbar is used to share an image from the application to other applications. The same image can also be shared with other editing software from Skylum (and others) or uploaded directly to social networks and other online services. • Export to Image. Creates a new file in a common image format. • Services. Choose to send to system applications or upload directly to photo sharing websites. • Open In.
Skylum Luminar - 4 • Gallery images mode. Choose to view a gallery of multiple images. This is useful for browsing and organizing. • Single image mode. Choose to inspect a single image. This is best for checking file details (like name and ratings) or editing. Layout Buttons The next three buttons control the layout of the Luminar application window. You will switch depending on the task at hand. • Library. Browse image folders and albums. • Edit. Adjust an image with tools for a perfect appearance.
Skylum Luminar - 4 There are two additional items you can choose to activate when editing an image. • Filmstrip. The Filmstrip displays a strip of images along the left side of the interface. It shows you all of the images in the currently selected view, album, or folder. It’s a convenient way to select images without having to switch back to the Library view. • Current Photo Actions. View the name, rating, and labels for the selected image.
Skylum Luminar - 4 6.2.2. Edit Sidebar The Sidebar gives you access to three important sets of controls. A Histogram is a useful tool for judging exposure and details. Layers lets you work with multiple objects to create a composite image or to isolate effects or textures to their own place. The Tools section gives you precise control over each filter you’ve added to a layer. • Histogram. While color correcting or adjusting exposure, the histogram can be a great help.
Skylum ! ! Luminar - 4 Note: If you use older Luminar Looks or open a previously edited file you may see Deprecated tools. These have been slated for retirement from Luminar. Note: Workspaces are no longer used by Luminar 4. This is because all tools can now be viewed in the Edit Sidebar organized by category. Be sure to explore Luminar Looks if you’d like to save an arrangement of frequently used tools (along with preset values).
Skylum Luminar - 4 6.2.2.1. Histogram While color correcting or adjusting exposure, the histogram can be a great help. A histogram is a graphical representation of the tonal values of your image. This graph illustrates how the pixels in the image are distributed across brightness levels. In other words, it shows the amount of tones of particular brightness found in your photograph ranging from black (0% brightness) to white (100% brightness).
Skylum ! * Luminar - 4 In both cases, this can be problematic (especially for printing) as there is too much ink coverage for cold pixels and no details at all in the hot pixels. These indicators are a sign that you should adjust the exposure of the image. You may want to leave the Histogram panel open as you work because it is an easy way to learn to read the graphical details of a digital image.
Skylum Luminar - 4 6.2.2.2. Current Photo Actions Below the currently selected image is a series of quick controls so you can both review the status of an image or apply criteria to help with sorting. • File Name. View the name of the currently selected image. • Color Label. Apply a color label to indicate the status or category for an image. • Flagged Image. A Flagged or Favorite image will have its heart icon filled in. This is a top-level rating that will help you find your best images.
Skylum Luminar - 4 6.2.2.3. History Luminar saves a history of every edit you perform on an image. This allows you unlimited undos, and you can even step through all of your previous edits. Even if you quit and reopen a catalog, all of your edits to each image are preserved. 1. Click the History button located in the bottom right of the Edit sidebar. 2. Inspect the list of edits. The most recent edits appear on the top of the list. 3. Click on a history state to revert the image to that point.
Skylum Luminar - 4 6.2.3. Additional Tool Controls If you’d like to take additional control over how tools behave, try these three advanced options. • Double click a Slider. If you double-click on any slider name resets the value to the default. In most cases, double-clicking returns it to 0. • Drag the Numbers. If you click and drag on the number value in the sidebar, moving the cursor to the left and right will let you set the values of the slider with high accuracy.
Skylum Luminar - 4 6.3. Info View The Info view provides basic information about a photo. When the Info View is activated, this information is displayed from left to right, top to bottom: • Filename. The name assigned to the file on your disk. • Capture Date and Time. When the image was captured by your camera or created in the case of scanned files. • Resolution. The current resolution of the image in pixels. • File Size. How large the file is. • Camera Model. Which camera was used to capture the image.
Skylum Luminar - 4 6.4. Filter to Tool Migration Where to locate previous controls | Luminar 3 to Luminar 4 migration (also applies to Luminar Flex).
Skylum Luminar - 4 Split Toning Professional Split Toning Sunrays Creative Sunrays Texture Overlay Creative Texture Overlay Advanced Contrast Professional Advanced Contrast Channel Mixer Deprecated Channel Mixer Color Balance Professional Color Enhancer Color Contrast Professional Color Enhancer Curves Essentials Light Dodge & Burn Professional Dodge & Burn HSL Essentials Color LUT Mapping Creative Color Styles (LUT) Microstructure Deprecated AI Structure Photo Filter
Skylum Luminar - 4 7. Opening Images for Editing There are several ways to open images into Luminar for editing. • You can add folders, which leave your photos exactly where they are on your hard drives. • If you want to import images from a memory card or external drive, then Import images that moves or copies your images to a new location.
Skylum Luminar - 4 7.1. Editing a Single Image The Edit Single Image command makes it easy to work with individual photos in Luminar. It is also useful for images that don’t exist in your Luminar library. This is similar to using previous versions of the Luminar standalone application. When to Use the Edit Single Image Command When you want to edit a single image or several images, but not Add or Import them into your library, you can use the Edit Single Image function in Luminar.
Skylum Luminar - 4 • Drag an image onto the application icon 2. A system dialog box appears. Navigate to where the image(s) you want to edit is located. 3. Select the image you want to edit. (You can select multiple photos using modifier keys like Shift or Cmd/Ctrl. 4. Click Open. The images appear on the Filmstrip sidebar. If multiple images are selected the first image selected will be opened in the main window ready to edit.
Skylum Luminar - 4 5. To select another image to edit you can scroll through the Filmstrip on the left or switch back to the Gallery View (The G key will also switch your layout to the Gallery Images Mode.) 6. Select the image you want to process and develop and export it as you would any other image in your Library. Remember to File > Export to save your edited image for use in other applications.
Skylum ! Luminar - 4 Note The File menu and shortcuts may be grayed out until you’ve opened your first image. Be sure to use the + menu to add an image. Managing Images in the Single Image Edits Collection Images will stay in your Single Image Edits shortcut collection until you remove them. This is a collection that builds automatically You can use the Showing and Sort By menus at the top of the window to reduce the number of images shown or change their display order. 1.
Skylum Luminar - 4 If you decide you want to keep a Single Image Edits photo in your Library, you can simply drag it onto any of the folders in the Library Sidebar. The original photo will be moved on your hard drive into the corresponding folder in your Library. Even though the image is now part of your regular library, it will still show up under the Edit Single Image shortcut until you remove it. ! Note There is no need to set the PPI (pixels per inch) or DPI (dots per inch) when opening the file.
Skylum Luminar - 4 7.2. Adding a Folder with Images Adding a folder of images to your library allows you to quickly access, organize, and work with photos located on your hard drive, on external hard drives, and even synced cloud storage. When you add a folder, none of your photos are moved. Luminar scans the folder and any subfolders and creates a thumbnail and link to the images inside. If there are folders inside the folder being added, Luminar will keep the folder structure.
Skylum Luminar - 4 • Here you can navigate to and folders on your hard drive and select them. When you select a folder, it will be added as a top-level folder to your folder collection. All folders contained within an added folder are also added as subfolders. All the folders added will now appear under the word Folders in the Library Sidebar. Each of these folders is considered a Master Folder. Any folders contained within a Master folder are added as subfolders.
Skylum ©2020 Skylum Luminar - 4 Page 92 of 309
Skylum Luminar - 4 Adding from the Open Button Menu The Open Button menu is located on the left side of both the Library and Edit toolbars. Clicking on the Open Button menu will reveal two options. Choose Add Folder with Images to add an existing folder on your computer to your library. Once selected, folders are added the same way as from the Library sidebar. Adding with the menu bar You can add a folder from the main menu by choosing File > Add Folder with Images.
Skylum Luminar - 4 You can add folders located on an external hard drive. The process is the same as adding folders from an internal hard drive. Be aware that if the external hard drive is disconnected from your system, the media will go offline. If the media is offline, the name of the folder is greyed out, and a warning triangle appears next to the folders name. • When an offline folder is opened, thumbnails of the original photos will be available.
Skylum Luminar - 4 If your system cannot locate the drive, you can also right-click on the folder and choose Locate Drive. Adding Folders from Synced Cloud Storage Luminar lets you add folders from cloud storage locations that are synced to your computer. In this case, synced means that a physical copy of the photo resides on either your internal or external hard drive.
Skylum Luminar - 4 7.3. Importing from a Memory Card Importing images is different than adding a folder of images to your Luminar Library. Importing physically moves your images or lets you create a copy of your images to a new location. You can import images from an internal hard drive, an external hard drive, and even a memory card. You can import images from the Open Button Menu, by clicking directly on a folder or subfolder in the Library Sidebar, or through the Menu Bar. 1.
Skylum Luminar - 4 3. Make sure the additional controls are viewable at the bottom of the import window. If hidden click the Options button. 4. With the Location menu choose an existing folder in your Luminar Library. 5. Click the Action menu to choose whether you want to Copy the images to a new location or Move them to the new folder and erase them on the source disk.
Skylum Luminar - 4 6. Click the Organize drop-down menu to choose if and how the images are sorted into subfolders. 7. Mark the Include Subfolders checkbox if you want to take additional folders of images contained within a selected folder. If this is checked, Luminar will add images from all subfolders inside the selected folder. If left unchecked, only the images at the top level of the folder will be imported. The contents of the subfolders will be ignored.
Skylum Luminar - 4 Organizing Images During Import To make it easier to find your best photos, Luminar offers several ways to organize imported images. These commands automatically build subfolders based on different image or folder properties. Just click the Organize menu in the Import dialog to choose one of these options. • Into One Folder. This will place all the images into a single level of the folder. No subfolders will be created. • Keep Existing Folder Structure.
Skylum Luminar - 4 8. Working with the Essential Tools The Essential Tools are some of the most frequently used in Luminar. These tools perform core adjustments that are useful for most images. 1. Select an image in your library or open a single image 2. Click the Essentials Tools icon in the Edit Sidebar 3.
Skylum Luminar - 4 8.1. Light Tool The Light tool contains the most essential controls for adjusting an image. The Light tool contains color and tone adjustments that should be made. This sets the stage for all the adjustments that come after. Standard Controls • White Balance. The Eyedropper can also be used to click on an area that should be white or neutral gray to calculate a custom white balance.
Skylum Luminar - 4 cause very bright areas to become brighter, while moving the slider to the left, makes them darker. • Shadows. Adjusts the brightness level of the darkest areas of the image. Moving the slider to the right will cause such areas to become brighter and additional details will appear. When moving to the left, such areas become darker, and the number of shadow areas in the image generally increases. Advanced Settings • Profile.
Skylum Luminar - 4 • Tabs. You can make a curve adjustment to all channels equally or to an individual channel (such as to blue to emphasize the sky). • Sliders. At the bottom, there are sliders that let you adjust black and white points of the histogram (the leftmost and rightmost sliders), as well as the middle bend of the curve (the central slider). • Points. You can add up to 10 control points. Drag up to add contrast to an area and down to lighten the area.
Skylum Luminar - 4 8.2. AI Enhance Tool This tool contains two useful adjustments that harness the power of Artificial Intelligence to enhance your photos. The tool automatically analyzes your image and instantly corrects it while still offering control over the final amount. • AI Accent. Under the hood, more than a dozen controls are in use. This effect tends to yield naturally beautiful results with one simple slider.
Skylum ! * Luminar - 4 Note If the controls are grayed out after applying the tool, the artificial intelligence could not recognize the sky in the photo. Skies that are very out of focus or blurred may not be detected automatically. TIP If you apply a Luminar Look that uses the AI Sky Enhancer tool and no sky is detected, Luminar will skip the adjustment.
Skylum Luminar - 4 8.3. AI Structure Tool This tool allows the adjusting of image detail and clarity. Using this tool you can get great detail or get a smoother picture with less detail. This is the main tool to increase the contrast of the image and visualize more details in the image. Thanks to AI the tool is content-aware, so it can adjust areas variably, based on the subject. The tool is also human-aware so it doesn’t over-process them.
Skylum ©2020 Skylum Luminar - 4 Page 107 of 309
Skylum Luminar - 4 8.4. Color Tool This tool is a useful way to control the Intensity of colors in a photo. It is often used in conjunction with the Light tool. Standard Controls • Saturation. This slider adjusts the intensity of all colors in your photo. • Vibrance. This slider adjusts only the intensity of muted colors, ignoring well-saturated colors. This is useful for finer control when adjusting color. • Remove Color Cast.
Skylum Luminar - 4 further to the right results in a shift towards the next color in the list (for example from Orange to Yellow). Sliding the left shifts the hue towards the previous color in the list (for example from Orange to Red). • Saturation. Adjust color saturation for the selected target. Sliding the control further to the right results in a more intense color. Of course, moving to the left removes color. • Luminance. Adjust the brightness of the colors for the selected target.
Skylum Luminar - 4 8.5. Black & White Conversion Tool The Black & White Conversion filter converts a color photo to black & white. It also contains a number of controls to manipulate the monochrome look. • Convert to B&W. Click this button to convert between color and black & white. • Luminance. Color sliders control the brightness of each relative color as it is converted from color to black and white. • Saturation.
Skylum Luminar - 4 8.6. Details Enhancer Tool The Details Enhancer filter helps you create dramatic photos and brings crystal-clear sharpness to your images. With the proper detail enhancement, you can make your photos look great and sharp, with no halos or extra artifacts. Standard Controls • Small Details. Small sets sharpness of fine details. At 0, the effect is not applied.
Skylum Luminar - 4 Advanced Settings • Details Protection. To ensure that areas of the image aren’t over-processed, use the Details Protection slider. • Details Masking. The dynamic masking feature allows you to reveal details only in appropriate areas and can help you define the sharpness in your image. • Sharpening Radius. Distance away from contrast edges that the effect is applied. • Sharpening Masking. Try the Masking slider to control the zone of detail amplification.
Skylum ©2020 Skylum Luminar - 4 Page 113 of 309
Skylum Luminar - 4 8.7. Denoise Tool Upon close inspection, you may notice unwanted and distracting noise or grain in your digital image. This is typically caused by shooting photos with a high ISO setting on a digital camera, but it can also be caused by underexposure or long shutter speed. A lower-quality consumer camera is also more likely to exhibit noise problems. Fortunately, Luminar offers an easy tool to reduce or remove noise. Standard Controls • Luminosity Denoise.
Skylum Luminar - 4 8.8. Landscape Enhancer Tool These tools are designed specifically to help landscape photographs. However, they can also help with real estate, travel, and nature photographs as well. Standard Controls • Dehaze. The perfect blend of contrast, clarity and color adjustments to help eliminate the effects of fog and haze often found in cityscapes, landscapes, and aerial photos. It’s especially helpful when editing photos shot through glass or if there is a lot of mist or fog in the scene.
Skylum Luminar - 4 Advanced Controls • Hue. Modifies the hue of the affected foliage. Useful to dial in the right amount of green.
Skylum Luminar - 4 8.9. Vignette Tool A Vignette darkens or lightens the edges of your image. This is quite an old technique to emphasize the accents on photos. The effect typically leaves the central area unaffected while the edges are shaded or lightened. Luminar goes further by letting you place the center point of the vignette anywhere in the image you like. Standard Controls • Choose Subject. Click this button to enable a crosshair, you can then click within the photo to center the vignette.
Skylum Luminar - 4 • Inner Light. This slider increases the brightness in the central region which is not affected by shading. It allows you to create a contrast effect. ! Note This tool allows you to highlight key points in the photo, making it more interesting. A slight edges shading always provokes the viewer’s eye to consider the lighter central part of the photo. For a realistic picture, don’t lower the Amount below -50. As a rule, this effect is used only with darker shading.
Skylum Luminar - 4 9. Working with the Creative Tools Creative Tools help you express yourself with your photos. Explore new options for color and style that can affect the mood of an image. 1. Select an image in your library or open a single image 2. Click the Creative Tools icon in the Edit Sidebar 3.
Skylum Luminar - 4 9.1. AI Sky Replacement Tool If your photo lacks a compelling sky, AI Sky Replacement makes replacing it easy. The tool is designed to work with flat or blown out skies, but can often be adjusted to work with most skies by refining the sliders. Using the power of artificial intelligence, the AI Sky Replacement tool automatically analyzes an image, identifies where the sky begins, and ends, then seamlessly replaces the sky to create a realistic look. Standard Controls • Sky Selection.
Skylum * Luminar - 4 Easily access your own skies. Be sure to load your own skies into this menu. From the top of the Sky Selection list choose Show Custom Skies. You can copy your own JPEG files into this folder. See this article for more details on using your own skies. It is recommended to keep fewer than 50 skies at a time loaded for better performance. You will see the skies from this folder appear in the main list of skies available for AI Sky Replacement.
Skylum ! Luminar - 4 FAQ: I’m trying to use Sky Replacement and the sliders are greyed out. How come? If the AI Sky Replacement is disabled there are two likely causes. First is that the skies are not visible enough in the image. The other cause is that you’ve applied the effect to an adjustment layer. In this case, be sure to use the original image layer or a Stamped layer for the AI Sky Replacement tool.
Skylum Luminar - 4 9.1.1. AI Sky Replacement Guidelines In order to achieve the best results with Luminar 4’s AI Sky Replacement tool, it is suggested that you follow these guidelines. Doing so will give the application the most information and ensure best results. While the filter includes sample skies for you to use, many will want to use sky photos of their own creation.
Skylum Luminar - 4 • Horizon line should be perfectly aligned for a straight edge. Do not use sky textures where the horizon is not aligned to the bottom part of the image. If needed, you can crop and pre-preprocess the image to a new file in advance. • Sky texture should contain ONLY the sky. Be sure to avoid any other objects like trees, mountains or power lines. This will significantly affect the quality of the sky replacement effect.
Skylum Luminar - 4 • A photo should have perspective. Ideally, clouds on the horizon should be further away and any cloud near the top of the image should be closer to the viewer. Issues to avoid In order to achieve the most realistic results, please avoid images captured incorrectly. The AI Sky Replacement filter will generate poor results if the following images are used. • Avoid telephoto lenses. Do not use sky textures captured with a telephoto lens set to a large focal distance.
Skylum Luminar - 4 • No horizon. Do not use a sky texture without a clear (and level) horizon line.
Skylum Luminar - 4 • No foreground or objects. Avoid using a sky texture that contains mountains, trees or any other kinds of objects on the horizon.
Skylum ©2020 Skylum Luminar - 4 Page 128 of 309
Skylum Luminar - 4 9.2. AI Augmented Sky Tool If your photo could benefit from a more visually interesting sky, the AI Augmented Sky Tool is the perfect fix. AI Augmented Sky detects a photo’s sky automatically and adds a chosen element to the sky area. Thanks to content-aware technologies, foreground objects are taken into account automatically, making the object blend naturally with the sky. And if you want more control over the placement, you can easily drag the new element around the sky area.
Skylum Luminar - 4 choose Show Custom Sky Objects. You can copy your own JPEG or PNG files into this folder. It is recommended to keep fewer than 50 skies at a time loaded for better performance. You will see the skies from this folder appear in the main list of sky objects available for AI Augmented Sky. To remove the objects from this list, remove them from the folder. • Amount. This slider allows you to adjust the intensity of the added object. • Warmth.
Skylum Luminar - 4 9.3. Sunrays Tool Add a whole new light source to your photo, the sun! You can control its position, the warmth, and the amount of glow for a subtle or even dramatic change in lighting. Combine the filter with blending modes for even more control of your lighting. Standard Controls • Place Sun Center. Click this button to interactively nudge the sun’s position by dragging. • Amount. Controls the overall intensity of the sun rays. • Overall Look.
Skylum Luminar - 4 • Overall Randomize. Use this slider to get entirely new results that are a variation based on the current settings.
Skylum Luminar - 4 9.4. Dramatic Tool The Dramatic tool is a creative option that lowers saturation and increases contrast, helping to achieve a gritty cinematic look in your photos, similar to the darkroom technique “Bleach Bypass.” It is often used in stylized fashion shoots, urban images, or grungy athletic portraits. Standard Controls • Amount. The Amount slider controls the total intensity of the added effect. • Local Contrast.
Skylum Luminar - 4 9.5. Matte Look Tool This tool can give your photos an aged look with flat color and high contrast. This works well for both landscape and portraits to change the emotion of your image. Standard Controls • Amount. The overall strength of the matte look effect. • Fade. Controls the loss of detail that happens in the darker areas of the image. • Contrast. This adjusts the relationship between the brighter and darker areas of the tool. Advanced Controls • Saturation.
Skylum Luminar - 4 9.6. Mystical Tool This tool provides for an overall “dreamy” look to your image by softening image luminescence, and increasing contrast & saturation. It can create a dreamy, fantasy look for photos by increasing contrast and adding a creative glow, prioritized to the lighter areas of the image. Standard Controls • Amount. The overall effect strength. For a moderate effect and a more realistic image, keep the values in the Amount to +40.
Skylum ©2020 Skylum Luminar - 4 Page 136 of 309
Skylum Luminar - 4 9.7. Color Styles (LUT) Tool Use professional lookup tables to change the appearance of your photo quickly. Choose from film stocks, black and white looks, or create color grades to unlock a new style in seconds. You’ll find several built-in styles in the pop-up list, you can also load your own lookup tables in the .cube format. • Choose LUT. Choose a preset or recently used LUT file or load a new one. • Amount. This lets you reduce the intensity of the Lookup Table. • Contrast.
Skylum Luminar - 4 Tip Need to make custom LUTs? Check out this article to learn more.
Skylum Luminar - 4 9.8. Texture Overlay Tool Enables custom images and textures to be blended as a layer into the current image. Textures can easily give your photos new unique looks, especially when you’re trying to achieve a vintage or grungy look. Standard Controls • Load Texture. Click the Select Texture button to open a file browser. You’ll be able to choose a texture graphic on your hard drive. • Flip/Flop buttons. This swaps the direction of the texture image. • Blend Mode.
Skylum Luminar - 4 9.9. Glow Tool This tool is useful for creating a lighting effect in photos. It is especially useful for bright areas in your image such as streetlights or sky. Standard Controls • Type. Choose from 3 different options that affect characteristics of the glow. • Amount. The overall effect strength. If the Amount value is 0, then the effect is not applied. Move the slider to the right to increase Amount. • Brightness. Use this slider to control the brightness of the effect.
Skylum Luminar - 4 9.10. Film Grain Tool Emulates the structure of analog film stock by introducing a random, stylized grain into your image. Keep in mind that grain and photo noise are different things. Use grain to give your color and black & white photos a cool analog feel. Standard Controls • Amount. This controls how present the grain is. Advanced Controls • Size. This adjusts the size of the grain that is added. • Roughness. This affects the visual appearance of the grain.
Skylum Luminar - 4 9.11. Fog Tool Allows you to add a strong softening or blurring effect to part of your photo, simulating the high humidity weather phenomenon commonly known as “Fog”. You can add Light Fog or Dark Fog to an image and adjust its intensity with the Amount slider. • Type. Choose from two different styles of fog. • Amount.
Skylum Luminar - 4 10. Working with the Portrait Tools The Portrait Tools are designed to make enhancing portraits easy. Be sure to explore the ability to sync adjustments to multiple photos and build your own Luminar Looks. 1. Select an image in your library or open a single image 2. Click the Portrait Tools icon in the Edit Sidebar 3.
Skylum ©2020 Skylum Luminar - 4 Page 144 of 309
Skylum Luminar - 4 10.1. AI Skin Enhancer Tool This tool analyzes your image and can enhance and retouch a person’s skin automatically. You retain complete control over how the content-aware adjustments are applied. Additionally AI Skin Enhancer can get rid of various skin imperfections like acne, freckles, and moles. It can smoothen the skin, but make sure that small details like hair and eyelashes are still sharp as can be. • Amount.
Skylum * * Luminar - 4 Tip. If details are removed that you’d like to preserve, use the Edit Mask feature to paint them back in. Tip. You can also use the Erase tool in the Canvas Tools group to remove unwanted details.
Skylum Luminar - 4 10.2. AI Portrait Enhancer Tool This collection of tools is designed to help improve portrait photos in a natural, yet pleasing way. The tools also help to highlight and improve the primary features of a person’s face. The tool uses AI to recognize facial details. The tool requires that the face fills at least 25% of the frame for the best results. If multiple faces are present, they will be handled by the tool (provided that the faces are large enough to be detected). • Face Light.
Skylum Luminar - 4 • Slim Face 2.0. A useful technology to realistically contour and shape a face. Make the face proportionally smaller and naturally slim, achieving more attractive results in your portrait. It’s also useful to correct lens distortion on a face. • Enlarge Eyes. Is your portrait subject not fully awake yet? Squinting in bright light? Bring their eyes to life by gently increasing the size of their eyes. • Eyebrow Improve. Thicken and darken brows for stronger framing of the eyes.
Skylum * ! Luminar - 4 Tip. If you need to boost an adjustment to a higher value (such as Dark Circles Removal or Teeth Whitening) just add an adjustment layer and use a second instance of the tool. Note. AI Skin Enhancer is designed to work on portraits. As such it prefers that the person fills at least 25% of the image.
Skylum * Luminar - 4 Tip. Just like AI Skin Enhancer, you can apply your Portrait Enhancer adjustments to multiple images.
Skylum Luminar - 4 10.3. High Key Tool Emulates the look of a high key lighting set-up where the main light source slightly overexposes the subject. This produces bright high contrast images. Often used in Fashion & Beauty photography. Standard Controls • Amount. How much of the effect is added to the image. • Standard High Key. Affects the image in a global fashion. • Dynamic High Key. It is more limited in its effect, taking skin tones into account as it applies the filter to the image. • Blacks.
Skylum Luminar - 4 10.4. Orton Effect Tool The Orton Effect allows enhancements to an image that includes glow and focus which produces photos that are sharp and blurry at the same time. This is a great way to add a unique look to your photos. While it works great on portraits, you can absolutely use it on most photos. Standard Controls • Type. They Type pop-up menu offers two choices. ◦ Type 1 increases the Saturation of the image. ◦ Type 2 is a softer glow. • Amount.
Skylum Luminar - 4 11. Working with the Professional Tools The Professional Tools are designed to offer precise controls to advanced and discerning users. Explore them for some of the most useful tools in Luminar to control color and tone. 1. Select an image in your library or open a single image 2. Click the Professional Tools icon in the Edit Sidebar 3.
Skylum Luminar - 4 11.1. Advanced Contrast Tool Precisely adjusts tonal contrast with six distinct controls spanning highlights, midtones, and shadows, making for more detailed results. • Use the Highlights, Midtones, and Shadows sliders to refine the amount of contrast in each zone. Dragging to the right increases contrast. • Use the three Balance sliders to define the midpoint for each zone. This allows you to define which area is treated as a Shadow, Midtone, and Highlight.
Skylum Luminar - 4 11.2. Adjustable Gradient Tool The Adjustable Gradient tool allows you to selectively adjust exposure, contrast, vibrance, and warmth for 2 different parts of the image. You can adjust the mask orientation for selective editing. • Top & Bottom. Choose which areas are affected by the tool. • Exposure. Adjusts the luminance of the image. Moving a slider to the left results in a darker image (reduction of exposure value).
Skylum Luminar - 4 • Set Orientation. Use intuitive on-screen controls to adjust the blending of the top and bottom area. * Tip Consider rotating the Adjustable Gradient Tool and use it to relight portraits.
Skylum Luminar - 4 11.3. Dodge & Burn Tool Dodge & Burn tools are known as toning tools. They allow for finer control over lightening or darkening an image. These tools simulate traditional techniques used by photographers. In a darkroom, the photographer would regulate the amount of light on a particular area of a print. 1. To Dodge and Burn, apply the Dodge & Burn tool in the Professional Tools section. 2. Click the Start Painting button to open up your canvas. 3.
Skylum Luminar - 4 11.4. Color Enhancer Tool The Color Enhancer Tool offers several advanced options for precise control over color. While you’ll likely not need all of these sliders for each image, being familiar with their controls and benefits is very helpful. • Brilliance. Useful for creating rich color in a photo. • Warmth. This controls the color temperature in the image. It can be used to stylize an image. Positive values can be used to warm the image.
Skylum Luminar - 4 increased color contrast and vibrancy or create creative toning effects. You can separately adjust the Warm Colors and Cool Colors. • Warm. Drag the slider to the left to neutralize warm tones such as yellows and reds and to the right to enhance them. • Cool. Drag the slider to the left to cool down Blues, Aqua and Cyan and to the right to neutralize and warm them up.
Skylum Luminar - 4 11.5. Photo Filter Tool This tool simulates color filters that traditionally are attached to a camera lens. Professional photographers often place glass filters in front of the camera lens to “cool” or “warm” a picture, or to add special effects. These can also be used to accentuate complementary colors and add creative toning to your photos. • Amount. Controls how much of the colored filter is added to the image. • Hue. Sets the color value for the photo filter. • Saturation.
Skylum Luminar - 4 11.6. Split Toning Tool A powerful creative tool, Split Toning offers the ability to introduce color toning to black and white images. Toning a black and white image can transform the mood of the resulting image and also help in some printing processes. • Amount. The overall strength of color toning applied to an image. • Highlights ◦ Hue. Scroll through a spectrum of colors to choose the toning of the bright values in a scene. ◦ Saturation.
Skylum Luminar - 4 12. Working with Canvas Tools The Canvas Tools help you correct distortions within an image. They are also useful for recomposing a photograph or removing distractions. Some of these tools work directly on the selected layer, while the Erase and Clone & Stamp Tools generate a new layer. 1. Select an image in your library or open a single image 2. Click the Canvas Tools icon in the Edit Sidebar 3.
Skylum Luminar - 4 12.1. Crop & Rotate Tool Directly out of a camera, your digital photos will likely not be sized to the exact dimensions you need. Between different shaped screens, web pages, social networks, and prints its often common to change the shape and size of an image. 1. Open an image that needs cropping or straightening. 2. Switch to the Crop Tool by clicking the Canvas Tools group in the Edit Sidebar or pressing the C key.
Skylum Luminar - 4 3. A grid and controls now appear over your image. A new set of controls is also available in the Canvas Tools area. [add screenshot] 4. Choose a Ratio from the Aspect drop-down menu. The image is displayed with a grid that represents the ratio chosen in the Aspect drop-down menu. • Free. Create a custom shape by dragging to taste. • Original. Preserves the original shape of the photo but allows you to crop more tightly to remove details from the edges • Transposed.
Skylum * Luminar - 4 Use the Rule of Thirds. This is a standard overlAy used to help with cropping. The four intersecting points are considered the best place to put a subject. Many feel that following these guides makes an image appear better. 5. The Crop & Rotate tool contains additional controls as well • The Reset button reverts the image to no crop • The Rotate Crop button transposes the crop (the original dimensions are reversed for the crop, a 5 : 7 becomes a 7 : 5).
Skylum Luminar - 4 7. To Move the image inside the crop, just click inside the image crop area and drag to reposition the image behind the cropping rectangle.
Skylum Luminar - 4 8. To Rotate an image you can click and drag just outside a corner to rotate. A grid overlay appears to help you with accurate cropping. 9. You can also transform the layer while cropping. These tools are located at the bottom of the Crop and Rotate tool. • Flip Horizontal. Reverse the left and right-sides of the image creating a mirror image. • Flip Vertical. Reverse the top and bottom sides of the photo. • Rotate Left (CCW). Rotates the image 90˚ counter-clockwise.
Skylum Luminar - 4 10. When happy with the cropping, click the Done button. You can also just switch to another tool to apply the crop. 11. To cancel this Crop click the Reset button and then Done. If you do not like the result, you can easily undo the cropping by pressing the Reset button. Hence cropping is a safe operation that can be easily undone.
Skylum Luminar - 4 12.2. Erase Tool The Erase tool serves a similar purpose to the Clone & Stamp tool, it’s all about removing unwanted objects or details. But its approach is a bit different. Rather than Option-clicking to set a source point for pixels, you simply click and paint over the unwanted areas. Luminar then examines the surrounding pixels and generates a new texture based on its awareness of what’s nearby in the photo.
Skylum Luminar - 4 3. Use the Zoom buttons and the Hand tool to explore the image’s details. Simply hold down the spacebar to switch to the hand tool temporarily. 4. When you find an area to Erase, simply click and brush over the unwanted area. 5. You can adjust the size and hardness of the brush with the toolbar at the top of the screen. 6. To subtract from the targeted areas, press the X key to toggle between adding and subtracting pixels with the brush. 7.
Skylum Luminar - 4 9. When you have a basic selection, click on the first point to close the loop. 10. Click the Erase button to remove the selected areas. 11. When happy with the pixel removal, click the Done button. ! Note Since the Erase Tool creates a new stamped layer, be sure to develop your raw or primary image first to get the best corrections for color and tone.
Skylum Luminar - 4 12.3. Clone & Stamp Tool The Clone & Stamp tool works by replacing unwanted or damaged pixels with good pixels that you target. This tool is easy to use and allows you to set a sample point (where the good pixels are taken from), and then paint into bad areas (to cover up damage or blemishes). Luminar offers feathered brushes to make the blending of strokes easier. 1. Open an image that needs cloning and stamping. 2.
Skylum Luminar - 4 5. Click and brush over the damaged area. 6. Click and paint out the pixels you want to remove. You can also try small dabs and short strokes to get a blended look. The sampled pixels are taken from the sample point and cover the unwanted pixels. Try blending multiple strokes together and lower the opacity of the brush for the best results. 7. After each stroke, the screen blends, and updates to show the new pixels. Continue to examine the results and make additional strokes as needed.
Skylum * ! ! Luminar - 4 Tip Here are some practical tips to get better results using the Clone & Stamp tool. Try cloning at a low opacity and build-up strokes. Try sampling from several different places to fill in an area. Experiment with blending modes. Note Be sure to also try the AI Skin Enhancer to remove blemishes in portraits. Note Since the Clone & Stamp Tool creates a new stamped layer, be sure to develop your raw or primary image first to get the best corrections for color and tone.
Skylum Luminar - 4 12.4. Lens & Geometry Tool This tool is useful for enhancing your image and removing lens imperfections. These sliders are designed to remove flaws in the image caused by the lens or camera handling. The exact controls you’ll see vary between standard and raw files. • Auto Distortion Corrections (raw only). Click this option to remove lens distortion automatically. The filter analyzes your image and its metadata to calculate an automatic fix that you can apply in one-click.
Skylum ! Luminar - 4 Note: Geometry controls It is also possible to transform the shape of a photo to compensate for perspective issues or problems caused by the camera’s physical position. With the Geometry controls, there are many options available for changing the position, rotation, and scale of a layer. There is also the Free Transform command available in the Layers Tool. Adjust any of the following properties as needed to transform the image: • Vertical.
Skylum ©2020 Skylum Luminar - 4 Page 177 of 309
Skylum Luminar - 4 13. Luminar Looks Luminar Looks allow you to make instant changes to your image with one click of a button. Each Luminar Look is made up of all the saved tools as well as the settings used for each of those tools.
Skylum Luminar - 4 13.1. Working With Luminar Looks In order to save time when developing your image, you’ll find an extensive collection of Luminar Looks. Professional photographers from around the world have helped us create a comprehensive group of Luminar Looks that give your images amazing enhancements in a single click. To apply a Luminar Look: 1. Make sure an image is open in Luminar. 2. If the Luminar Looks Panel isn’t visible, click its icon in the Top Toolbar.
Skylum Luminar - 4 7. If you hover your mouse over a Luminar Look, an Amount slider is revealed, with the default set to 100% opacity. By moving the Amount slider located within the Luminar Look name you can lower the intensity that the effect has on your image. 8. Click the Star icon on a Luminar Look thumbnail to add it to your Favorites list for easy access. 9. In order to quickly return to the original state of a photograph, just use the Reset Adjustments button.
Skylum ©2020 Skylum Luminar - 4 Page 181 of 309
Skylum Luminar - 4 13.2. Loading Additional Luminar Looks Collections There are many Luminar Looks included with Luminar 4. To make it easy to manage these Luminar Looks, you’ll find that they are organized into several collections. Choosing a Collection Luminar Looks are organized into collections. Just click on the Luminar Looks pop-up menu at the left edge of the Luminar Looks Browser. This will open up the Luminar Looks Collection browser. Here you can browse any Looks that you have installed.
Skylum Luminar - 4 • Essentials. These Luminar Looks create subtle changes in your image for clarity, vivid colors, adding a vignette, and more. • Street. These work well for photographs shot under on-the-move conditions. Bring out detail and add contrast to your images quickly. • Landscape. A collection of Luminar Looks that are well-suited for outdoor lighting. Use these Luminar Looks to quickly add contrast, make colors vivid, improve skies, or add details with structure. • Portrait.
Skylum Luminar - 4 • All Luminar Looks shows you both Luminar Looks created by the Skylum team as well as any that you’ve saved or imported. • Favorite are the Luminar Looks that you tagged with a star (just click the hollow star on a Luminar Look’s thumbnail). Use these Luminar Looks to create a consistent edit across a series of images or to keep a short list of your favorite adjustments. • User Luminar Looks shows you Luminar Looks that you’ve created on your own.
Skylum Luminar - 4 13.3. Customizing Luminar Looks Remember, a Luminar Look is merely a starting point. Different photographers will desire different Luminar Looks. Plus a Luminar Look may work great on some photos, but need a little tweaking for others. Once you select a Luminar Look, you have the ability in the Sidebar to use tool controls to modify that Luminar Look to fit your specific image needs.
Skylum Luminar - 4 You must be viewing All Luminar Looks or the User Luminar Looks category to see these options. To access this menu for a User Luminar Look, click the small triangle next to a Luminar Looks name while hovering over the Luminar Look’s thumbnail image. • Update with Current Settings. To overwrite or re-save the Luminar Look with the current state of the sliders in the Filters controls. • Delete. Deletes the current user Luminar Look. • Rename. Renames the current Luminar Look.
Skylum Luminar - 4 2. Select the Luminar Looks you want to share, then send them to fellow Luminar users. 3. To copy Luminar Looks on another machine, just choose File > Show Luminar Looks Folder… on the other computer. 4. Simply drag the new Luminar Looks into your Luminar Looks Folder. All Luminar Looks in this folder appear in the Custom category and the All Luminar Looks category. 5. For best results, restart Luminar to load all the new Luminar Looks.
Skylum Luminar - 4 13.4. Adding a Custom Luminar Look Pack Occasionally Skylum or other professional photographers will release a collection of Luminar Looks. When you import a Custom Luminar Look Collection, it will create a new Collection in the Luminar Looks browser and display any associated Luminar Looks therein. To add a Custom Luminar Look Collection, select the menu item File > Add Luminar Looks Collection…. An open dialog will be displayed, allowing you to choose the Collection you wish to add.
Skylum Luminar - 4 14. Working with Layers If you’d like to combine multiple elements together in a project, be sure to check out layers. You can access controls for layers by clicking the Layers button in the Edit sidebar. Each layer can contain discrete elements of your project. Layers can contain photos, textures, core adjustments. There are lots of ways to create and manage layers, but it all comes back to having an organized design.
Skylum Luminar - 4 14.1. An Overview of Layers The use of layers helps you combine multiple elements into a new design. To make sure Layers are visible, do the following. 1. Launch Luminar and open an image. 2. If Layers aren’t visible, click Edit in the Top Toolbar to open the Sidebar. You can also press the Tab key to open the Sidebar if it’s hidden. 3. If Layers aren’t seen, click the Layers button near the top of the Sidebar. 4. Review the Layers panel.
Skylum Luminar - 4 14.2. Using an Adjustment Layer Luminar offers a special type of layer that makes it easy to precisely edit your photos. Any tool or tools in Luminar can be used with an Adjustment Layer. This is a really flexible way to work with your photos as it means you can easily control advanced options for filters such as their application order, opacity, or blending modes. Adjustment layers give you the most flexibility when editing a photo. Here’s how to work with Adjustment Layers. 1.
Skylum Luminar - 4 3. At the top of the Filters section click the + button. 4. Choose the item Add New Adjustment Layer. 5. Choose which tools you want to use with the controls in the Edit sidebar. 6. To make things easier, be sure to give the new adjustment layer a descriptive name. Click the action menu to the right of a layer’s name. 7. Use advanced controls to refine the look of the filter such as the layer’s blending mode and opacity settings. 8.
Skylum Luminar - 4 14.3. Using an Image Layer The Add Image command is a useful way to add one image on top of another in a Luminar project. There are many possible reasons to do this, including design and technical. Loading a Texture Layer The use of texture layers is quite a useful way to stylize an image. You can use the Add New Image Layer command to place a texture above a photo. 1. Click the + symbol at the top of the Layers panel and choose Add New Image Layer….
Skylum Luminar - 4 2. Navigate to a texture layer on your hard drive and click the Open button to add the file to your document. The layer is automatically named with the filename of the selected file. 3. To scale the texture, click on the action menu and choose Image Mapping. Select one of the three mapping options. • You can Fit the image to the width or height • Scale to Fit to enlarge the image to fit the screen • Use Fill to distort the image to fill the screen.
Skylum Luminar - 4 4. Click the Blend menu to change the Blending mode for the Texture layer. 5. Drag the Opacity slider to refine the blending of the two layers. Remember, a texture must be an external file. As you adjust the blend mode and opacity of the texture layer, it will create many different creative effects. Each mode will have a different impact on your image based on the type and opacity you choose.
Skylum Luminar - 4 specific areas of your image. * Note Textures are not stored in Luminar. These files are located wherever you’ve saved them for usage. For easy access, we recommend keeping all of your textures in a consistent place on your hard disk. Loading a Watermark or Logo Layer A logo or watermark is an excellent way to brand an image before you post it to the Internet or make a print. You can use the Add Image command to place a watermark or logo above a photo.
Skylum Luminar - 4 3. To scale the texture, click on the action menu and choose Image Mapping. 4. To prevent unwanted distortion of the watermark or logo, choose Fit. 5. Let’s turn the logo to white text over a black background. We’ll do this by applying the Light tool to the logo layer. 6. Go to the advanced section of Light and choose Curves. 7. Invert the curve by reversing the white and black points. 8.
Skylum Luminar - 4 (Windows). 9. Click the Lock icon in the Info Bar to prevent unwanted distortion. 10. Drag a corner handle to resize the logo. Drag in the center to position. Resize and position the logo to taste 11. Click the Done button when satisfied to position the logo.
Skylum Luminar - 4 12. You can also experiment with different blending modes to remove the background color. For example, you can use Screen to remove a black background and Multiply to remove a white background.
Skylum Luminar - 4 14.4. Creating a Stamped Layer As you work with layered photos, you may decide that you want to create a merged copy of those layers. Perhaps its to apply additional effects, or maybe to mask and blend the layers together. Luminar calls this feature a stamped layer, and it simply means that all of the current layers and filters combine to a new layer at the top of the Layers panel. Here’s how to create a stamped layer. 1. Open an image within Luminar. 2.
Skylum Luminar - 4 14.5. Transforming a Layer Once you’ve added a new layer to a document, it’s easy to transform it to a new size. The Layer Transform command is quite useful. 1. Open the Layers tool by clicking its icon in the sidebar 2. Select an existing layer or click the + symbol at the top of the Layers tool or use the Add New Image Layer… command. 3. To scale a layer, click the Layer Transform button or press Cmd+T (macOS) or Ctrl+T (Windows). 4.
Skylum Luminar - 4 5. Drag a corner handle to resize the layer. • Drag a corner to resize the layer in two directions. • Drag the top, bottom, or side to scale in one direction only. • Drag in the center to position. Resize and position the logo to taste. 6. To Move the image, just click inside the image area and drag to reposition the image. 7. To Rotate an image you can click on the Angle readout to reveal a drop-down slider for adjusting the angle of the image up to 45 degrees in either direction.
Skylum Luminar - 4 corner to rotate. A grid overlay appears to help you with accurate cropping. 8. When happy with the position of the new layer, click the Done button. To cancel this action click the Reset button then click Done.
Skylum Luminar - 4 14.6. Using Blending Modes with Layers A blending mode compares the content of two layers and enacts changes based on the content of both. You can choose from 14 different blending modes using the pop-up menu at the top of the Layers controls. Understanding blending modes requires a bit of science. To start let’s establish three key terms. • Base color. The original color in the image • Blend color. The color being applied by the top layer or Adjustment layer. • Result color.
Skylum Luminar - 4 The default mode performs no additional change to how layer contents interact.
Skylum Luminar - 4 Darken Pixels lighter than blend are replaced; darker ones are not.
Skylum Luminar - 4 Multiply It is similar to drawing strokes on the image with markers. The colors of the top layer or blended with the image.
Skylum Luminar - 4 Evaluates each channel; darkens base by increasing contrast.
Skylum Luminar - 4 Lighten Evaluates each channel; it then uses base or blend color (whichever is lighter).
Skylum Luminar - 4 Screen Uses a lighter color. It is useful for “knocking” black out of a layer.Overlay Overlays existing pixels while preserving highlights and shadows of base.
Skylum Luminar - 4 Overlays existing pixels while preserving highlights and shadows of base.
Skylum Luminar - 4 Soft Light The effect is similar to shining a diffused spotlight on the image.
Skylum Luminar - 4 Hard Light Effect is similar to shining a harsh spotlight on the image.
Skylum Luminar - 4 Difference Evaluates each channel and subtracts or inverts depending on brightness.
Skylum Luminar - 4 Subtract Looks at the color in each channel and subtracts the blend from the base.
Skylum Luminar - 4 Hue Uses luminance and saturation of the base and the hue of the blend.
Skylum Luminar - 4 Color Preserves gray levels. It’s very useful for coloring and tinting.
Skylum Luminar - 4 Luminosity Is the inverse effect from the Color mode.
Skylum Luminar - 4 15. Masking Options in Luminar The use of masks allows you to hide or obscure parts of an image. Masks are useful so you can combine the contents or results of one layer with your primary image. Layer Masks allow you to use powerful painting tools to control their results. The more you work on combining multiple images, the more you’ll use masks. Luminar offers 4 types of masks: • Brush. The Brush is one of the easiest ways to mask an image.
Skylum Luminar - 4 15.1. Creating a Layer Mask If you’d like to use a mask on a layer, the first step is to add one. This approach is most useful when you want to globally mask parts of an image layer or to blend several filters at once. This mask can be edited using the Brush, Radial Mask, or Gradient Mask tools. To add a mask: 1. Open a photo within Luminar 4. 2. Select the desired layer. By default, layers and adjustment layers have no mask. 3. Click the Edit Mask button. 4.
Skylum Luminar - 4 15.2. Creating a Tool Mask Another way to apply a mask is directly to a tool. This workflow allows you to isolate the results of a specific area. Perhaps it’s to enhance just the sky or to add details to a specific area of an image. The use of the Gradient Mask and Radial Mask mode can be helpful to smoothly blend a filter. To create a Tool Mask: 1. Select an individual tool in the Edit sidebar. 2. Click the Edit Mask button below the tool. 3.
Skylum Luminar - 4 15.3. Using a Brush Mask The Brush can be used in either Paint mode or Erase mode to add to or subtract from areas of the mask. Clicking on the Paint option will add white areas to the mask. These areas will be preserved on the current layer. Brushing with Erase mode is handy for “trimming” overspray of the mask and making your selection more accurate. To control a brush, click the Brush Settings drop-down menu (it’s next to the Erase option).
Skylum Luminar - 4 10. Continue painting the mask to get the desired results. Use the toolbar at the top of the window to control the behavior of the Masking Brush tool. Click the Brush Settings drop-down menu to control the shape and dynamics of the brush. You can also click on each property in the top toolbar to edit them individually • Size. Controls the diameter of the brush. You can also use the keyboard shortcuts [ and ] to make the brush smaller or larger. • Softness.
Skylum Luminar - 4 15.4. Using a Radial Mask The use of a Radial Mask is a quick, easy way to highlight the sun, a face or anything else on your photo. You can create an ellipse or circular shape that makes its easy to create a gradual blend between two states. It can be used with an image layer to add ramping transparency. For an adjustment layer, it’s useful to create a blend between the modified and original state. Here’s how to use the Radial Mask tool: 1.
Skylum Luminar - 4 7. You can change the mode of the mask if you need to change how a mask is applied by clicking the Invert button. By default, the Radial Gradient mask that is created will “protect” the center of the circle/oval and any enhancements will be applied outside of the inner circle. Click this button to invert the mask so that effects will be applied to the inner circle. 8. You can also adjust properties like Blending modes and Opacity to change the masks impact on the image. 9.
Skylum Luminar - 4 15.5. Using a Gradient Mask The Gradient Mask Tool is useful for creating a gradual blend between two states. It can be used with an image layer to add ramping transparency. For an Adjustment Layer, it’s useful to create a blend between the modified and original state. The Gradient Mask is a favorite tool of landscape photographers that allows you to enhance images smoothly with effects applied to the Gradient. 1.
Skylum Luminar - 4 8. When satisfied with the mask, click the Done button. 9. If using an Adjustment Layer, adjust the Tool controls as needed. The mask will control how its results are applied. If using an image layer, you can control the opacity and blending mode of the layer. * Tip You can edit the results of a Linear mask by clicking the Edit Mask button. This lets you add or subtract from the mask using the Brush tool for greater control over the mask.
Skylum Luminar - 4 15.6. Using a Luminosity Mask A Luminosity Mask is a fast and easy way to create a new mask based on the brightness of image pixels. When selected, the command will fill the active layer with a mask based on the brightness of image pixels. The transparency for the layer is directly related to the brightness of the pixels. This command works very well to mask an overlaid image such as a cloud or texture layer. You can also mask a copy of a layer to enhance only part of an image.
Skylum Luminar - 4 8. You can also re-run the Create Luminosity Mask multiple times to generate different masks each time. 9. Use the layer’s blending mode and opacity sliders to blend the layer to taste. * Tip When editing a mask, you can press the Backspace hotkey to reset a gradient/radial mask to its default setting.
Skylum Luminar - 4 15.7. Additional Mask Controls Once you’ve added a mask, you can now add or subtract using a variety of tools. You can freely switch between the Brush, Radial Mask, and Gradient Mask tools while working. Once you’ve chosen one of these tools, a new toolbar appears. Let’s explore the essential controls. Global Mask Controls Once you start to edit a mask, you’ll see global mask controls. These make it easier to visualize a mask or edit its contents.
Skylum Luminar - 4 • Density. Controls the transparency of pixels outside of a mask so the overall the mask fades into the background better. • Feather. Blurs the edges of a mask to more naturally fade the mask adjustments into the image. ! Note When trying to paste a mask, there needs to be a mask already applied to the layer. If you cannot paste, make a temporary mask and then replace it with the one on your clipboard.
Skylum * Luminar - 4 Tip If you own a pen and tablet, you can use it with Luminar’s brush strokes. Be sure to examine the pen pressure sensitivity option.
Skylum Luminar - 4 16. Rating Images Over time, your photo library will grow. One of the key benefits of a Luminar library is finding just the images you want to work with, view, or share. In this way, you should rate your images so you can find your favorites easily in the future.
Skylum Luminar - 4 16.1. Understanding Rating Controls There are three types of ratings you can apply to an image. Luminar lets you quickly rate your photos with a 5-star system. You can also flag your images as favorites or rejects., Additionally, color labels can be applied. Flags Flags are the quickest way to rate and sort images. There are three types of Flags that you can apply to an image. • Flagged. Flagged images are considered your Favorites.
Skylum Luminar - 4 on focus issues, closed eyes, or other problems that can’t be fixed in editing. • Unmarked. Images that are neither Flagged or Rejected remain unmarked. You can filter out everything but unmarked images to determine if you want to flag or reject them. Images that have been flagged or Rejected can have their rating removed using the Unmarked command. Ratings Images can be rated on a numerical scale of 0 to 5 stars, with 5 stars being the best.
Skylum Luminar - 4 16.2. Rating Images in the Library View The easiest place to rate images is the Library View. This is because you can compare images to each other. In the Library view, there are many different options to rate your images either by using your mouse or with keyboard shortcuts. In the Gallery View, you can flag and rate a photo directly on the image thumbnail.
Skylum Luminar - 4 • Star Rating. You can apply a star rating by clicking on the hollow stars along the lower left edge of its thumbnail, You can also use the following keyboard shortcuts. • Flag an Image. Click the hollow heart in the lower right edge of each thumbnail, The heart can be toggled on or off with each click to mark flagged or Unmarked. • View Color Label. You can also view color labels on the image thumbnail. To change colors you will need to choose Image > Set Color Label.
Skylum Luminar - 4 16.3. Rating Images in the Single View You can also rate images in the Edit or Single Image Library view. This can be useful as you enhance the image as you might change your mind about how good it is (especially after taking advantage of Luminar’s filters and Looks). To start: 1. Click a Shortcut in the Library panel or choose a Folder, Subfolder, or Album for the images you want to work with. 2. Press the G key to ensure you are in Gallery images mode.
Skylum Luminar - 4 • File name. Matches the name of the file on your hard drive. • Color Label. You can click on the circle to get a drop down of the various color labels • Flagged. Click the heart to flag the image as a favorite • Rejected. Click the X to reject the image • Rating. Click any of the 5 stars to rate the image. * Tip: You can also use keyboard shortcuts to label images.
Skylum Luminar - 4 16.4.
Skylum Luminar - 4 17. Organizing Images A key benefit of working with the Library panel is organization. Being able to find your best and favorite photos make your library more useful. Taking the time to organize in Luminar is important. The primary organization tool in Luminar are folders, which connect directly to Folders on your hard drive. In addition to physically being able to organize your real world-folders within Luminar, you can also create a virtual organization of your images using Albums.
Skylum Luminar - 4 17.1. Using Shortcuts to Find Your Photos One of the easiest ways to find your content is with shortcuts. Located in the Library Side Panel, Shortcuts let you quickly access your library. Luminar makes it easy to see content arranged by dynamically populated Shortcuts that organize your images based on common and powerful criteria. All Photos Selecting the All Photos shortcut loads all of the photos in your current catalog.
Skylum Luminar - 4 Favorites If you have Flagged any images as Favorites, the favorites shortcut will appear. This is the quickest way to find all of your favorite images. Combining this option with a selection from the Viewing Filter allows you to filter your favorite images by star rating, color label, and other criteria. Just click the dropdown list located next to the word Showing in Gallery View to get started. Recently Added Recently added photos appear under the Recently Added shortcut.
Skylum Luminar - 4 17.2. Using Folders to Organize Images Organizing your images within folders in Luminar is a great way to keep and maintain your images on your hard drive. All organization you apply to folders inside of Luminar directly affects how the folder on your hard drive is organized, and vice versa. If you create subfolders or add new images to folders on your hard drive, your image library in Luminar is also updated.
Skylum Luminar - 4 Creating Subfolders As you work in your Luminar Library, you may want to create additional folders to get organized. You can quickly create additional subfolders inside of any folder in your Luminar Library in two ways. • Right-clicking on a folder and choose New Subfolder • Selecting a folder in your Library panel and choose Library > New Subfolder from the main application menu. A new subfolder is created called Untitled, which you should rename.
Skylum Luminar - 4 17.3. Moving Images Between Folders You can move images and subfolders from one folder in your Library to another folder in your Library. If you decide to reorganize your photos within Luminar, you can select single or multiple images and drag them onto a different master folder or into a subfolder. These images will be relocated on your hard drive to match their new location inside of Luminar.
Skylum Luminar - 4 1. In the Shortcuts area, click on the Single Image Edits collection. 2. Select an image (or multiple images) 3. Drag the image thumbnails onto any folder or subfolder in the Library Panel. The images will be physically moved into the matching location on your hard drive. ! Note: When you drag an image from the Single Image Edits collection, it will be moved on your hard drive to the new location.
Skylum Luminar - 4 17.4. Reconnecting Missing Folders and Images As you work with folders and hard drives, it’s possible that images may move from time to time. For example, if an external hard drive is unmounted, the folders linked to that hard drive will be grayed out. When opened, thumbnails of the images contained in that folder will be seen, and the photos can still be rated. However, you will not be able to edit or move those images while the drive is offline.
Skylum Luminar - 4 17.5. Deleting Files from Folders Taking the time to delete images in your Luminar library is a way to clean up your hard drives and free up storage space. Remember that deleting files from within folders in Luminar will also delete them from your hard drive. However, there are checks in place to keep you from accidentally deleting your original media. It takes three steps, with warnings along the way to delete media permanently from your hard drive when using Luminar.
Skylum Luminar - 4 A useful way to queue a file for deletion is to reject it. This is the first step in archiving or deleting unwanted images. Just press the X key to mark a file as rejected (press U to unmark the file if needed). When you mark an image as a reject, it becomes greyed out in Luminar. Safely removing Rejected files from your library Luminar makes it easy to see and manage rejected files. This way you are only working with the files you want to remove. 1.
Skylum Luminar - 4 Now you will be showing only the images you marked as Rejected. You can now move all of these images into their own master folder. If you need to create a new master folder click the add folder button or from the main menu choose File > Add Folder with Images. You can create a new folder on your hard drive by selecting the New Folder button on the lower left corner of the dialogue box.
Skylum Luminar - 4 All of the rejected images have now been moved into the new master folder (in both Luminar and on your hard drive). If you want to remove them from your catalog, but not your hard drive, right click on the Rejected folder and select Remove From Catalog from the drop-down menu. The images will be removed from your catalog, but the source folder and the original files will remain on your disk.
Skylum Luminar - 4 17.6. Using Albums to Organize Images Albums let you organize your images into groups without affecting their location on your hard drive. Albums are a useful way to sort your images into groups or categories, such a people, places, pets, and so on. What are Albums? Albums are virtual storage locations. Think of them as musical playlists for your photos.
Skylum Luminar - 4 2. Click on the Add Album button (the small + button to the right of the word Albums) in the Library panel. A new Album is created named “Untitled,” and, the selected images are placed in that album. You can also choose Library > New Ablum. 3. When you first create an album the name is highlighted, allowing you to easily rename that album. Add a descriptive name to the new album.
Skylum Luminar - 4 1. Select multiple images in your library 2. Choose Library > New Album (or press Cmd+N / Ctrl+N) Renaming Albums You can rename an Album at any time by right-clicking on it and selecting Rename from the pop-up menu. It is possible to have two albums with identical names, so be careful when naming to promote a well-organized library.
Skylum Luminar - 4 You can drag images from one album to another album. This puts the image in the new album without removing it from the first album.
Skylum Luminar - 4 Removing an image from an album is easy. Since the file is still in its original folder and in your library, this is a fast operation. 1. Choose the album you want to work with 2. Select the images you want to discard (use the Shift key to select a range of images). 3. Press the Delete key. The images are removed from that selected Album; however, they will still live in other Albums and their original folder.
Skylum Luminar - 4 17.7. Moving Images from the Single Image Edits Collection to an Album Over time your Single Image Edits collection will grow. You can organize images you brought into your Single Image Edits collection into existing Album or create a new album. These images are still considered temporary and do not reside in any of the Folders in Luminar. This is a great way to organize a bunch of images you want to edit, but not affect where they are located on your hard drive.
Skylum Luminar - 4 18. Navigating & Managing Your Library As you continue to import images or add folders of images to your library, it will grow in size and complexity. Fortunately, Luminar makes it easy to navigate around your library, sort through images, and use multiple catalogs to manage your photos.
Skylum Luminar - 4 18.1. Filtering the View of Your Images The Showing drop-down menu located to the left of Shortcuts allows you to filter your images by favorite, ratings, color and even edited. With hundreds, thousands, even hundreds of thousands of pictures, finding the best ones can be tricky. For instance, selecting show 4 Stars or More, lets you view only some of your best photos. Combining Filtering, with Luminar’s Sort function and Shortcuts.
Skylum Luminar - 4 Color Label Allows you to view your images by color label and if no color label has been applied. This is very useful if you assigned different colors to represent different actions or locations. For instance, any image labeled green might still need to be edited or labeled Blue could be ready to export or print. Edited Shows all images that have been edited.
Skylum Luminar - 4 18.2. Handling Raw + JPEG Pairs Some photographers choose to shoot Raw and JPEG files simultaneously. This is often done to have the JPEG files as a reference for in-camera processing or as a backup strategy. Luminar can make it easier to organize files that are captured this way. When you import Raw and JPEG pairs, you can decide which files to see. This can create a less cluttered library. 1. Click the View menu and choose View > Raw + JPEG Pairs and select the desired option. 2.
Skylum Luminar - 4 • If you move a file, files are moved as a pair. • If you choose to view Raw Only or JPEG Only, deleting an image will move both files to the trash in Luminar. • If viewing Raw and JPEG separately, you can delete images independent of each other for the pair.
Skylum Luminar - 4 18.3. Sorting Images The Sort drop-down menu lets you choose the best order to view images in the Library view. Located in the upper right corner of the Library view, lets you easily switch between different sorting options depending on your needs. Maybe you want to find your most recent photos – Sort by Capture Time and Descending… or your oldest images sort by Capture Time and Ascending. Capture Time This uses date and time metadata when a photo was shot to sort your images.
Skylum Luminar - 4 Pick Groups and sorts your images by how you flagged them. If you sort by ascending, you will see Unmarked images, Rejected images, and Favorite images in that order. Switching to Descending reverses the order show Rejected images first, then Favorites, and finally unmarked. Color Label This allows you to sort your photos by the color label you applied to an image. If set to Ascending, the sort order will be – none, red, yellow, green, blue, and purple. Descending reverses that order.
Skylum Luminar - 4 18.4. Syncing Adjustments Once you’ve developed one image, it’s easy to reuse those adjustments on other photos. This process is called syncing and works by selecting the images that you want to unify. Syncing is a global command and takes all of the adjustments from one photo and applies them to one or more selected images. To sync an image: 1. Open an image in Luminar and edit it to the desired state. 2. Make sure that the adjusted image that you want to use is selected.
Skylum Luminar - 4 3. Select multiple images that you want to apply the same adjustments to. • This can be done in Gallery Images Mode (press the G key to switch). • You can also select multiple images in the side Filmstrip (View > Hide/View Filmstrip) 4. Select the additional photos you want to use. • Hold down the shift key and click to select a range of images. • Hold down the Cmd key (macOS) or Ctrl key (Windows) and click on individual photos to add them to the selection.
Skylum Luminar - 4 (macOS) or Shift+Ctrl+S (Windows). The images will synchronize, once complete you’ll notice an adjustment badge in the upper left corner when viewing in the Gallery Images Mode. 6. Inspect the newly synced images and modify them as needed. * Power Tip: Using tools that rely on artificial intelligence, such as AI Accent, AI Structure, and AI Skin Enhancer, can improve the results you get when syncing images. These AI tools can adjust to changes between photographs easily.
Skylum Luminar - 4 18.5. Revealing Original Images There are times when you want to locate an original photo or your hard drive. Perhaps to save or archive the original on another Drive or to send to someone. Often, you just want to find another image that you shot at the same time, and that image is not in your Luminar Library. Luminar allows you to quickly located the original image files on your hard drive.
Skylum Luminar - 4 Folder: Here’s how locate a folder of images on your hard drive. 1. Switch to the Library view. 2. Under the Folders section, in the right Sidebar select the folder or subfolder you wish to reveal. 3. Right-click on it. 4. In the Popup Menu, choose Show in Explorer/Show in Finder. Luminar will reveal the folder on your hard drive. ! Note: If an image or folder resides on an external hard drive and that hard drive is offline, the reveal in Finder option will not be available.
Skylum Luminar - 4 18.6. Working with the Trash folder At any point of editing, you can throw away images directly from within Luminar. This makes it easy to organize your hard drive and reduce clutter. However, as a protective measure, Luminar will take three steps before they are permanently deleted. Deleting a File in Luminar To delete an image or multiple images in Luminar select them and then right-click and choose Move to Trash from the drop-down menu.
Skylum Luminar - 4 1. Select the image(s) that you want to restore. 2. Choose Image > Put Back to restore to your Library (the same command is also available by rightclicking on the image). Emptying Luminar’s Trash If you decide that you want to permanently remove an image from the Luminar Library you can.
Skylum Luminar - 4 • You can right click on a single or select multiple images, and select Delete Forever from the popup menu. • Click the Empty Trash button at the top of the window. This will get rid of all images in the trash. Your files are not yet deleted from disk. Luminar has only moved your images into the Operating System Trash or Recycle Bin. You can still open the Trash/Recycle Bin on your computer and retrieve the files. To permanently free up disk space, be sure to empty the trash.
Skylum Luminar - 4 18.7. Reconnecting Lost Edits Luminar attempts to accurately track both the edits applied to an image and its location on your hard drive or network. However it is possible for an image to go missing. This typically happens for one of a few reasons. • Luminar was closed when you moved an image to another folder • Luminar was closed when you renamed an image or folder • You moved an image at the Finder/Explorer level to a different location that isn’t in your Luminar library.
Skylum Luminar - 4 6. Click the Choose Folder button to relink the file(s). The images will reconnect and be added to your library: • If the chosen folder is already in your Library – all edits transfer to the selected image(s). The images are automatically removed from the Lost Edits collection. If multiple images are in the same folder, their Lost Edits will also be resolved.
Skylum Luminar - 4 Once a photo is matched, the following occurs: • If all photos from album Lost Edits are located, the album disappears from the Lost Edits Shortcuts list. • All attributes are transferred and are available for the selected photos. • If there were multiple images from the same folder in Lost Edits > all these images will be located and added to the Library. • For Raw+JPEG files, these will also be reconnected.
Skylum Luminar - 4 19. Working with Catalogs You can backup your photos by exporting them. Saving them as JPEG files creates smaller easier to manage files, however, there will be a quality loss due to compression. Saving them as TIFF images create archivalquality files. These files will be much larger than if they had been saved as JPEGs.As you work in Luminar, your edits are stored in a catalog file. This catalog tracks your image library and the edits made to those images.
Skylum Luminar - 4 19.1. What is a Catalog? Chances are, you set up a catalog when you first installed Luminar. The catalog contains all of the information about your files including metadata like ratings and labels as well as any edits you make with the tools. Remember, the edits you make in Luminar are always nondestructive when you work with a library. This means you are not changing the actual files but rather capturing the instructions into a database.
Skylum Luminar - 4 19.2. Working with Multiple Catalogs Initially, Luminar creates a default catalog when you first launch the application. You can use just this one catalog for all your photos or easily create new catalogs. Catalogs can be located anywhere on your hard drive. By default, Luminar creates its first catalog in your pictures folder.
Skylum Luminar - 4 3. When you save the new catalog the current catalog is closed and the new one is opened. You can now add images or open Single Image Edits as desired. Switching Catalogs If you’re working with multiple catalogs, switching is just a click away. 1.
Skylum Luminar - 4 2. Navigate to the Catalog you want to work with, it will appear as a folder. 3. Select it and click open. 4. The current catalog is closed and the selected catalog is opened.
Skylum Luminar - 4 19.3. Backing Up a Catalog Luminar is constantly backing up its database as you work with it. This ensures that your latest edits are stores. However, there are times you may want to manually back a catalog up in case your hard drive has a problem. Windows backup To backup your catalog, its suggested you use an external drive or a cloud location. 1. With Luminar open, edit with the catalog you want to backup. 2. Choose File > Catalog > Show in Explorer. 3.
Skylum Luminar - 4 3. This reveals the catalog file nested inside a folder. 4. Go up on level on your hard drive and backup this entire folder for the most complete backup. If you ever need to restore the backup, just copy it to your machine and choose File > Catalog > Open to select it. You can also choose to invoke the Backup command to store a backup catalog. To back up a catalog: 1. Go to File > Catalog > Backup. 2.
Skylum Luminar - 4 3. To restore a backup file go to File > Catalog > Restore from Backup.
Skylum Luminar - 4 19.4. Backing Up Your Photo Edits You can backup your photos by exporting them. Saving them as JPEG files creates smaller easier to manage files, however, there will be a quality loss due to compression. Saving them as TIFF images creates archival quality files. These files will be much larger than if they had been saved as JPEGs.
Skylum Luminar - 4 20. Saving & Exporting Files When you edit an image in Luminar, all of the tools you apply, the adjustments you make to those tools, everything you do to an image is saved in the Luminar catalog. When you export a final image, Luminar applies those adjustments to your photo, so they are ready to send to clients, upload to social media, or send for printing.
Skylum Luminar - 4 20.1. Saving Adjustments in a Catalog When working with your photos in Luminar 4, there is no need to save any of your adjustments. All of your flagging, ratings, and edits are stored automatically into the catalog database as you work. So you don’t need to worry about saving all the time, and you can focus on being creative. How the Luminar Catalog Captures Edits When you work on an individual image, Luminar saves all of your edits for that image in its catalog as a .state file.
Skylum Luminar - 4 20.2. Exporting an Image As you work with digital images, at some point you’ll reach a point where saving a file is a good idea. It might be an in-progress save to capture work to date as you edit a photo. Perhaps it’s to prepare a file for printing or sharing on the Internet. Or maybe export to social media. Luminar offers many different options for saving and exporting images to meet your needs. When you are ready to export a finished image, you can choose Export… 1.
Skylum Luminar - 4 20.2.1. Saving an Image File You may need to export multiple files for other tasks. Maybe it’s to post online, to drop into a presentation, or to collaborate with others. When you export a file, you can save in a variety of file formats including JPG, TIFF, and PNG. 1. Chose the image or images you want to save. 2. From the main menu choose File > Export or click the Share image button in the top toolbar corner and choose Export to image…. A new dialog box opens. 3.
Skylum Luminar - 4 • Format. Choose from eight different file formats. Some options like TIFF and JPEG may offer additional settings for control over compression and bit depth. • Sharpen. Choose whether you want to Sharpen the exported file. This can increase details in the edges of the image and overcome some of the compression artifacts of formats like JPEG. • Resize. You can choose to export at the original size or to enter a new dimension for the image to fit its long side or short side.
Skylum Luminar - 4 20.2.2. Supported File Formats The following types of file can be created in Luminar. • JPEG (.jpg). The Joint Photographic Experts Group (JPEG) format is most often used to display continuous-tone images (such as photos) on the Internet. Most digital cameras use JPEG because it provides excellent compression; the maximum setting provides comparable image quality to much larger file formats like TIFF. Occasionally, the print industry (especially newspapers) will use JPEGs.
Skylum Luminar - 4 20.3. Sharing an Image If you’d like to send your image via mail, message, or upload it to a social media site just click the Share Image button in the upper right corner and select how you would like to share your image(s). Here is an example of some of the options you will see for sharing. Some options are not available depending on your operating system. • Mail. Attach a JPEG to a mail message.
Skylum Luminar - 4 20.3.1. Sharing an Image to 500px You can quickly and easily share a photo to your 500px account. Get inspired with incredible photos from diverse styles and genres around the world. ! Note: A 500px membership is a separate service. You can learn more at https://500px.com/upgrade. 1. In your Luminar library select one photo that you’d like to share. 2. From the main menu choose File > Share > 500px or click the Share image button in the top toolbar corner and choose 500px.
Skylum Luminar - 4 3. Please wait while the edits are applied to your photo and it is converted to the right format for sharing. If this is the first time sharing to 500px you will be prompted to log in to 500px. 4. Make your image easier to discover by adding: • Title • Description • Category • Location • Keywords • EXIF data. For macOS users, the EXIF data is automatically sent. Windows users have a checkbox to control whether EXIF data is uploaded.
Skylum Luminar - 4 5. Control access to your image by choosing a Privacy level: • Public • Private 6. If your image contains details unsuitable for children or the workplace, mark the box next to NSFW (Not Safe For Work content). 7. Click the Upload button to add it to your 500px account. After pushing the Upload button, your photo is automatically uploaded to the 500px website to the Photo manager section of your Profile. 8.
Skylum Luminar - 4 20.4. Batch Processing Photos If you have several images from one photo shoot, you can often save time by applying the same develop settings to multiple photos. This is particularly helpful to those who shoot events, sports, and other types of photography where a lot of images are shot under similar conditions. The Batch Processing feature is very versatile and contains many options that you can conveniently apply to a large set of images.
Skylum Luminar - 4 • Drag files or folders into the Batch Process window • Click the Browse button.If the “Include Subfolders” option is checked and you’ve added folders, then Luminar 4 will search for all images in every subfolder of the added folders. Give the application a little time to analyze the images. 3. After the images you wish to process have been selected, press the Continue button to reveal options and settings for Batch Processing.
Skylum Luminar - 4 • Last Used. The settings from the previous time using the Batch Process command. User Settings This section contains any custom workflows you’ve created. These can be made using the settings on the right. To store the Batch Process settings for later click the Save Settings button at the bottom of the window. Be sure to give the preset a descriptive name. Batch Settings When you ready to configure the batch process, there are several useful settings to choose from. • Luminar Look.
Skylum Luminar - 4 a variety of base names and even select the case of the letters. This gives you tremendous flexibility to organize your files as part of the batch processing operation. • Format. Choose what type of file should be created. You can make a JPEG, PNG, TIFF or PSD file during the batch processing. • Color Profile. This controls how the colors are interpreted. Options include sRGB, Adobe RGB, and ProPhoto RGB • Resize. Easily choose a dimension for the new files.
Skylum Luminar - 4 21. Keyboard Shortcut Keys While keyboard shortcuts are optional, they can be a huge timesaver. Be sure to practice these and add them to your workflow. You may find it helpful to print these out. To print a page, just use the print button in the upper-right corner.
Skylum Luminar - 4 21.1. macOS Keyboard Shortcuts General \ Activates before/after comparison. When the key is pressed, the original image will be shown. Releasing the key will reveal the enhanced image. ; Activates split-screen comparison mode where the original image is on the left side and the edited result will be on the right side. To exit the mode press the ; button again.
Skylum Luminar - 4 Shift + Cmd +E Export to Image Cmd + B Opens Batch Processing Mode Shift + Cmd +P Page Setup Cmd + P Print Edit Menu Cmd + Z Undo Shift + Cmd +Z Redo Cmd + X Cut Cmd + C Copy Cmd + V Paste Cmd + A Select All Cmd + D Deselect All Tools C Enter the Crop tool Cmd + T Free Transform tool Cmd + J Clone & Stamp tool Alt Change Chosen Part for Cloning Cmd + E Erase tool X Press the X key while in Crop mode to Rotate Aspect Ratio.
Skylum Luminar - 4 P Flagged X Rejected U Unmarked Set Rating 5 5-star rating 4 4-star rating 3 3-star rating 2 2-star rating 1 1-star rating 0 0-star rating [ Increase rating ] Decrease rating Set Color Label 6 Red 7 Yellow 8 Green 9 Blue – None Rotate Cmd + [ Rotate Left (CCW) Cmd + ] Rotate Right (CW) Adjustments Shift + Cmd +S Sync Adjustments Cmd + C Copy Adjustments Cmd + V Paste Adjustments Shift + Cmd +R Reset Adjustments Remove Images ©2020 Skylum Pag
Skylum Luminar - 4 Cmd + Delete Move to Trash Delete Remove from Album/Collection Cmd + R Show in Finder View Menu Option + Cmd + T Hide/Show Toolbar L Toggle Library Sidebar D Toggle Edit Sidebar I Toggle Info Sidebar Cmd + + Zoom In Cmd + – Zoom Out Cmd + 1 Zoom to 100% Cmd + 0 Fit to Screen ; Compare Ctrl + Cmd + F Enter Full Screen F Show a full-screen preview of just the image J Show/hide Clipping Cmd + L Show/Hide Filter Catalog Mask Editing B Brush G Gradient Mask
Skylum Luminar - 4 21.2. Windows Keyboard Shortcuts General \ Quick Preview ; Compare G Switch to the Gallery Mode Space Quick switch between Single Image View/Gallery View D Switch to Edit Mode and Panel I Switch to the Info Panel Tab Hide/Show all panels -> Next Photo <- Previous Photo Ctrl+ -> Next Look Ctrl+ <- Previous Look Ctrl+ click Select Multiple discrete photos Shift+ click Select multiple contiguous photos Ctrl+O Open (Images for Quick Edits) Ctrl+F Invoke a librar
Skylum Luminar - 4 Tools C Enter the Crop Tool Ctrl+T Free Transform Tool Ctrl+J Clone&Stamp Tool Alt Change Chosen Part for Cloning Ctrl+E Erase Tool X Press the X key while in Crop mode to Rotate Aspect Ratio. Switch crop between portrait and landscape orientation.
Skylum Luminar - 4 X Rejected U Unmarked Rotate Ctrl+[ Rotate Left (CCW) Ctrl+] Rotate Right (CW) Adjustments Shift+Ctrl+S Sync Adjustments Ctrl+C Copy Adjustments Ctrl+V Paste Adjustments Shift+Ctrl+R Reset Adjustments Remove images Ctrl+Delete Move to Trash Delete Remove from Album Ctrl+R Show in Explorer View Menu Ctrl++ Zoom In Ctrl+- Zoom Out Ctrl+1* Zoom to 100% Ctrl+0 Fit to screen J Hide/Show Clipping Ctrl+L* Show Filters Catalog Mask Editing B Brush R Radial
Skylum Luminar - 4 Shift+] Increase the brush softness X Switching between painting/erasing modes [ Decrease the brush radius ] Increase the brush radius Shift+[ Decrease the brush softness Shift+] Increase the brush softness X Switching between painting/erasing modes Ctrl+I Invert the layer mask ©2020 Skylum Page 308 of 309
Skylum Luminar - 4 22. Keeping Luminar Up To Date Luminar4 has a handy automatic update feature to address updates, new features, enhancements and bug fixes. macOS To ensure you’ve got the latest release, open the software and choose the Luminar 4 > Check for Updates… menu. Windows To ensure you’ve got the latest release, open the software and choose the Help > Check for Updates… menu. This will launch the Skylum update service and automatically grab any updates you need.