Seek Tuning 1. Press the [FM/AM] UI button to select the radio band(FM1→FM2→FM3→AM1→AM2). 2. Press the [ ] or [ When touching the [ ] key on the unit panel to automatically seek a station. ] key, the station is sought in the direction of higher frequencies. When touching the [ ] key, the station is sought in the direction of lower frequencies. When digital audio is acquired, [ not acquired, [ If on SPS, [ or on an MPS, [ ] will change to SPS (MPS→SPS→Seek Freq).
. Press the right [ ] knob on the unit panel to change to tuning mode. Rotate the knob clockwise, the frequency will go higher step by step. Rotate the knob counter-clockwise, the frequency will go lower step by step. 3. Touch the [ ] or [ ] UI button to change the frequency one by one step. When touching the [ ] key, the frequency will go higher with one step. When touching the [ ] key, the frequency will go lower with one step.
Digital, CD-quality sound. HD Radio Technology enables local radio stations to broadcast a clean digital signal. AM sounds like today’s FM and FM sounds like a CD. Program Service Data: Contributes to the superior user experience of HD Radio Technology. Presents song name, artist, station IDs, HD2/HD3 Channel Guide, and other relevant data streams. Adjacent to traditional main stations are extra local FM channels.
5 SXM Operations This function is available when a Satellite Radio Receiver is connected through the dedicated connection.. Note: Satellite radio is a subscription service. Press the [SXM] button on Main Menu display. The system changes to the SXM. The SXM mode screen is displayed 1. 2. 3. 4. 5. 6. 7. 8. 9. 10. Channel up button. Play and pause button. Channel down button Show the channel is live. Choose channel list. Keypad Button. Channel category type. Channel list.
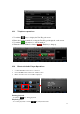
6 Settings Operation 6.1 Main Settings Press [Settings] button on the Main menu screen. The Setting menu screen will be displayed. Contains Main、Camera、Style、Tabs. 6.2 Set Bottom Tabs 1. A total of seven tabs are on the shortcut. Among them the third to the sixth users can customize. User can press [ 2. ] or [ ] button to set different tabs. While user sets tabs, the shortcut will be shown the same on each source. 6.3 Video Setup Menu TV Shape: Set TV Shape Normal or Cinema.
Set Day: Set Day value from 0 to 20. Set Nigh: Set Nigh value from 0 to 20. Auto: Choose ON or OFF. Rear Zone: Touch the [ / ] key to select the Rear Zone source. 6.4 Audio Setup Menu This menu contains: EQ、Speaker、Sub-Out、Volume EQ: Set the audio sound effect Speaker: Set the balance and fader Sub-Out: Set the sound level and crossover Volume: Set the volume and preamp for sources 6.5 Right/Left Hand Drive Mode To change the location of home button of Apple CarPlay: 1.
iPod/iPhone Operations 1. 2. 3. Connect iPod/iPhone to the USB cable. (*Note1) The system will automatically detect the connected device. (*Note2) Touch the iPod Audio icon. iPod Audio mode screen will be displayed. *Note1: The USB cable with the label of “iPod/iPhone” only supports iPod Audio mode. *Note2: When the device which does not support CarPlay or is disabled CarPlay on iPhone is connected, this system will work in the iPod Audio mode. 1 2 3 4 5 6 7 9 8 10 1.
• Touch the [ 6. SEARCH ] key to switch the shuffle mode on or off. • Touch the [ 7. LIST ] key to search with the first alphabet in current list. • Touch the [ Information. ] key to display the current play list, touch again to display the ID3 8. ALBUM ART WORK 9. ID3 INFORMATION 10. PROCESS BAR • Touch the [ ] on seek bar and drag it to any position where you want to start playback. 8 Pandora Audio 1. 2. 3. 4. Launch Pandora application on your iPhone. Connect iPod/iPhone to the USB cable.
*Note1: Another USB cable is not supported for Apple CarPlay. *Note2: During The connection of CarPlay, prohibit the use of Bluetooth. To go to Apple CarPlay screen • When you touch “Apple CarPlay” icon, “CarPlay” screen is displayed. • When you touch “iPod Audio” icon, “CarPlay now playing” screen is displayed and start playback music. 10 Bluetooth Operations 10.1 Bluetooth Paring 1. Turn on the power of the cellular phone you wish to register. 2. Touch the [ ] key to display the Device Select screen.
.3 Telephone operations 1. Touch the [ ] key to display the Ten-Key pad screen. 2. Enter the telephone number by using the Ten-Key pad displayed on the screen. ] (Send) key to call the number. 3. Touch the [ ] (End) key to hang up. 4. When the call is finished, touch the [ 10.4 1. 2. 3. Bluetooth Audio Player Operations Confirm that Bluetooth device is connected. Press “HOME” button and choose “A2DP” source. Bluetooth Audio mode screen will be displayed.
Skipping a track • Press the [ ] or [ ] button during playback, Tracks are skipped. 11 Camera In Operations Switching to Camera mode • Touch the [Camera] key on Main Menu to select desired mode. • The LCD will display the external camera video. The screen will display "No Signal", if a valid camera is not connect to this head unit. • Press Menu button on Operational Panel to return to the Main Menu.
13 AUX Operations External peripheral devices, including a game console, camcorder, navigation unit, iPod/iPhone, etc. 1. Touch [AV] button on Main Menu to select desired mode (when unit is reading). 2. Touch [AV] button in other source to select desired mode.
FCC and IC Note: This device complies with Part 15 of the FCC rules and Industry Canada license-exempt RSS standard(s). Operation is subject to the following two conditions: (1) this device may not cause harmful interference, and (2) this device must accept any interference received, including interference that may cause undesired operation. The manufacturer is not responsible for any radio or TV interference caused by unauthorized modifications or change to this equipment.