
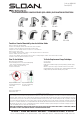
Installation Sheet


2
Soap Dispenser Installation
NOTE: ESD-2100 Shown, instructions applicable for all Sloan soap dispensers
Installing the Touchfree Counter Mounted System
Prior to beginning installation, study the exploded view of the Touchfree Counter-Mounted System and locate all the
pieces. Also, look beneath the countertop to and a suitable place for mounting of the Battery Box (9) so that it will not
interfere with system components or plumbing.
Feed the Data Cable 5a and the
shank of the Dispenser Assembly
1 through the hole in the
countertop. Point the spout of the
Dispenser into the sink bowl.
From underneath the counter,
feed the Lock Washer 3 and then
the Mounting Nut 3a over the
Data Cable 5a and onto the
threaded shank of the Dispenser
Assembly 1. Tighten the nut
securely.
Align the indent inside the top of
the Motor Assembly/Bottle
Support 7 with the indent on the
shank of the Dispenser Assembly
1 and rmly push the Motor
Assembly/Bottle Support up, onto
the shank.
NOTE: Hold the Data Cable rmly
out of the way as you push up on
the Motor Assembly/Bottle
Support. Continue pushing
upward until the vertical slots in
the Dispenser shank and the
Motor Assembly/Bottle Support
line up.
Secure the Motor Assembly/Bottle
Support 7 to the Dispenser
Assembly 1 shank by pushing the
Retaining Clip 4 into place
through the vertical slots, until it
goes all the way through the Motor
Assembly.
NOTE: Motor Assembly Bottle
Support will rotate 360° to avoid
any obstruction.
Remove the cover from the
Battery Box 8 by loosening the
two captive screws on the Battery
Box cover. Position the Box on a
convenient (vertical or horizontal)
surface under the counter top that
will allow access for battery
changing. Attach the Box to the
surface using the two screws 10
and anchors (if attaching to a
plaster or masonry surface).
Use the Wall Clip 11 to secure the
Power Cable to a wall or other
under-counter surface if desired.
Place four alkaline “D” Cell
batteries into the Battery Box 9
cover. The batteries must be
positioned according to the
diagrams shown on the inside of
the cover.
NOTE: If the batteries are not
properly installed or the cover is
not properly positioned on the
Box, the System will not work.
Position the cover (with batteries
installed) on the Battery Box and
tighten the two captive screws.
IMPORTANT: Connect the two
halves of the Data Cable 5a
and 5b
by visually lining up the white
stripes on each half and gently
pushing the cable connectors
together until the stripes touch.
Improperly assembled
connectors can cause unit to
not function as intended.
After the batteries are installed in
the battery box, connect the two
halves of the power cable 6a and
6b . Allow 20 seconds before the
system is ready to dispense soap.