
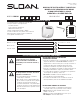
Installation Sheet


2
READ AND SAVE THESE INSTRUCTIONS
INSTALLATION INSTRUCTIONS
1. Disconnect the power source previously brought to the
hand dryer location (see pre installation wiring).
2. Remove the 2 cover mounting screws using the
Tamper-Proof Wrench supplied. Lift the cover to remove
from base plate.
3. If electrical wiring entry is to be made from the rear,
remove the appropriate pre-formed knockout on the base
plate. If entry is to be made from the bottom, knock out the
pre-formed area on the cover for your supply connection.
A rigid conduit must be used for the electrical wiring to the
unit.
4. Select the appropriate mounting height for dryer. (Table 1)
Select the recommended fastener (Table 2). There should
be no obstruction between the hand dryer and the oor. If
mounting over a countertop, distance from counter to dryer
must be 15” (381 mm) minimum.
CAUTION: Do not use the Base Plate as a guide when
drilling. Make sure no pipe work (gas, water, air) or
any electrical cables or wires are located directly
behind the area to be drilled.
5. Attach Base Plate at the four corners to a smooth wall.
For most secure installation, use 2 additional mounting
holes as shown in drawing. For non-HEPA units, remove
Control Assembly to access the right side mounting hole.
For HEPA units, remove lter only to access the right side
mounting hole.
6. Identify the voltage of your dryer from the rating sticker
of the unit. Then connect to a dedicated branch circuit
not exceeding 20 Amp.
7. Secure electrical wiring to terminals as indicated by the
schematic afxed to blower housing. An identied
ground connection point is supplied on the Base Plate
for your equipment ground wire. Dryers should be
installed per local code requirements.
8. Carefully replace Cover using the 2 screws previously
removed in step 2. Restore power and test for proper
operation. In multiple installations, make sure the serial
number marked on the inside matches the cover
number.
9. It is highly recommended that a bead of silicone sealant
be placed around the outside of the cover at the wall to
protect dryer from internal corrosion caused by wash
water and cleaning solutions.
10. Return Tamper-Proof Wrench to owner.
TABLE 1
TABLE 2
SUGGESTED MOUNTING HEIGHT
from oor to bottom of dryer:
Men 45” (114 cm)
Women 43” (109 cm)
Teenagers 41” (104 cm)
Small Children 35” (89 cm)
Accessible 37” (94 cm)
1
MOUNTING HARDWARE
Recommended Fastener (not supplied):
Masonry Wall ½” Expansion Sleeve with ¼” Lag Bolt
Hollow Wall ¼” Wing Type Toggle Bolt
Wooden Wall ¼” Lag Screw With Washer
2