
User Guide

99-00855-20 C0 Installing Your SMART Audio 240 System 9
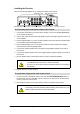
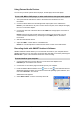
1. Run the speaker wires from the receiver into the ceiling and to the ceiling speaker.
2. Connect the positive cable to the speaker’s positive (red) terminal.
3. Connect the negative cable to the speaker’s negative (black) terminal.
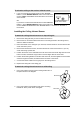
Complete the following steps for each ceiling speaker.
1. Remove the ceiling tile next to the tile where you installed the ceiling speaker.
2. Use a ladder to climb partly into the opening in the ceiling.
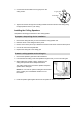
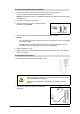
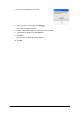
3. Securely attach the safety strap or cable to the
speaker’s safety loop.
4. Securely attach the safety strap or cable to a permanent and sturdy ceiling structure so
that the setup conforms to your local safety codes.
5. Tighten the safety strap or cable so that it’s snug, there’s no slack and the setup conforms
to your local safety codes.
To attach the speaker cables to the ceiling speaker
WARNING
Ensure that you bundle and mark cables extending across the floor to your
SMART Audio 240 system to avoid a trip hazard.
To attach the ceiling speaker’s safety strap or cable
WARNING
• Failure to follow the installation instructions shipped with your SMART Audio
240 system or adhere to the following procedures could result in personal
injury and/or damage to the product.
• You must secure each ceiling speaker using a safety strap or cable that
conforms to your local safety codes.
Safety Loop