
User Guide

12 Using Your SMART Audio 240 System 99-00855-20 C0
1. Remove the battery cover by twisting the lower section of the microphone
counter-clockwise, and then install the included AA batteries.
NOTE: Ensure that the polarity of the batteries matches the polarity marked in the battery
compartment.
2. Turn on the receiver’s power switch.
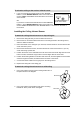
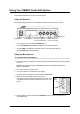
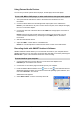
3. Set the channel switch on the handheld student
microphone to Channel B.
4. Set the High/Low switch on the handheld student microphone to Low.
NOTES
– If the microphone and sensor infrared connection is intermittent, you can set the High/
Low switch to High.
–The High setting increases the power of the infrared signal transmitted from the
microphone and uses more battery power than the Low setting.
5. Replace the battery cover.
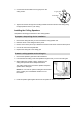
6. Begin speaking at a comfortable volume and keep the microphone under your chin and
close to your mouth.
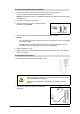
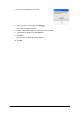
1. Connect the microphone charger to a power outlet.
2. Connect the charger’s plug to the microphone’s
power jack.
To use the handheld student microphone
To charge the microphones
WARNING
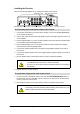
• Do not connect the receiver’s power supply to the microphones. Only
use the microphone chargers to recharge the teacher microphone and
the handheld student microphone.
• Recharge only the batteries included with your SMART Audio 240
system.
High/Low Switch
Channel A/B Switch
Power Jacks