Installation Guide for System Administrators SMART Board™ Software 9.
Trademark Notice SMART Board, Notebook and the SMART logo are trademarks of SMART Technologies Inc. Windows is either a registered trademark or a trademark of Microsoft Corporation in the U.S. and/or other countries. All other thirdparty product and company names may be the trademarks of their respective owners. Copyright Notice © 2006-2007 SMART Technologies Inc. All rights reserved.
Table of Contents SMART Board Software 9.5 Administration 1 Overview ......................................................................................................................................... 1 About Microsoft® Installer ........................................................................................................ 1 Command Line Options ............................................................................................................
Sharing Gallery Content................................................................................................................ 19 To install SMART Board software and place Gallery content on a network server ................ 19 To silently install SMART Board software, registered with shared Gallery content ................ 19 Administering Notebook Content After Installation 21 Introduction ..........................................................................................................
SMART Board Software 9.5 Administration Overview If you're a system administrator, use this guide to deploy SMART Board 9.5 software in a workgroup, computer lab or full institution environment. You can also use this information in conjunction with imaging or remote management tools to automate the installation process further.
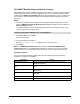
The SMART Board Software Installation Package The SMART Board software installation package contains all of the information that the Windows Installer requires to install or remove the application and to run the user setup interface. Simply double-click the SMART Board Software.msi file in Windows Explorer or run the .msi file from a command line to start the Windows Installer and interactively install the package using default parameters.
Examples of Msiexec Command Lines Silent Installation You can use the install option (/i) together with the quiet optional parameter (/q) to install the software in Silent mode, that is, without the user interface. For example: msiexec /i"Path to .msi\SMART Board Software.
Installing Notebook Software and Content to a Network Server You can add the NOTEBOOK_ONLY and INSTALLDIR properties to the command to silently install Notebook software, including Help, Spell Checker, Language and Gallery Sampler content files to a specified network folder. For example: mssiexec /i"Path to .msi\SMART Board Software.msi" NOTEBOOK_ONLY=1 INSTALLDIR="UNC path" /q If you run the same command line on all computers, using the same network path, all users can share the installed files.
Silent Removal of Earlier SMART Board Software Versions About Removing Earlier Versions IMPORTANT SMART recommends that you remove any previous version of SMART Board software before silently installing a new version. When you silently install SMART Board software 9.x, unlike an interactive installation process, the Windows installer doesn’t attempt to remove any earlier versions of SMART Board software from your computer. Although the silent installation of version 9.
To create the silent removal file You only need to create the initial setup.iss file once. You can then use this setup.iss file to remove the same version of SMART Board software from other computers on your network. 1. Check the version of SMART Board software that are installed on your computers. Refer to the table above to identify the GUID you must use in the following commands. 2. Click Start > Run and type CMD into the Open field. A DOS window opens. 3.
Removing SMART Board Software 8.x SMART used the Install Shield installation utility to install SMART Board software versions 8.x. To remove these versions of software silently, you must create a setup.iss file. Before you can perform the following procedures, you must obtain the product code for your version of SMART Board software. Refer to the following table for the ProductCode value to use for these versions of software: SMART Board Software Version ProductCode 8.0.
8 Silent Removal of Earlier SMART Board Software Versions
Silently Installing Other Languages If you use the basic silent installation command shown on page 3, the installation program installs only the English folder groups and icons regardless of what language the computer’s Windows operating system is running. To silently install SMART Board software in another language, you must: 1. Specify the language that you want the installation program to use when creating the application’s folder groups and icons. 2. Run the Language setup.
Silently Removing Language Packs NOTE: If you want to silently remove all components of SMART Board software, including language packs, you must remove the language packs first. If you remove SMART Board software before you remove the language packs, you can’t run the following command. The following example command runs the program from its default location and removes all language packs from the computer: "C:\Program Files\SMART Board Software\Language Setup.
Installing Notebook Gallery Content Introduction The SMART Notebook software installation package, the SMART Essentials for Educators.msi file, contains all of the information that the Windows Installer requires to install or uninstall the Gallery files and to run the user setup interface. To perform a default installation of Notebook Gallery content 1. Click Start > Run and type CMD. A DOS window opens. 2. Type the following command line: msiexec /i"Path to .msi\SMART Essentials for Educators.msi" 3.
Examples of Msiexec Command Lines Silently Installing from the SMART Website You can use the following command line to install the Gallery Setup.exe and supporting files from the path to the default destination of C:\Program Files\Common Files\SMART Technologies Inc\Gallery: msiexec /i"Path to .msi\SMART Essentials for Educators.msi" FULLCONTENT=1 /qn Once the installation program has copied the files, the command line silently runs the Gallery Setup.
Installing Notebook Gallery Content At the end of an interactive installation of SMART Board software, the installer software starts the Gallery Setup.exe program automatically. Using this program, you can select the Gallery content that it will install to (or remove from) your computer, and select the destination folder for the Gallery files. The SMART Board software installation installs the Gallery Setup.
Installation Command Usage Common options: [<-overrideproxy> [-proxy proxyhost:port]] [-username name] [-password pass] [-verbose] GUI: [-source path] [-configuration path | -guid gallery_id] {common options} Install everything: --installall [-destination path] <-source path | -allowdownload> [-remote] {common options} Install selected: --installsome [-destination path] <-source path | -allowdownload> [remote] <-configuration path | -guid gallery_id> <-c alias1 [-c al
Installation Options The following tables explain the functions of the commands, optional command line flags and values you can use to customize the installation. Specify a particular gallery to work with using a -guid parameter (-guid gallery.smarttech.com for SMART Essentials), or /configuration parameter (-configuration “path/SMARTEssentials.
Flag Description -remote Use this flag to prevent the Gallery Setup application from registering itself with Notebook. This disables the "Check for Updates" feature and prevents users from updating the content.
Parameter Description /source "path" This parameter defines the full path to a local or network location where the Gallery data files are stored before installation. If you omit the parameter, the installation program uses the default URL from the gallery configuration, as specified by the /guid or /configuration parameters. /destination "path" This parameter defines the full path to a local or network location where the installation program installs the Gallery files.
Examples of Gallery Setup.exe Command Lines NOTE: The /configuration parameter now specifies a path to the .gallerycollection file, not the configuration.xml file as in previous versions. Downloading all Gallery Content to a Local or Network Folder You can use the following command to copy all Gallery content from a specific source folder to a common destination folder where authorized users can install them: "Path to .exe\Gallery setup.
Sharing Gallery Content When you set up a system where all Notebook software users share the Gallery content located on a network server, all users see the shared Gallery content as "their own." If any user in the system removes their SMART Board software, they will also remove the shared content from the network server. To prevent this from occurring, SMART recommends the following process: To install SMART Board software and place Gallery content on a network server 1.
20 Installing Notebook Gallery Content
Administering Notebook Content After Installation Introduction When users start Notebook software by clicking the Notebook icon, they can use installed content from the Gallery Sampler and the Essentials for Educators folders. They can also use and add new content and folders to their own My Content folder. NOTE: By default, a user’s My Content files can’t be seen by any other users. Notebook software creates an empty My Content folder for each user that logs into the computer and starts Notebook software.
To change the location of the My Content folder NOTE: Before you can change the location of the My Content folder, you must create a folder containing an imsmanifest.xml file in the new location. 1. Copy or move an existing My Content folder and its contents to the new location. 2. While in Administration mode, click the Show Additional Gallery Actions button. Show Additional Gallery Actions Button 3. Select Administration: Content Locations. The Administration: Content Locations dialog box opens.
To create a Team Content folder 1. While in Administration mode, click the Show Additional Gallery Actions button. Show Additional Gallery Actions Button 2. Select Administration: Content Locations. The Administration: Content Locations dialog box opens. 3. Click Create New. The Browse For Folder dialog box opens. 4. Browse to the location where you want to keep your team’s Gallery content.
6. Click Close. NOTES – Updating the Team Content folder’s name may take thirty seconds or more. – While in Administration mode, you can add, remove and rename Team Content folders from any computer in the team without warning. Customizing Online Resources When you install SMART Notebook software, the installer creates links to online resources that are available from SMART’s website. As an administrator, you can create a link to your own private or a public RSS feed.
Installing Service Packs SMART offers free upgrades for licensed users. If you’ve already installed SMART Board software 9.5, you can download service packs from the SMART website to update SMART Board software on your Windows computer. Individual SMART Board software 9.5 users can download the current service pack and install it to add new features and fix problems that they may have encountered.
To perform a silent installation using the installation package You can add the quiet switch /qn to the default command line installation above to install the service pack silently. 1. Click Start > Run and type CMD. A DOS window opens. 2. Type the following command line: msiexec /p"Path to the .msp\Board95ServicePackSPx.msp" /qn REINSTALLMODE=omus REINSTALL=ALL 3. Press Enter. The Service Pack Installation Program You can also download the Board95ServicePackSPx.
Troubleshooting Installation Problems Introduction When you remove a previous version of SMART Board software, the uninstall process may leave behind some registry entries, preventing the installation of the current version of SMART Board software. If you have problems installing SMART Board software after removing an earlier version, download and run the appropriate Cleanup utility. To download and run the Cleanup utility 1. Type http://downloads.smarttech.com/software/sbs/cleanuputility/Board95Cleanup.
SMART Technologies Inc. 1207 – 11 Avenue SW, Suite 300 Calgary, AB T3C 0M5 CANADA Support +1.403.228.5940 or Toll Free 1.866.518.6791 (Canada/U.S.) Support Fax +1.403.806.1256 support@smarttech.com www.smarttech.