
Graphics Tablet User Manual


Installing the DT770 13
NOTE: If SMART Board software doesn’t recognize the DT770, activate the port manually
using an attached keyboard or mouse. For more information, refer to the SMART Board
software online Help. Also, if the DT770 is your secondary monitor, enable it. For further
information, refer to the instructions that came with your computer.
Since you must have SMART Board tools running to use the DT770, select the option to start
SMART Board tools automatically when you start your computer. You’ll know SMART Board
tools are running if you can see the SMART Board icon in the system tray or the Dock.
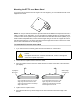
4. After you’ve installed the software, touch the interactive screen with your finger or the tethered
pen. The pointer appears underneath your finger or the tip of the pen.
NOTE: If the pointer doesn’t appear beneath your finger or the tip of the pen, orient the screen
(see below). If this doesn’t improve the pointer’s accuracy, refer to the Troubleshooting section
of this guide (page 25).
Matching the Screen and Computer Resolutions
For best results in most circumstances, set the computer’s resolution to match the DT770’s native
resolution of 1280 × 1024 (SXGA) and set the computer’s vertical refresh rate to 60 Hz or 75 Hz.
You must use the mouse to do this.
However, if your DT770 is connected to a Mac computer, and you see a black border at the top
and bottom of the DT770’s interactive screen, try a number of different resolutions to determine
which one produces the best results.
Also, if you’re integrating the DT770 with a projector, you must set your computer’s resolution to
match the projector’s resolution. For example, if your projector supports XGA (1024 x 768) but not
SXGA (1280 x 1024), set your computer’s resolution to XGA.
NOTE: Don’t set the resolution of the DT770 to greater than 1280 × 1024 (SXGA).
1. Open the Windows Control Panel.
2. Press Display.
The Display Properties dialog box appears.
3. Press the Settings tab.
4. Move the slider to change the pixel setting to 1280 × 1024.
5. Press OK.
1. Press the System Preferences icon in the Dock.
2. Press Displays.
3. On the Display tab of the Monitors dialog box, press 1280 × 1024.
4. Close the dialog box.
To set the resolution for the Windows operating system
To set the resolution for the Mac OS X operating system