
User's Manual

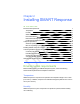
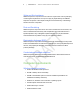

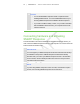

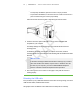

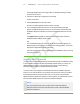
Table Of Contents
- Important information
- About SMART Response
- Installing SMART Response
- Getting started
- Using SMART Response
- About SMART Notebook
- Creating Assessments
- Adding questions to the assessment
- About question types
- About intelligent expression grading
- Adding questions using the Insert Question wizard
- Importing questions from a Word document
- Example Word document question formats
- Importing questions from an XML or SQZ file
- Importing questions from a PDF file
- Adding choices to a question
- Tagging questions
- Starting and connecting to a class
- Disconnecting students from a class
- Using clickers
- Completing assessments
- Reviewing, printing and exporting assessment results
- Maintaining SMART Response
- Hardware environmental compliance
- Waste Electrical and Electronic Equipment Regulations (WEEE directive)
- Restriction of Certain Hazardous Substances (RoHS directive)
- Batteries
- Packaging
- Covered Electronics Devices
- China’s Electronic Information Products regulations
- U.S. Consumer Product Safety Improvement Act
- California Air Resource Board – Airborne Toxic Control Measure
- Restriction of Certain Chemicals (REACH directive)
- Customer support

1 2
o
For temporary installations, place the receiver on top of your desk.
o
For permanent installations, mount the receiver on a wall or on the front of a
piece of furniture using two screws (not provided).
Orient the receiver with the long side or edge facing the class as shown.
2. Insert the receiver's captive USB cable connector into an available USB
receptacle on your computer.
The Ready LED light on the receiver lights up to indicate that the receiver is
receiving power.
On Windows computers, the first time you connect the receiver, a balloon
message appears from the notification area indicating that new hardware has been
detected.
I M P O R T A N T
If the balloon message indicates that Windows is starting to try to locate a
driver from the Microsoft website, stop the search. If Windows can't find
the driver on your computer, you haven't installed SMART Response
software. Install the software and repeat the above procedure.
3. See Checking the receiver’s status on next page to verify that the receiver is
working properly.
Extending the USB cable
If the provided 6' (1.8 m) USB cable attached to the receiver isn’t long enough, use active
USB extender cables, USB extenders or hubs.
This graphic shows the SMART active USB extension cable (Part No. USB-XT).
| C H A P T E R 2 – I N S T A L L I N G S M A R T R E S P O N S E