
Installation Guide

w w w .th e s m a r t t iles . c o m
IMPORTANT : Product cannot be used as a counter top, a table pad or to entirely cover shower walls. On newly painted walls, allow
minimum of 3 weeks for the paint to set and dry before installing the Mosaïks. To install behind a gas ranges without a back control
panel or metal plate, you must preserve a safety zone (without Smart Tiles) of 15 ‘’ (38 cm) on the back wall to prevent direct exposure to
and others, leave a gap of 2 inches (6 cm) between the Mosaïk and the appliance.
MINIMO
1X2 RECTANGOSQUARE
TANGO
This is what you will need to
complete the work
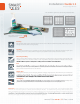
This installation guide is for the following Mosaïk families:
Installation Guide 1.1
Straight edge Mosaïks
Guideline
Using a level or chalk line, trace a guideline to ensure perfect alignment using a Mosaïk to mark the height. If you
are facing an uneven counter, mark the height of your guideline on the lowest side of the counter.
Measuring & Cutting
Using a simple utility knife (box cutter) and a metal ruler, you will be able to trim and shape your Mosaïk at will
should you come across electrical outlets or other irregularities during the installation. Measure and mark your
Peel
We strongly recommend you wash your hands before you start the installation to ensure no dust particles or
greasy residue are transferred on to the adhesive.
Align & Stick
Now align the adhesive portion with your guideline and apply a light pressure. This will allow you to validate the
Overlapping
overlap all the
grout lines as you go. This will result in a continuous and even layout of the entire project.
Cleaning
First, wash the surface with a powerful grease-remover such as TSP (Tri-Sodium Phosphate). Make sure you allow
enough time for the surface to dry properly.