IQ Products Training Manual TM
Inside Cover TBD (graphics)
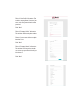
Table of Contents
TM
COMING SOON TM
portal
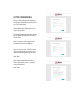
Getting Started with IQ Once you have purchased your IQ products through your local distributor you will need to set up your online portal. Contact Bell Sensing Technologies for your unique “Access Code”. Bell Sensing Technologies personnel will send you the website link along with your unique “Access Code”. https://smartwave-smart-trap-portal-dev. azurewebsites.
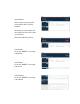
Fill in all “User Profile” Information. This includes: company Name, first name, last name, role, email, password and confirm password. Click “Next”. Fill in all “Company Profile” information. This includes: address and phone number. Choose if your account will have multiple branches or not. Click “Next”. Fill in all “Company Details” information. This includes: how many techs, distributor, services you provide and how did you hear about us. Click “Next”.
Click “Log In”. This will take you to the screen where you can log in and set up your branches, accounts and users. Once on the login screen fill in your “Email” and “Password”. Click “Log In”. The “Trial Account” page will pop up letting you know that this is a 90-day trial. Click “Continue Trial”. Input your credit card and billing details. Click “Next”. Review payment details. Click “Begin Sensing”.
Home Dashboard When you login to your portal you will be automatically taken to your home dashboard. This will give you a quick snapshot of all the information you have access to within your online portal. On the home dashboard you will see: Active Branches You can click “MANAGE” to see a listing of all branches. Active Accounts You can click “MANAGE” to see a listing of all accounts. Active Technicians You can click “MANAGE” to see a listing of all technicians.
Reports You can click “Account Historical Report” or “Service Tech Summary Report” to quickly jump to the report itself. Branch List This will be a listing of all active branches. To view inactive branches uncheck the “Active Branches Only”. This will show you the branch name, address and how many accounts are linked to that branch. Account List This will be a listing of all active accounts. To view inactive accounts uncheck the “Active Accounts Only”.
Creating Branch(es) On the homepage of your portal click “Branches” across the top of the screen. On the right-hand side of the screen click the red “NEW BRANCH” icon. Input branch information: name, phone, address and upload a logo if you would like. Click “CREATE NEW BRANCH”. Your new branch will now show up on your “Manage Branch” list. Viewing Branch(es) The “Manage Branch” list will show you a list of all active branches. If you wish to see inactive branches, uncheck the “Active Branches Only”.
Editing Branch(es) On the branch dashboard you can make edits to your branch information by clicking the red “EDIT DETAILS” icon in the upper right-hand corner. Make any changes that are needed. Click the blue “SAVE CHANGES” icon on the bottom right-hand corner of the page. Disabling Branch(es) On the homepage of your portal click “Branches” across the top of the screen. This will show you a list of all active branches. To disable a branch click the red “DISABLE” icon under the actions column.
Creating Accounts On the homepage of your portal click “Accounts” across the top of the screen. On the right-hand side of the screen click the blue “NEW ACCOUNT” icon. Input account information: choose branch, account name, address, client contact info, account specifications, visit proof, reporting emails and upload a floor plan if you would like. Visit Proof: Under the visit proof section you will have the option of choosing “Serviced” or “Viewable” for devices with and without activity.
Service Rules: To create you custom service rules for the account click the blue “Edit Service Rules” icon on the bottom right-hand corner next to “Save Changes”. There will be service rule options for each of the four different products we currently offer within our IQ platform.
Viewing Accounts This is the screen where you can view all active accounts. If you wish to see inactive accounts, uncheck the “Active Accounts Only”. Selecting Accounts To choose an account click the blue account name. Account Dashboard Once on the selected account dashboard you will see the detailed account information: Name Address Active devices Total visits for the calendar year Date of last visit Under the detailed account information you will see a number of graphs.
Account Location This section is a map of where the account is located. The information for this will be pulled from Google Maps using the address inputted as the account’s address. Service History This section provides the detailed information of the service history of the account. For each service visit it will show the day/time it was serviced, the technician, the duration of the service, how many devices were serviced, the event totals for all devices and any notes recorded during the service visit.
Creating Users On the homepage of your portal click “Users” across the top of the screen. On the right-hand side of the screen click the red “NEW USER” icon. Input user information including: personal info, contact info, access level & branch access options. Click the blue “CREATE NEW USER” icon. Your new user will now appear on your “Manage Users” list. Viewing Users This view will show you a list of all active and inactive users. If you wish to see pending users, check the box next to “Pending Users”.
Editing Users Once you’re on the user dashboard in the upper right-hand corner click the blue “Edit User Details” icon. Make any changes that are needed. Click the blue “SAVE CHANGES” icon on the bottom right-hand corner of the page. Disabling Users On the homepage of your portal click “Users” across the top of the screen. This will show you a list of all active and inactive users. To deactivate a user click the red “DEACTIVATE” icon under the actions column.
Viewing Devices On the homepage of your portal click “Accounts” across the top of the screen. To choose an account click the blue account name. Scroll down to the bottom of the page to the section labeled “Device List”. This will be the listing of all active devices deployed at the account. Selecting Devices To choose a device click the blue device name. This will bring you to the device dashboard.