A ™ battery charger TEST - CHARGE - REPAIR - MAINTAIN Battery Charger User Guide MODEL: IC-1000 Revision: AB Issue Date: April 2017 Manual No.
DANGER Please read and understand all important safety and operating instructions before using this charger. In addition, please read and follow all battery and vehicle manufacturer’s instructions and cautionary markings. Failure to follow the instructions may result in ELECTRICAL SHOCK, EXPLOSION, or FIRE, which may result in SERIOUS INJURY, DEATH, DAMAGE TO DEVICE or PROPERTY. Do not discard this information.
What’s Included • IC-1000 Battery Charger • Battery Clamp Connectors • Eyelet Terminal Connectors • 12V Cigarette Lighter Male Connector • Fuse (Extra) & Screws • User Guide RISK OF EXPLOSIVE GASES WORKING IN THE VICINITY OF A LEAD-ACID BATTERY IS DANGEROUS. BATTERIES GENERATE EXPLOSIVE GASES DURING NORMAL BATTERY OPERATION. FOR THIS REASON, IT IS OF UTMOST IMPORTANCE THAT YOU FOLLOW THE INSTRUCTIONS EACH TIME YOU USE THE CHARGER.
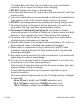
7) Study all battery manufacturer’s specific precautions such as removing or not removing cell caps when charging and recommended rates of charge. 8) Clean battery terminals before connecting the charger. Be careful to keep corrosion from coming in contact with eyes. 9) For battery installed in a vehicle, first connect charger output lead (red) to positive (+) terminal on the battery. Second, connect the negative charger lead (black, -) to the vehicle’s chasis (away from the battery).
18 inches above the floor. Do not install on or over combustible surfaces. Do not cover the charger while charging. 3) DO NOT operate this unit in or around water. 4) Connect and disconnect DC output only after removing AC cord from electric outlet. 5) Use of an attachment not recommended or sold by the manufacturer may result in a risk of fire, electric shock or injury to persons. 6) DO NOT overcharge batteries by selecting the wrong charge mode.
FOLLOW THESE STEPS WHEN BATTERY IS INSTALLED IN VEHICLE (USING THE BATTERY CLAMP CONNECTORS) 1) Check polarity of battery posts. POSITIVE (POS, P, +) battery post usually has a larger diameter than the NEGATIVE (NEG, N, -) post. 2) Identify if you have a negative or positive grounded vehicle. This can be done by identifying which battery post (NEGATIVE OR POSITIVE) is connected to the chassis.
FOLLOW THESE STEPS WHEN BATTERY IS OUTSIDE VEHICLE 1) Check polarity of battery posts. POSITIVE (POS, P, +) battery post usually has a larger diameter than the NEGATIVE (NEG, N, -) post. 2) Connect the RED POSITIVE cable clamp or ring terminal to the POSITIVE post of battery. 3) Position yourself as far away from the battery as possible – then connect the BLACK NEGATIVE charger cable clamp or ring terminal to NEGATIVE post of battery. 4) Connect charger AC supply cord to electric outlet.
6) This charger has four external holes for mounting. Mount the charger in a desired location with equipped self-drill screws. It is important to keep in mind the distance to the battery. The DC cable length from the charger, with either the battery clamp or ring terminal, is approximately 75 inches (1900mm). 7) Following is the charger’s technical specification: AC Input 120VAC, 60Hz, 1A AC Working Input 85-135VAC. 50-60Hz; Variable Power 18W Max.
MODES The charger has five (5) modes. Some charge modes must be held for three (3) seconds and/or pressed to enter the mode. Do not operate the charger until you confirm the appropriate charge mode for your battery.
CHARGING STEPS STEP 1: DIAGNOSIS (Checks the battery’s initial condition, including voltage, state-of-charge and health, to determine if the battery is stable before charging) STEP 2: DESULPHATION (If battery voltage is too low, the charger automatically generates a pulsing current to remove sulphate and lift battery voltage, up to 5 hours) STEP 3: ANALYZE (Checks the battery again to determine if the voltage is suitable to begin the charging process) STEP 4: SOFT START (Begins the charging process with ge
CHARGE LEVEL EXPLAINATIONE VEL INDICATOR LED 25% 50% 75% 100% 7. CHARGING TIME IC-1000 Explanation The 25% Charge Red LED will slowly flash when the battery level is less than 25%. When 25% is reached, the LED will be solid. The 50% Charge Red LED will slowly flash when the battery level is less than 50%. When 50% is reached, the LED will be solid. The 75% Charge Red LED will slowly flash when the battery level is less than 75%. When 75% is reached, the LED will be solid.
WARNING/COMMUNICATION LIGHTS LIGHT(S) CONDITION Solid Red Warning! LED Flashing Red Warning! LED Slow flashing Red Warning! LED + Corresponding charging mode LED Only charging mode LED is on, and four battery level indicator LEDs are all off IC-1000 CAUSE(S) SOLUTION(S) Reverse Polarity Exchange the red and black clamps or ring terminals to the correct battery posts 1) Open-circuit 2) Dirty Battery Posts 3) Dead Battery 4) Output Short Circuit 1) Connect the red and black clamps or ring terminals t
Quick flashing Red Warning! LED + Corresponding charging mode LED Battery cannot store electric charge during charging process Replace the battery with a new one immediately Only corresponding charging mode LED + Four battery level indicator LEDs are all OFF In Desulphation Process ------ Red Warning! LED light flashes 2x stop for 3secs, 2x stop for 3 secs… Battery cannot be recovered through Desulphation Process or Battery cannot be recovered through Recover Process Replace with a new battery Flas
6V/12V 6V/12V COMPATIBILITY Charge fully drained lead-acid batteries up to 40Ah DESIGNED FOR SAFETY Reverse polarity, short circuit, open circuit, spark proof, overheat, overcurrent & overcharge VARIABLE INPUT COMPENSATION 100% full charge even with varying A/C input voltages FF FAULT PROTECTION Automatically shuts “off” if charger remains in Bulk charge mode for an extended period of time AUTO-MEMORY Returns to last selected mode when restarted HF HE HF/HE SWITCH MODE DESIGN High-frequency, high-effic
LIMITED WARRANTY Effective April 15, 2017. Replaces all undated warranties and all warranties dated before April 15, 2017 Repair/Replacement Warranty Smartech Products warrants to the original purchaser that the mechanical and electrical components will be free of defects in material and workmanship for a period of five (5) years from the original date of purchase. This product is intended for household use only.
LIMITED Warranty (continued) Other Exclusions This warranty excludes: • Merchandise sold as reconditioned, used as rental equipment, or floor/display models sold without packaging and/or missing parts or components. • Repair and transportation costs of merchandise determined not to be defective. • Cosmetic defects such as paint, decals, etc. • Failures due to acts of God and other forces of nature beyond the manufacturer’s control. • Problems caused by parts that are not original parts.