
User's Manual


Page 15 of 25 Rev: 3/1/2012 3:06 PM
Installation
CAUTIONS AND WARNINGS
Read and understand these instructions before installing and retain them for future reference.
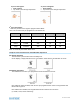
Tools Needed
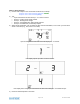
- TempLinc Zone Thermostat will primarily be used as a table-top thermostat
- If desired, you may wall mount TempLinc Zone Thermostat using the slotted holes in the back cover
of TempLinc
1
Preparation
Proper installation of the TempLinc Zone thermostat will be accomplished by following these steps.
However, the main use for this product will be table-top. Wall mounting is optional.
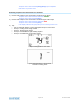
4) Make sure the location that you have selected for the TempLinc Zone Thermostat will not be affected
by daily movement of sunlight or in direct line of sight to a nearby HVAC vent or fan
5) Insert 2 AA batteries into TempLinc Zone Thermostat
6) Close the cover of TempLinc Zone thermostat
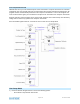
- After a few seconds TempLinc Zone Thermostat will display ambient temperature and humidity
- Mode will default to OFF
- Battery segment should show full with fresh batteries
- Time will show default 12:00pm and will become active
5) Snap TempLinc Zone Thermostat into the supplied table-top stand or mount safely to a wall
Test Operation
The wireless TempLinc Zone Thermostat does not directly control the HVAC system. Instead, TempLinc
Zone Thermostat communicates via RF to TempLinc Thermostat which is directly in contact to the wiring
controlling the HVAC system.
Before Adding to a Scene as a Responder or Controller of TempLinc Thermostat perform the following
tests; this will help to familiarize you with TempLinc Zone Thermostat. Keep in mind you are not yet
sending any communication to any INSTEON device. The TempLinc Zone Thermostat is presently a
stand alone device.
Note: While testing, no HVAC operations will take place, only display changes
TempLinc Zone Thermostat defaults 10 minutes delay between cycling the AC
compressor
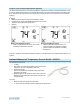
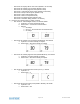
Heating Mode Test
12) Press mode button once to enter Heat mode
13) Tap the up or down arrow several times until set point is 1 degree above ambient
TempLinc Zone Thermostat will call for Heat
“Heat” segment changes to “Heating” and will blink for 3 seconds then goes steady
Status LED will display red
No furnace activity will take place at this time, only display changes
14) Tap the up or down arrow until you reach a desirable heat temperature set point below ambient
Cooling Mode Test
15) Tap mode button once again to enter Cool mode
16) Tap the up or down arrow several times until set point is 1 degree below ambient
TempLinc Zone Thermostat will call for Cooling
“Cool” segment changes to “Cooling” and will blink for 3 seconds then goes steady
Status LED will display green
No A/C activity will take place at this time, only display changes
17) Tap the up or down arrow until you reach a desirable cool temperature set point
1
Screws and wall anchors not provided