
User's Manual


DRAFT Page 6 | August 10, 2010
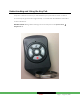
2. Install the battery in the key fob.
Img_1424.mov
Figure 1: Double-click to View Example of How to Install the Battery
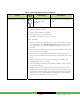
The LED blinks several times every five seconds. This means that the key fob is in Search mode and can be paired
with the SMA Gateway device.
Im g_1425.mov
Figure 2: Double-click to View Example of Key Fob in Search Mode
If the key fob does not blink, it means that:
The key fob is not defaulted (see page 8 for how to default the device).
The battery is not securely installed in the device
3. If the green LED is stops blinking, it means the key fob has stopped Search mode to save battery
power. Press any key fob button to restart Search mode.
4. If the key fob does not return to Search mode when you press a button, ensure the battery has
not become displaced.
5. Follow the instructions in the Locating Key Fobs screen and click Next to add the key fob.
IMPORTANT: While pairing key fobs, ensure no sensors that have not been added to the
system are faulted. This might cause the key fob or the sensors to fail to pair.
The SMA Gateway begins searching for key fob devices in Search mode.
6. As each key fob is located by the device, a Key Fob icon is displayed on the screen.
7. Touch a Key Fob icon to pair the associated key fob with the SMA Gateway.
8. After all the devices are paired, touch Stop.
The Wireless Key Fobs Located screen is displayed.
9. Click Next.
The Configure Wireless Key Fobs screen is displayed.