Contents 1.1 1.2 1.3 1.4 1.5 1.6 Introduction This user manual Intended use Manufacturer liability Identification plate Disposal 2 Description 2.1 Product description 2.2 Description of parts 3 Use 3.1 3.2 3.3 3.4 3.5 7 7 7 8 8 8 9 9 10 13 Before first use How to remove the blade assembly Using the blender Functions Speed setting suggestions 4 Cleaning and Care 4.1 4.2 4.3 4.4 4.5 4.6 4.
Important Safeguards RECOGNIZE SAFETY INFORMATION This is a safety alert symbol. This symbol alerts you to potential hazards that can result in severe personal injury or death. UNDERSTAND SIGNAL WORDS A signal word - DANGER, WARNING or CAUTION - is used with the safety alert symbol. DANGER denotes the most serious hazards. It means you could be killed or seriously injured if you do not immediately follow the instructions.
WARNING To reduce the risk of fire, electrical shock, personal injury, or damage when using the appliance, follow basic safety precautions, including the following: When using electrical appliances, basic safety precautions should always be followed including the following: • Read all instructions. • To protect against risk of electrical shock do not put the motor unit in water or other liquid. • Close supervision is necessary when any appliance is used by or near children.
Important Safeguards For this appliance • Avoid touching moving parts. Keep hands, hair, clothing and utensils away from the blades during operation, to prevent personal injury and/or damage to the appliance. • Remove blades from the jar before washing. • The use of attachments, including canning jars, not recommended by the manufacturer may cause a risk of injury to persons. • Blades are sharp. Handle carefully.
1 Instructions 1.1 Introduction Key information for the user: Instructions General information on this user manual, safety and final disposal. Description Appliance description. Use Information on using the appliance Cleaning and care Information for proper cleaning and maintenance of the appliance. Recipes List of recipes Safety instructions Information Advice 1.
Important Safeguards 1.4 Manufacturer liability The manufacturer declines all liability for damage to persons or property caused by: • Using the appliance other than as intended; • Not having read the user manual; • Tampering with any part of the appliance; • Using non-original spare parts; • Not following the safety instructions. 1.5 Identification plate The identification plate bears the technical data, serial number and brand name of the appliance. Do not remove the identification plate for any reason.
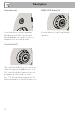
Description EN 2 Description 2.1 Product description 1 2 3 9 10 4 5 6 7 8 Model BLF01 - Blender 1 Measuring cup 2 Lid with pouring hole 3 1.
Description 2.2 Description of parts Measuring cup (1) 1.5 liter (6 cups) TritanTM BPA-Free jar (3) Convenient measuring cup. It can be used for measuring ingredients and as a device to unscrew the blade assembly from the base of the jar. See “3.2 How to remove the blade assembly”. Lid with pouring hole (2) The lid has a seal that closes the blender jar tightly. It has a pouring hole in the centre to make adding ingredients easier during blender operation.
Description Stainless steel detachable blades to crush ice cubes and prepare delicious smoothies, milkshakes, cocktails, etc. It can be unscrewed from the base of the jar to be cleaned. Sharp blades Danger of cuts • Never touch the blades with your hands. • Remove the blade assembly only using the measuring cup, as indicated in section “3.2 How to remove the blade assembly”. Motor base (5) EN Detachable blade assembly (4) The base houses a powerful 600-watt motor.
Description Pulse button (6) START/STOP button (8) Press this button to get the maximum blending speed. Perfect for the most demanding tasks. It can be used for a maximum of 2 seconds at a time. Press this button to start/stop blender operation. Control knob (7) The control knob allows you to select one of the four speeds available from 1 to 4. The control knob also features 2 pre-set programs: smoothie and ice crush. See “3.5 Speed setting suggestions” for further information on which speed to use.
3 Use Electrical Shock Hazard • • • • • Plug into a grounded 3-prong outlet. Do not remove the ground prong. Do not use an adapter. Do not use an extension cord. Failure to follow these instructions can result in death, fire, or electrical shock. Volts: 120 Volts AC only. Hertz: 60 Hz If a longer detachable power supply cord or extension cord is used: • The marked electrical rating of the power supply cord or extension cord should be at least as great as the electrical rating of the appliance.
Use 3.1 Before first use 1. Remove all stickers and labels from the blender and clean the motor base with a damp cloth. 2. Remove the blender jar. 3. Remove the blade assembly (see “3.2 How to remove the blade assembly”). 4. Wash and dry thoroughly (see “4.4 Cleaning the blender jar and blade assembly”). 3.2 How to remove the blade assembly 1. Take hold of the handle (1) and lift the blender jar.
3. Turn the jar upside down and place it on a flat surface. Insert the open end of the measuring cup (3) into the base of the blade assembly. 4. Unscrew the blade assembly (4) from the jar body, turning the measuring cup counterclockwise. Manually remove the blade assembly (4) from the jar body.
Use 5. Wash the jar, measuring cup, and blade assembly in warm soapy water. The jar and the measuring cup may also be washed in the dishwasher. 3.3 Using the blender 1. Insert the blender jar onto the motor base. The blender jar can be washed in a dishwasher without placing it upside down (see picture below). 6. Dry thoroughly and replace the blade assembly into the jar body following in the reverse order the instructions given previously. Make sure to insert the blade assembly until it locks into place.
3. Position the lid with the measuring cup fitted onto the blender jar. Ensure the lid is firmly screwed on. EN Use The PULSE button can be used alone or in combination with speeds 1 to 3 to reach the maximum speed. 5. Press the START button to start blending. See the table “3.5 Speed setting suggestions” for further information on the most suitable speed to use. 4. Plug the blender into a power socket. The red LED will flash to indicate the power is on.
Use 6. You can add more ingredients while blending by removing the measuring cup and pouring ingredients through the hole in the lid. 7. If you have selected a speed between 1 and 4, when you have finished blending, press the STOP button, turn the knob to ‘0’ and unplug the blender. Canceling/stopping the blending cycle The blending cycle can be canceled or stopped at any time by pressing the START/ STOP button.
Use EN 3.4 Functions Safety lock system Ice Crush and Smoothie The blender has a safety lock system which automatically shuts off the blender when the jar is removed from the base. It also features a motor safety cut-out which trips if the motor is overloaded. The pre-set ‘Ice Crush’ and ‘Smoothie’ programs automatically adjust the speed to optimize blending results for a certain factory set time, then turn off automatically.
Use 3.5 Speed setting suggestions Speed PULSE 1 or 2 3 or 4 Suitable for • Ice cubes • Meat • Self-clean option (“4.5 Using the Self-clean option”).
Tips for using your blender • Cut the food to be blended into cubes to obtain better results. • Use the PULSE function for no more than 2 seconds at a time when blending dry mixtures. You might need to stop operation to push the ingredients down the sides of the blender jar with a spatula. • When blending together liquid and dry ingredients, blend liquids first and then add the dry ingredients. • Always remove pits from fruit and bones from meat as they can damage the blade assembly.
Cleaning and Care 4 Cleaning and Care 4.1 Instructions Improper use Danger of electrocution 4.4 Cleaning the blender jar and blade assembly Clean the appliance following the instructions in section “3.2 How to remove the blade assembly”. Sharp blades • Unplug the blender before cleaning it. • Do not immerse the motor base in water or other liquids. Improper use Risk of damage to surfaces Danger of cuts • Never touch the blades with your hands. • Remove the blade assembly using the measuring cup only. 4.
Cleaning and Care Problem EN 4.7 What to do if... Possible cause The motor has overheated. The motor will not start Solution Unplug the blender and leave the motor to cool. Insert the plug into the power socket. Do not use adaptors The plug is not properly or extensions. inserted in the power socket. Check that the house main breaker is on. The cable is defective. Contact an Authorized Service Center. Lack of power. Check that the house main breaker is on.
Cleaning and Care Problem Possible cause Solution The blender switches on, but The jar has not been correctly Remove the jar from its base locked into its base. and lock it into place. the blades do not turn The blender stops while operating The motor has overheated. The blender stops during The blades may have operation and the white LED jammed. flashes If the problem has not been resolved or in the event of another type of fault, contact your local technical support center.
Recipes Mixed fruit smoothie Soy milk Ingredients: 2 nectarines, pits removed (or canned peaches in syrup) and cut into pieces 4 1/2 oz frozen raspberries 4 1/2 oz frozen strawberries 1/2 cup orange juice 1/2 cup apple juice Ingredients for 1 quart of soy milk: 3 1/2 oz yellow soy beans 1 1/2 quarts water Method 1. Put the nectarine pieces and the juices into the blender jar. 2. Add the frozen fruit. 3. Turn the control knob to the Smoothie program and start the blender by pressing the START button. 4.
Recipes Whipped cream Vegetable purée Ingredients: 2 cups cold whipping cream 1/3 cup powdered sugar Ingredients: 10 oz zucchini 1/2 cup water or vegetable stock Method 1. Whip the cream in the blender at speed 3 for approximately 30 seconds. 2. Stop the operation by pressing the STOP button. 3. Add the icing sugar. 4. Select speed 4 and whip for a further 15 seconds, until the cream is fully whipped. Method 1. Steam the zucchini and cut it into rounds. 2.