DHT93LIT Asciugatrice Manuale utente Dryer User Manual 2960312006_IT/040219.
Please read this user manual first! Dear Customer, Thank you for prefering a Smeg product. We hope that your product which has been manufactured with high quality and technology will give you the best results. We advise you to read through this manual and the other accompanying documentation carefully before using your product and keep it for future reference. If you transfer the product to someone else, give its manual as well.
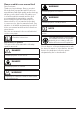
1 Important instructions for safety and environment C NOTE • This section contains safety instructions that will help protect from risk of personal injury or property damage. Failure to follow these instructions shall void any warranty. 1.
1.1.1 Electrical safety B DANGER! • Electrical safety instructions should be followed while electrical connection is made during the installation. • The appliance must not be supplied through an external switching device, such as a timer,or connected to a circuit that is regularly switched on and off by utility. • Connect the dryer to a grounded outlet protected by a fuse at the value specified on the type label. Have the grounding installation performed by a qualified electrician.
DANGER! Points to be taken into consideration for fire hazard: Below specified laundry or items must not be dried in the dryer considering fire hazard. • Unwashed laundry items • Items soiled with oil, acetone, alcohol, fuel oil, kerosene, stain removers, turpentine, paraffin or paraffin removers must be washed in hot water with plenty of detergent before being dried in the dryer.
Dryer / User Manual • • A fixing device should be used between the two machines when installing the dryer above a washing machine. The fitting device must be installed by the authorized service agent. Total weight of the washing machine and the dryer -with full load- when they are placed on top of each other reaches to approx. 180 kilograms. Place the products on a solid floor that has sufficient load carrying capacity! A • WARNING! Washing machine cannot be placed on the dryer.
1.4 Child safety • Packaging materials are dangerous for the children. Keep packaging materials away from children. Electrical products are dangerous for the children. Keep children away from the product when it is operating. Do not let them tamper with the dryer. Use the childproof lock in order to prevent the children to tamper with the dryer. • C NOTE Child-proof lock is on the control panel. (See Child lock) • Keep loading door closed even when the dryer is not in use. 1.
2 Your Dryer 3 Installation 2.1 Overview Before the calling the nearest Authorized Service for the installation of the dryer, ensure that electrical installation and water drain is appropriate referring to the user’s manual. If they are not suitable, contact a qualified electrician and technician to make necessary arrangements. 11 1 2 10 3 9 8 C • 4 5 7 6 1. Top panel 2. Control panel 3. Loading door 4. Kick plate opening button 5. Ventilation grids 6. Adjustable legs 7.
• be adversely affected and it can get damaged. The rear surface of the tumble dryer shall be placed against a wall. B DANGER! Do not place the dryer on the power cable. * Ignore following warning if your product’s system does not contains R290. DANGER! • • • • Dryer contains R290 refrigerant.* R290 is an environment-friendly, but flammable refrigerant.* Ensure that the air inlet of the dryer is open and it is well-ventilated.* Keep potential flame sources away from the dryer.* 3.
3.5 Transportation of the dryer Drain all water that has remained in the dryer. If direct water drain connection is made, then remove the hose connections. A • WARNING! We recommend carrying the dryer in upright position. If it is not possible to carry the machine in the upright position, we recommend carrying it by tilting towards the right side when looked from the front. 3.6 Warnings about sounds C • NOTE • It is normal to hear a metallic noise from the compressor sometimes during operation.
4 Preparation • 4.1 Laundry suitable for drying in the dryer • Always obey the instructions given on the garment tags. Dry only the laundry having a label stating that they are suitable for drying in a dryer and make sure that you select the appropriate programme.
5 Operating the product 5.1 Control panel 1 2 3 4 10 1. Programme Selection knob 2. Dryness Level Adjustment button 3. Audio Warning Level button 4. Display 5. On /Off/Cancel button 9 8 5 6 7 6. Start/Pause button 7. End Time button 8. Favourite button 9. Timer Programmes Selection button 10. Anti-creasing / Child Lock button cottons.) 5.2 Display symbols • C NOTE Pressing the On/Off/Cancel button does not mean that the programme has started. Press Start / Pause button to start the program.
5.5 Programme selection and consumption table Programmes Programme Description Capacity (kg) Spin speed in washing machine (rpm) Drying Time (minutes) EN Cottons Iron Dry You may dry your cotton laundry to be ironed in this program to have them slightly damp for ease of ironing. (Shirt, T-shirt, tablecloth, etc.) 9 1000 150 Cottons Cupboard Dry You may dry all your cotton laundry in this program. (T-shirt, pants, pyjamas, baby clothes, underwear, linen, etc.
Energy consumption value kWh Cottons cupboard dry* Cottons Iron dry Synthetics cupboard dry Capacity (kg) Approximate amount of remaining humidity Programmes Spin speed in washing machine (rpm) Energy consumption values 9 9 4,5 1000 1000 800 60% 60% 40% 1,63 1,50 0,60 R134a / 0,52 kg - GWP:1430 - 0,744 tCO2e Contains fluorinated greenhouse gases.
Volume level low Anti-creasing 0 minute Volume level high Anti-creasing 30 minute Dryness level adjustment selection Dryness level adjustment button is used to adjust the required dryness level. Programme duration can change depending on the selection. • C Anti-creasing 60 minute NOTE You can activate this function only before the programme has started. Anti-creasing 120 minute Anti-creasing Anti-creasing programme duration may be changed with the Anti-creasing selection button.
End time With the End Time function, the end time of the programme may be delayed up to 24 hours. The time on the display is the total of normal drying time and end time. • Open the loading door and put the laundry in. • Select the drying program. Press End Time button to set the desired time delay. • Press Start/Pause button. Time Delaying starts countdown and the time delaying symbol lights up on the display. The “:” in the middle of the displayed delay time will flash.
• C NOTE 5.9.Progress of programme For detailed information, see Maintenance and cleaning. If the water tank becomes full while the programme is running, the warning symbol will start to flash and the dryer will pause. Drain the water in the water tank and press Start / Pause button to resume the programme. The warning symbol turns off and the programme resumes operating. 5.
• Select desired programme by turning the Programme Selection knob. • Press the Start/Pause button to start the program. Adding / removing laundry while the dryer is in operation • In order to add or take out laundry after the drying programme has started: • Press the Start/Pause button to switch the dryer to Pause mode. Drying process will pause. • While in Pause mode, open the loading door, add or take out laundry and close the loading door. • Press the Start/Pause button to resume the program.
6 Maintenance and cleaning A layer can build up on the filter pores that can cause clogging of the filter after using the dryer for a while. Wash the lint filter with warm water to remove the layer that builds up on the lint filter surface. Dry the lint filter completely before reinstalling it. Service life of product extends and frequently experienced problems will be reduced if it is cleaned at regular intervals.
6.3 Draining the water tank Dampness of the laundry is removed and condensed during drying process and the water that arise accumulates in the water tank. Drain the water tank after each drying cycle. A • • WARNING! Condensed water is not drinkable! Never remove the water tank when the program is running! If you forget to drain the water tank, the machine will stop during the subsequent drying cycles when the water tank is full and the Water Tank warning symbol will flash.
• C • If you observe a layer over the filter which can block the filter, remove the layer washing with a water and then cleaning it. Dry the filter cloth properly before replacing the filter drawer. • Close the kick plate cover. NOTE There may be no cloth in the filter cassette of your drying machine, depending on its model. • C • Replace the filter drawer and tighten the cap turning the filter drawer lock turning it in the arrow direction. Place the sponge back into its place.
7 Troubleshooting Drying operation takes too long. Fibre filter pores might be clogged. >>> Wash the filter with warm water. Filter drawer might be clogged. >>> Clean the sponge and filter cloth (if any) in the filter drawer. (for the products with a heat pump) The condenser might be blocked. >>> Wash the condenser.(for the products with a condenser ) The ventilation grills in front of the machine may be closed. >>> Remove any objects in front of the ventilation grills that blocks air.
PRODUCT FICHE Complying Commission Delegated Regulation (EU) No 392/2012 SMEG Supplier name or trademark DHT93LIT Model name 9.