
Technical data
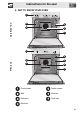
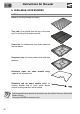
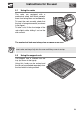
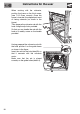
Table Of Contents
- 1. INSTRUCTIONS FOR USE
- 2. SAFETY PRECAUTIONS
- 3. ENVIRONMENTAL RESPONSIBILITY
- 4. GET TO KNOW YOUR OVEN
- 5. AVAILABLE ACCESSORIES
- 6. FRONT PANEL
- 7. USING THE OVEN
- 7.2.1 Internal oven lights
- 7.2.2 Oven runners
- 7.2.3 Cooling system
- 7.6.1 Cooking with a preset temperature
- 7.6.2 Changing the preset temperature
- 7.7.1 Cooking timed with the timer
- 7.7.2 Semi-automatic cooking
- 7.7.3 Automatic cooking
- 7.7.4 Changing the preset temperature
- 1 P1: OFF / ON Activate or deactivate the child safety lock (); this function, after 2 minutes of operation without any actions by the user, locks all the functions and knobs; it is identified by the appearance of on DSP1. To temporarily deactivate l...
- 2 P2: OFF / ON Activate or deactivate the Show Room function; this function disables all the heating elements so that only the control panel works (to use the oven normally, set P2:OFF).
- 3 P3: OFF / ON Activate or deactivate the function that allows a maximum consumption of 2300 W.
- 7.8.1 Change the settings in the secondary menu
- 8. COOKING WITH THE OVEN
- 9. CLEANING AND MAINTENANCE
- 10. EXTRAORDINARY MAINTENANCE
- 11. INSTALLING THE APPLIANCE
Instructions for the user
54
When cooking with the rotisserie,
position the frame on the third runner
(see 7.2.2 Oven runners). Once the
frame is inserted, the shaped part must
sit facing outwards (as shown in the
figure).
Then prepare the rotisserie rod with the
food, using the clip forks provided.
So that you can handle the rod with the
food on it readily, screw on the handle
provided.
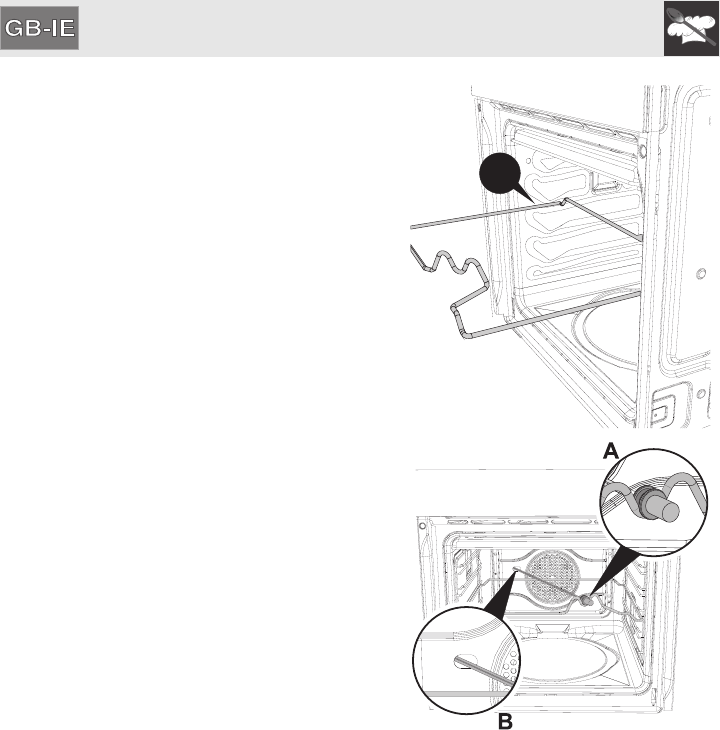
Having prepared the rotisserie rod with
the food, position it on the guide frame
as shown in the figure.
Insert the rod into the hole (detail B) so
that it connects with the rotisserie
motor.
Make sure that the pin is placed
correctly on the guide frame (detail A).
3