Contents 1.1 1.2 1.3 1.4 1.5 1.6 1.7 1.8 General safety instructions Instructions for using microwaves Manufacturer liability Appliance purpose Identification plate Disposal This user manual How to read the user manual 2 Description 2.1 2.2 2.3 2.4 2.5 General Description Control panel Microwaves Other parts Available accessories 3 Use 3.1 3.2 3.3 3.4 3.5 3.6 3.7 3.
Instructions 1 Instructions IMPORTANT SAFETY INSTRUCTIONS PLEASE READ CAREFULLY AND RETAIN FOR FUTURE USE. 1.1 General safety instructions Risk of personal injury • WARNING: If the door or the door seal is damaged, the oven must not be used until it has been repaired by authorised persons. • WARNING: It is hazardous for anyone other than a competent person to carry out any service or repair operation which involves the removal of a cover which offers protection against exposure to microwave energy.
Instructions 1.2 Instructions for using microwaves • Check the appliance visually during the cooking of foods in plastic or paper containers. EN • Do not try to repair the appliance yourself or without the intervention of authorised persons. • If the power supply cable is damaged, contact technical support immediately and they will replace it. Improper use Danger of explosion Risk of damaging the appliance • Do not use abrasive or corrosive detergents on glass parts (e.g.
Instructions (e.g. drying clothes, warming slippers, sponges, wet cloths or the like, dehydrating foods) because they can lead to the risk of injury or fire. • Clean the appliance constantly and remove any food residue. • Do not use the microwave to dry food. • Do not use the microwave to heat oils or fry. • Do not use the appliance to heat foods or beverages containing alcohol. • Baby food should not be heated in sealed containers. Remove the cover or the teat (in the case of baby bottles).
1.3 Manufacturer liability 1.6 Disposal The manufacturer declines all liability for damage to persons or property caused by: • Use of the appliance other than the one envisaged; • Non-observance of the user manual provisions; • Tampering with any part of the appliance; • Use of non-original spare parts. This appliance must be disposed of separately from other waste (Directives 2002/95/EC, 2002/ 96/EC, 2003/108/EC).
Instructions 1.7 This user manual 1.8 How to read the user manual This user manual is an integral part of the appliance and must therefore be kept in its entirety and within the user’s reach for the whole working life of the appliance. • Read this user manual carefully before using the appliance. This user manual uses the following reading conventions: Instructions General information on this user manual, on safety and final disposal. Description Description of the appliance and its accessories.
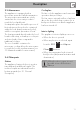
Description EN 2 Description 2.
Description 2.2 Control panel 1 Temperature knob This knob allows you to select: • the microwave power level • the cooking temperature • the duration of a function • programmed cooking • the current time • the switching on or off of the light inside the appliance. 10 2 Display Displays the current time, the selected cooking function, power and temperature and any time that has been set.
2.3 Microwaves Cooling fan The appliance is equipped with a microwave generator called a magnetron. The microwaves generated are evenly emitted into the oven cavity in order to reach the food and heat it. Heating takes place through the process of friction between the molecules contained within the food (mainly water molecules), with the consequent generation of heat.
Use 2.5 Available accessories Tray rack Boiling rod To be placed in containers when heating liquids, necessary to avoid delayed boiling with resulting superheating. Rack To be placed over the top of the oven tray; for cooking foods which may drip. Some models are not provided with all accessories. The oven accessories intended to come into contact with food are made of materials that comply with the provisions of current legislation. Useful for supporting containers with food during cooking.
3 Use 3.1 Instructions High temperature inside the oven cavity during use Danger of burns • Keep the oven door closed during cooking. • Protect your hands by wearing heat resistant gloves when handling food inside the oven cavity. • Do not touch the heating elements inside the oven cavity. • Do not pour water directly onto very hot trays. • Do not allow children to get close to the appliance when it is in operation.
Use MATERIALS TO USE: - Glass (always remove lids)* • Baking dishes • Glasses • Jars - Porcelain - Terracotta - Plastic (only if suitable for microwave use)* • Containers • Plastic wrap (must not come into contact with the food) *only if heat-resistant.
3.3 First use Racks and trays 1. Remove any protective film from the outside or inside of the appliance, including accessories. 2. Remove any labels (apart from the technical data plate) from the accessories and from the oven cavity. 3. Remove and wash all the appliance accessories (see 4 Cleaning and maintenance). 4. Heat the empty oven at maximum temperature (using the traditional functions) so as to remove any manufacturing residues.
Use Boiling rod 3.5 Using the oven When using the microwave to heat or reheat liquids, the boiling process may be delayed while the liquids nevertheless exceed 100 degrees. To avoid this dangerous phenomenon, it is necessary to insert the supplied boiling rod (or a heatresistant plastic spoon) in the container while heating.
Operating modes Stand-by: When no function is selected, the display shows the current time. Each time the temperature knob is pressed during a function, it will cycle through the parameters in the following order. The value can be changed in any mode by turning the temperature knob to the left or right. Keep the knob turned to produce a faster increase or decrease.
Use Setting the time On the first use, or after a power failure, will flash on the appliance’s display. The current time must be set in order for any cooking function to be started. 1. Turn the temperature knob to set the hour displayed (to increase or decrease it more quickly keep the knob turned to the right or left). 2. Press the temperature knob. 3. Turn the temperature knob to set the minutes (to increase or decrease it more quickly keep the knob turned to the right or left). 4.
Use 1. Turn the functions knob to select the microwave function . EN Microwaves Given that they penetrate directly into the food, microwaves allow cooking to take place in a very short period of time and with a considerable saving of energy. They are suitable for cooking without fat and for defrosting and re-heating food while maintaining its original appearance and fragrance. 6. Press the function knob to start microwave cooking. The cooking function is stopped if the door is opened.
Use 8. To deactivate the buzzer, press or turn one of the two knobs or open the door. To deactivate the buzzer and select another timed cooking function, turn the temperature knob to the right. To deactivate the buzzer and select a different cooking function, turn the function knob to the right or left. QUICK START microwave function The QUICK START function allows the microwave to be started quickly. This is useful for heating small quantities of liquid or food. 1.
Combined Functions Improper use Risk of damage to the appliance • Do not use the combined functions to heat or boil liquids. Combination cooking is a mix of traditional cooking and microwave cooking. These functions are indicated by the traditional function symbol and the microwave turning on. function icon 1. Turn the function knob to select a combined function. 2. Press the temperature knob. 3. Turn knob to set the temperature. 4. Press the temperature knob. 5.
Use Combination functions list Microwave + Grill The use of the grill results in perfect browning of the food’s surface. Using the microwave on the other hand leads to rapid internal cooking of the food. Microwave + Static + fan The operation of the fan, combined with traditional cooking, ensures consistent cooking even with complex recipes. Using the microwave on the other hand leads to rapid internal cooking of the food.
Traditional functions list ECO This function is particularly suitable for cooking on a single shelf with low power consumption. Ideal when cooking meat, fish and vegetables. It is not recommended for foods that require proving. To obtain maximum energy savings and reduce cooking times, it is recommended to place food in the oven without preheating the oven cavity.
Use Minute minder timer Baker’s function The combination of the fan with just the bottom heating element allows cooking to be completed more rapidly. This system is recommended for sterilising or for finishing to cook foods that are already well-cooked on the outside, but not on the inside and which therefore need a little more heat. Perfect for any type of food.
4. To deactivate the buzzer, press or turn one of the two knobs. 5. To select another minute minder, turn the temperature knob. 2. Turn the temperature knob right or left to set the cooking duration from 00:01 to 12:59. Keep the knob turned to produce a faster increase or decrease. Set the value to zero in order to cancel the minute minder timer. Timed cooking Timed cooking is the function which allows a cooking operation to be started and then ended after a specific length of time set by the user.
Use 5. To deactivate the buzzer, press or turn one of the two knobs or open the door. To deactivate the buzzer and select another timed cooking function, turn the temperature knob to the right. To deactivate the buzzer and select a different cooking function, turn the function knob to the right or left. Press and hold the function knob to switch off the appliance.
3. Press the temperature knob a fourth time. The indicator light flashes. Turn the knob right or left to set the cooking end time. 5. At the end of the cooking time appears on the display and a buzzer sounds. 4. After a few seconds, the and indicator lights stop flashing. The appliance waits for the set start time. 6. To deactivate the buzzer, press or turn one of the two knobs or open the door. Press and hold the function knob to switch off the appliance.
Use 1. Press the control knob when the and Traditional cooking tips indicator lights are on steadily and the appliance is waiting to start cooking. The indicator light starts flashing. 2. Turn the temperature knob right or left to change the previously set cooking duration. 3. Press the temperature knob again. The indicator light switches off and the General advice indicator light starts flashing. The display shows the cooking end time. 4.
Use • Use dark metal moulds: They help to absorb the heat better. • The temperature and the cooking time depend on the quality and consistency of the dough. • To check whether the dessert is cooked right through: At the end of the cooking time, put a toothpick into the highest point of the dessert. If the dough does not stick to the toothpick, the dessert is cooked.
Use 5. To deactivate the buzzer, press or turn one of the two knobs or open the door. 6. Press and hold the function knob for at least 3 seconds to exit from the function. Sabbath mode Reheat This function is used for re-heating food using microwaves that has been previously cooked and stored in the refrigerator. 1. Press the function knob to confirm the settings and start re-heating. 2. Press the temperature knob. 3. Turn the temperature knob to change the re-heating time. 4.
Defrost by time After activating the Sabbath mode the settings cannot be altered. Using the knobs will have no effect; only the function knob remains active to allow you to turn off the appliance. 1. Press and turn the function knob to select Sabbath mode . 2. Press and turn the temperature knob to modify the temperature of the function. 3. Press the temperature knob to confirm the set temperature. The text flashes. 4. Press the function knob to start the Sabbath mode. 5.
Use Defrost by weight For best results during defrosting the food in the oven should be turned. See: “Turn” procedure This function defrosts food according to the type and the weight of the frozen product. 1. Place the food into the oven cavity (see “Turn” procedure) 2. Press and turn the function knob to select the defrost by weight function indicated by symbols and the illuminated food . 7. When finished appears on the display and a buzzer sounds. 8.
“Turn” procedure For best defrosting results it is recommended, when necessary, to turn the dish inside the oven compartment. 1. Put the food in the oven, placing it parallel to the door. If dish rotation is not performed the appliance will wait for one minute and then automatically continue defrosting. The word will be displayed beneath the countdown indicator as a reminder. 2. The food should be turned when appears on the display. 3. Open the door and turn the dish 90°. 4.
Use 3.7 Automatic programs 5. When preheating has finished, will flash. Place the food to be cooked into the oven and press the function knob to start cooking. The automatic cooking programs are divided up according to the type of dish to be cooked. 1. Press and turn the function knob to select cooking with automatic programs, indicated by and the illuminated food symbols . 2. Press the function knob to confirm cooking with automatic programs. 3.
Use EN Automatic programs table MEAT (01 - 05) Pr Subcategory Weight Level (g) 01 Roast beef (medium) 1000 1 02 Pork loin 1000 1 03 Lamb (medium) 1200 04 Veal (roasted) 05 Roast chicken (whole) Function Temperature Time (°C) (minutes) 200 60 + 190+300W 60 1 + 190+300W 60 1000 1 + 190+300W 70 1000 1 + 200+300W 50 FISH (06 - 07) Pr Subcategory Weight Level (g) Function Temperature Time (°C) (minutes) 06 Fresh (whole) 500 1 + 160+300W 30 07 Frozen 500 1 + 160+300
Use DESSERTS / PASTRIES (11 - 13) Pr Subcategory Weight Level (g) Function Temperature Time (°C) (minutes) 11 Biscuits 600 1 160 18 12 Tarts 800 1 170 40 BREAD - PIZZA - PASTA (14 -20) Pr Subcategory Weight Level (g) Function Temperature Time (°C) (minutes) 13 Leavened bread (loaf) 1000 1 200 30 15 Pan baked pizza 1000 1 250 9 15 Pizza (frozen) 300 1 250 8 16 Pasta bake 2000 1 220 40 17 Lasagne (fresh) 2000 1 230 35 18 Lasagne (frozen) 300 1 230+500W 9 19 Qu
3.8 Secondary menu Child lock mode The appliance has a drop-down secondary menu that allows the user to: • Activate or deactivate the Child lock. • Activate or deactivate Showroom mode (which disables all the heating elements so that only the control panel works). • Activate or deactivate Low Power mode (Eco-Logic). • Activate or deactivate timed light mode (Eco-Light).
Use Showroom mode (for exhibitors only) Low power mode This mode allows the appliance to deactivate all heating elements, while keeping the control panel active. This mode allows the appliance to limit the power used. Suitable for simultaneous use with further home appliances. HI: normal power. In order to use the appliance normally, set this mode to OFF. LO: low power. If the mode is active, the indicator light lights up on the display.
Keep Warm Mode (some models only) Timed light mode This mode allows the appliance to keep cooked food warm (at low temperatures) for approximately 1 hour after a cooking cycle finishes for which a duration has been set (if this is not manually interrupted). For greater energy savings, the light is turned off automatically one minute after the start of cooking. To prevent the appliance from turning off the light automatically after one minute set this mode to OFF.
Cleaning and maintenance 4 Cleaning and maintenance 4.1 Instructions High temperature inside the oven cavity after use Danger of burns • Perform cleaning only after letting the appliance cool down. Improper use Risk of damage to surfaces • Do not use steam jets to clean the appliance. • Do not use cleaning products containing chlorine, ammonia or bleach on steel parts or parts with metallic finishes on the surface (e.g. anodizing, nickel- or chromium-plating).
Food stains or residues 4.4 Cleaning the oven cavity Do not use metallic sponges or sharp scrapers as they will damage the surfaces. Use ordinary non-abrasive products with the aid of wooden or plastic utensils if necessary. Rinse thoroughly and dry with a soft cloth or a microfibre cloth. Do not allow residues of sugary foods (such as jam) to set inside the oven. If left to set for too long, they might damage the enamel lining of the oven.
Cleaning and maintenance Removing racks/trays support frames Removing the guide frames enables the sides to be cleaned more easily. To remove the guide frames: 1. Unscrew the two fastening pins of the frame: 2. Pull the frame towards the inside of the oven cavity in order to release it from the fastening pins.
4.5 Vapour Clean Vapour Clean is an assisted cleaning procedure which facilitates the removal of dirt. This process makes it possible to clean the oven cavity very easily. The dirt residues are softened by the heat and water vapour for easier removal afterwards. Improper use Risk of damage to surfaces • Remove any food residues or large spills from previous cooking operations from the oven cavity. • Carry out assisted oven cleaning operations only when the oven is cold.
Cleaning and maintenance Vapour Clean setting If the internal temperature is higher than that required for the Vapour Clean function, the cycle will be stopped immediately and will appear on the display. Allow the appliance to cool down before activating the assisted cleaning cycle. Programmed Vapour Clean Cycle Just like with normal cooking functions, it is also possible to set an end time for the Vapour Clean function. 1. After having selected the Vapour Clean function, press the temperature knob.
3. Use an anti-scratch sponge with brass filaments on tougher encrustations. 4. In case of grease residues use specific oven cleaning products. 5. Remove any remaining water from the oven cavity. For improved hygiene and to prevent food being affected by unpleasant odours, we recommend that you dry the oven cavity using a fan assisted function at 160°C for approximately 10 minutes. We recommend wearing rubber gloves for these operations.
Installation 5 Installation 5.1 Electrical connection Power voltage Danger of electrocution • Have the electrical connection performed by authorised persons. • The appliance must be connected to earth in compliance with electrical system safety standards. • Disconnect the mains power supply. General information Check the grid characteristics against the data indicated on the plate. The identification plate bearing the technical data, serial number and brand name is visibly positioned on the appliance.
Installation Position of the power cable EN 5.2 Positioning Heavy appliance Crushing hazard • Position the appliance into the cabinet cutout with the help of a second person. Pressure on the open door Risk of damage to the appliance • Never use the oven door to lever the appliance into place when fitting. • Avoid exerting too much pressure on the oven door when open. Heat production during appliance operation Risk of fire • Check that the piece of furniture material is heat resistant.
Installation Fastening bushings Appliance overall dimensions (mm) Remove the bushing covers from the front of the oven. Mount the appliance into the recess. Secure the appliance to the piece of furniture using screws. Cover the bushings with the covers removed previously.
Installation EN Mounting under worktops (mm) (side view) Make sure that the piece of furniture rear/bottom part has an opening of approx. 60 mm.
Installation Mounting into a column (mm) Make sure that the top/rear part of the piece of furniture has an opening approx. 35-40 mm deep.