PRECAUTIONS 49 General safety instructions For this appliance Appliance purpose This user manual Manufacturer’s liability Identification plate Disposal Information for European Control Bodies Energy efficiency technical data To save energy Light sources How to read the user manual 49 52 53 53 53 54 54 54 54 54 54 55 DESCRIPTION 55 General Description 55 Control panel 56 Other parts 56 Accessories 57 Optional accessories (can be purchased separately) 57 USE 58 Preliminary operations Using the access
• • • • • • • • • • • • supervised or instructed by adults who are responsible for their safety. Children must not play with the appliance. Keep children under the age of 8 at a safe distance unless they are constantly supervised. Keep children under the age of 8 away from the appliance when it is in use. Cleaning and maintenance must not be carried out by unsupervised children. The cooking process must always be monitored. A short cooking process must be continuously surveyed.
into the side guides. The mechanical safety locks that prevent them from being removed must face downwards and towards the back of the oven cavity. • • • Do not use steam jets to clean the appliance. • Do not spray any spray product near the appliance. • Do not obstruct ventilation openings and heat dispersal slots. • Fire hazard: never leave objects in the oven cavity. • DO NOT FOR ANY REASON USE THE APPLIANCE AS A SPACE HEATER. • Do not use plastic cookware or containers when cooking food.
Installation and maintenance • THIS APPLIANCE MUST NOT BE INSTALLED IN A BOAT OR CARAVAN. • The appliance must not be installed on a pedestal. • Position the appliance into the cabinet cut-out with the help of a second person. • To prevent any possible overheating, the appliance should not be installed behind a decoration door or a panel. • Installation and servicing should be carried out by qualified personnel in accordance with current standards.
appliance outdoors. • (on some models only) Only use the temperature probe provided or recommended by the manufacturer. Temperature probe (if present) • Do not touch the rod or the tip of the temperature probe after use. • Wear oven gloves when handling the temperature probe. • Take care not to scratch or damage enamelled or chromeplated surfaces with the tip or the plug of the temperature probe. • Do not insert the temperature probe into openings and slots on the appliance.
• use of non-original spare parts. phase" in the USE chapter). Identification plate Energy efficiency technical data The identification plate bears the technical data, serial number and brand name of the appliance. Do not remove the identification plate for any reason. Information in accordance with the European energy labelling and ecodesign regulations is contained in a separate document accompanying the product instructions.
ambient temperature ≥300°C and intended for use in high temperature applications such as ovens. • This appliance contains light sources of efficiency class "G".
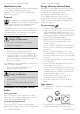
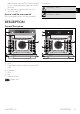
Control panel 1 ON/OFF key The ON/OFF button turns the appliance on or off. Cooling fan 2 Display The touch-screen display allows you to interact with the appliance. Touch the icons to access the various functions. All the operating parameters will be shown on the display. 3 Remote control indicator light (on some models only) When lit it indicates that the appliance can be controlled remotely via a smartphone or tablet (see the "Built-in oven connectivity" user manual).
Tray functions. In order to save energy, the light turns off after about one minute from the start of cooking or whenever the door is opened (this function can be disabled via the secondary menu). Accessories • Not all accessories are available on some models. • The accessories intended to come into contact with food are made of materials that comply with the provisions of current legislation. • Original supplied and optional accessories can be requested to Authorised Assistance Centres.
BBQ (teflon-coated barbecue grill pan) AIRFRY (oil-free frying grill) Double-use accessory: the striped side is recommended for grilling meat (fillets, hamburgers...), while the smooth surface can be used for cooking vegetables, fruit, fish... Recommended accessory for air-frying previously breaded, precooked and/or frozen food (chips, potato or meat croquettes, small mozzarella bites...). USE Preliminary operations See General safety instructions.
Clean the trays before using them for the first time to remove any residues left by the manufacturing process. Tray rack The tray rack has to be inserted into the tray. In this way fat can be collected separately from the food which is being cooked. Display The parameters and values for the currently selected function will be indicated on the display. To use it, simply touch the "virtual" keys and/or scroll through the values indicated (the image shows the main menu screen).
HISTORY protected) active and available in the place where the appliance is installed. • Internet connection. • Name and password of the home Wi-Fi network or WPS (Wi-Fi Protected Setup) mode available. For further information, please refer to the "Built-in oven connectivity" manual. TIMER First use etc...
When the current time is visible, after 2 minutes from the last operation by the user it is displayed with low brightness. The first time you use the appliance, it may be set to a language other than the one you speak. It is recommended that you set the required language at this point. 4. Touch the SETTINGS button on the display (at the right in the lower area 5. Touch the display button ). . 6.
3. Touch the TRADITIONAL COOKING MENU button. 4. Select a combination function (for example FAN-HEATED ) to enter the relevant cooking screen. 5. Touch the START right in the cooking level. button (at the lower ) to start pre-heating. Preheating stage Cooking itself is preceded by a preheating stage, which allows the appliance to heat to the cooking temperature more quickly. This stage is indicated by a progressive increase in the temperature level reached.
2. Scroll through the values and select the required duration. Programmed cooking Programmed cooking is the function which allows a time-controlled cooking operation to be stopped at an established time depending on the time set by the user, after which the appliance will switch off automatically. For safety reasons, it is not possible to set the end of cooking time by itself without setting the cooking duration. 3. Touch the CONFIRM button to confirm the selected cooking duration.
STATIC ECO Traditional cooking suitable for the preparation of one dish at a time. Ideal for cooking roasts, fatty meats, bread, pies. FAN-ASSISTED Intense and uniform cooking. Ideal for biscuits, cakes and multilevel cooking. THERMALLY-VENTILATED The heat is distributed quickly and evenly. Suitable for all dishes, ideal for cooking on several levels without mixing odours and flavours. TURBO Allows quick cooking on multiple shelves without mixing the aromas.
4. Touch the CONFIRM the selected duration. The DELETE button to confirm button appears in the lower area that can be used to delete a timer if one has been selected. 2. Insert the tip of the probe into the food before you place it in the oven. 3. For best results, make sure that the temperature probe is placed transversely in the thickest part of the food and for least 3/ 4 of its length. Make sure that it does not touch the tray underneath and that it does not protrude from the food. 5.
If the probe does not read the temperature of the food correctly, 2 error messages will appear on the display (to acknowledge), after which, the appliance will automatically carry out timed cooking. Setting cooking parameters when using the temperature probe 1. Select a cooking function. 2. Touch the TEMPERATURE button or the relevant value. 3. Scroll through the values and select the required cooking temperature. 4. Touch the CONFIRM 5. Touch the PROBE button. button in the lower area . 6.
Medium Sets a medium difference between the probe temperature and oven cavity temperature. This results in a medium cooking time. fast Sets the largest difference between the probe temperature and the temperature of the oven cavity. This results in a shorter cooking time. 3. Touch the CONFIRM button to confirm the selected probe temperature. Press the cooking button to eliminating the . With preheating: 1. Touch the START button to start preheating.
Advice for cooking with the Grill and the Fan with grill • Meat can be grilled even when it is put into the cold oven or into the preheated oven if you wish to change the effect of the cooking. • When using the fan-assisted with grill function, we recommend that you preheat the oven before grilling. • We recommend placing the food at the centre of the rack. • With the Grill function, we recommend that you set the temperature to the maximum value to optimise cooking.
Multistep cooking Sametime In this section you will find recipes created by Smeg chefs for SAMETIME cooking. This category allows a complete preparation at the same time. By choosing available combinations and setting the number of portions, the appliance selects the most suitable function, time and temperature. The instructions on the display indicate when to put the food in the oven and on which shelf. 1. Touch the SMART COOKING button on the "main menu". 2.
History This menu is particularly useful for viewing and reusing the last programs or personal recipes that were used. 1. Touch the HISTORY button to delete the button on the "main menu" (at the left in the lower area). 2. Select the function you wish to reuse and proceed with cooking as described in the previous sections. Deleting the history If you wish to delete the history: 1. Touch the HISTORY "main menu". 2. Touch the DELETE history. button on the 3.
add a new recipe. After storing your personal recipes these will then be available in the dedicated menu. 1. Touch the MY RECIPES "main menu" (at the left area). button on the in the lower It is possible to store a limited number of personal recipes. The minutes required for preheating are already included in the end-of-cooking time. Now it is possible to add programmed cooking. Saving a recipe Adding a recipe 1. Touch the NEW RECIPE 8. Touch the CONFIRM button to confirm the selected cooking duration.
14. Touch the CONFIRM the program. button to store Starting a personal recipe 1. Touch the MY RECIPES button on the "main menu". 2. Select the recipe that was saved previously. 3. Touch the START cooking. button to start Deleting a recipe 1. Touch the MY RECIPES button on the "main menu". 2. Select the recipe that was saved previously. 3. Touch the DELETE recipe. button to delete the 4.
Preset parameters: Type Weight (kg) Time Meats 0.5 1h 45m Fish 0.4 0h 40m Bread 0.3 0h 20m Desserts 1.0 0h 45m Defrosting times may vary on the basis of the shape and size of the food to be defrosted. When defrosting heavy and/or irregularly shaped food (e.g. chicken, fish, etc.), it is advisable to turn it inside the oven cavity at least once by 180°. DEFROST BY TIME Manual defrosting function.
5. Touch the COOKING DURATION button or the relevant value. The duration of the Proving function can be from a minimum of 1 minute to a maximum of 12 hours and 59 minutes. 6. Scroll through the values and select the required duration. . 2. Select PLATE WARMING 3. Touch the START button to start the Plate warming function. Unless otherwise set, the Plate warming function has a maximum duration of 12 hours and 59 minutes.
4. Select STONE . 5. Scroll through the values and select the required cooking temperature (from 50°C to 250°C). 6. Touch the START Stone function. button to start the As with normal cooking functions, you can skip pre-heating and set a timed and programmed cooking. 7. After preheating, open the door and place the food to be cooked on the accessory. 8. Close the door. When finished, a buzzer sounds briefly, which can be deactivated by touching any point of the display or by opening the door.
4. Select SABBATH . 5. Touch the TEMPERATURE button or the relevant value. 6. Scroll through the values and select the temperature (from 60°C to 100°C). 7. Touch the CONFIRM button to confirm the selected temperature. 8. Touch the START Sabbath function. To stop the function: • Touch the HOME seconds. button to start the remain as they were before the blackout, taking into account the time already elapsed.
Touch the CONFIRM button to activate the Digital clock mode. Oven settings Dedicated menu for additional product functions. • In the "settings menu SETTINGS Time display button. Keep warm Activates/deactivates the clock display when the oven is switched off. The "Show the time" function is factory set to Off. If the "Show the time" function is set to On, when the appliance is in standby it displays the current time at low brightness.
Eco light Controls lock For greater energy savings, the lights inside the oven cavity are automatically deactivated approximately one minute after the start of cooking or after the door is opened. To stop the appliance from automatically deactivating the light after approximately one minute, set this mode to Off. Allows the appliance to automatically lock the controls after one minute of normal operation without any intervention from the user. 1. Select Controls lock. 2. Select Yes. 3.
System info 2. Select °C or °F. button to activate 3. Touch the CONFIRM the required temperature format. Display brightness This allows the display brightness level to be selected. The Display brightness function is factory set to High. 1. Select Display brightness. 2. Select from the options High - Medium Low. 3. Touch the CONFIRM the selection.
3. Touch the CONFIRM button to activate the demo mode. Restore settings This restores all settings to the original factory settings. The operation also deletes personal recipes. • Touch the FACTORY RESET the "settings menu " (at the centre of the lower area ). 1. Touch the Yes button if you want to restore the original factory operations. or 2. Touch the No button to cancel the operation. button on CLEANING AND MAINTENANCE Cleaning the appliance See General safety instructions. 1.
that grooved sections A are resting completely in the slots. 4. Lower the door and once it is in place remove the pins from the holes in the hinges. 5. Pull the intermediate glass unit downwards from the door and then lift it upwards. N.B.: in some models, the intermediate glass unit consists of two glasses. Cleaning the door glazing The glass in the door should always be kept thoroughly clean. Use absorbent kitchen roll. In case of stubborn dirt, wash with a damp sponge and an ordinary detergent.
9. Reinsert the intermediate glass unit and reposition the inner glass. 4. Leave the door open until the inside of the appliance has dried completely. Removing rack/tray support frames Removing the rack/tray support frames enables the sides to be cleaned more easily. 10. Be sure to fit the 4 pins of the inner glass well into their seats on the door. A = front housing B = rear pin To remove the rack/tray support frames: 1.
3. Remove the frame from the rear pin B located at the bottom of the side wall. 3. Screw in the front fixing pin (you can help yourself with a tool, e.g. a coin). 4. Repeat the operation for the frame placed on the other side wall. To refit the rack/tray support frames: 1. Slide the rear part of the frame into the housing under the pin B located at the bottom of the side wall. 4. Repeat the operation for the frame placed on the other side wall.
were previously removed, separately in warm water and a small amount of detergent. Vapor Clean cycle setting If the indoor temperature is higher than expected, the function is not activated. Let the appliance cool down before activating the function. The duration and temperature of the Vapor Clean function cannot be changed by the user. 1. Touch the OTHER FUNCTIONS button on the "main menu" (in the main area ).
The display shows the Pyrolytic function duration (factory set to 2:00 hours). 3. Scroll with your finger to set the duration of the Pyrolytic function from a minimum of 2:00 hours to maximum 3:00 hours. Available pyrolytic function durations: • Light dirt: 2:00 • Medium dirt: 2:30 • Heavy dirt: 3:00 4. Press the CONFIRM button to confirm the selected duration. The display shows the warning to remove all accessories from the oven cavity before starting the function.
For easier manual cleaning of parts that are difficult to reach, we recommend removing the door. Take care not to scratch the enamel of the oven cavity wall. 4. Slide out and remove the light bulb. Extraordinary maintenance Seal maintenance tips The seal should be soft and elastic. • To keep the seal clean, use a non-abrasive sponge and wash with lukewarm water. Replacing the internal light bulb Power voltage Danger of electrocution • Unplug the appliance. • Wear protective gloves. 1.
The aforementioned power cables are sized taking into account the coincidence factor (in compliance with standard EN 60335-2-6). Fixed connection Fit the power line with an all-pole circuit breaker with a contact separation distance sufficient to provide complete disconnection in category III overvoltage conditions, pursuant to installation regulations. Positioning See General safety instructions.
Appliance overall dimensions (mm) 88 - INSTALLATION 914779721/A
Mounting into a column (mm) *Make sure that the cabinet top/rear section has an opening approx. 35-40 mm deep.
Mounting under worktops (mm) If the appliance is to be built-in under a worktop, a wooden bar has to be installed order to use the seal that is glued to the back of the front panel to prevent water or other liquids leaking in. A min. 603 mm B 560 - 564 mm C 583 - 585 mm D 9 - 11 mm E min. 5 mm F 121 - 1105 mm G min. 560 mm H min. 594 mm co Cutout for power cord (min. 6 cm2) jb Electrical connection box *Make sure that the piece of furniture top/rear part has an opening approx. 60 mm deep.
A min. 603 mm B 560 - 564 mm C 583 - 585 mm D 9 - 11 mm E min. 5 mm F 121 - 1105 mm G min. 560 mm H min. 594 mm co Cutout for power cord (min. 6 cm2) jb Electrical connection box wb Wooden bar (recommended) Mounting under worktops (mm) (pyrolytic models only) Whenever a hob is installed above the oven, a wooden separator has to be installed at a minimum distance of 20 mm from the top of the oven to prevent overheating when the two appliances are used at the same time.
When using a wooden separator, a wooden bar has to be installed under the worktop in order to use the seal that is glued to the back of the front panel to prevent water or other liquids leaking in.