Contents 1. 2. 3. 4. 5. 6. 7. 8. 9. INSTRUCTIONS FOR USE..................................................... 26 SAFETY PRECAUTIONS........................................................ 28 ENVIRONMENTAL RESPONSIBILITY ................................... 30 USING THE HOB .................................................................... 31 CLEANING AND MAINTENANCE .......................................... 33 POSITIONING IN THE COUNTER TOP ................................. 36 ELECTRICAL CONNECTION .....
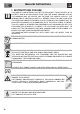
General instructions 1. INSTRUCTIONS FOR USE THIS MANUAL IS AN INTEGRAL PART OF THE APPLIANCE. IT MUST BE KEPT IN ITS ENTIRETY AND IN AN ACCESSIBLE PLACE FOR THE WHOLE WORKING LIFE OF THE COOKING HOB. WE ADVISE YOU TO READ THIS MANUAL AND ALL THE INFORMATION IT CONTAINS CAREFULLY BEFORE USING THE HOB. ALSO KEEP THE SERIES OF NOZZLES PROVIDED. INSTALLATION MUST BE CARRIED OUT BY QUALIFIED PERSONNEL IN ACCORDANCE WITH THE REGULATIONS IN FORCE.
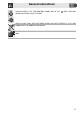
General instructions ALWAYS CHECK THAT THE CONTROL KNOBS ARE IN THE WHEN YOU FINISH USING THE HOB. (OFF) POSITION NEVER PLACE PANS WITH BOTTOMS WHICH ARE NOT PERFECTLY FLAT AND SMOOTH ON THE COOKING HOB RACKS. NEVER USE CONTAINERS WHICH PROJECT BEYOND THE OUTSIDE EDGE OF THE HOB.
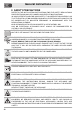
General instructions 2. SAFETY PRECAUTIONS REFER TO THE INSTALLATION INSTRUCTIONS FOR THE SAFETY REGULATIONS FOR ELECTRIC OR GAS APPLIANCES AND VENTILATION FUNCTIONS. IN YOUR INTERESTS AND FOR YOUR SAFETY IT HAS BEEN ESTABLISHED BY LAW THAT THE INSTALLATION AND SERVICING OF ALL ELECTRICAL APPLIANCES IS TO BE CARRIED OUT BY QUALIFIED PERSONNEL IN ACCORDANCE WITH THE REGULATIONS IN FORCE. OUR APPROVED INSTALLERS GUARANTEE A SATISFACTORY JOB.
General instructions DO NOT LET CHILDREN GO NEAR THE APPLIANCE WHEN IT IS IN OPERATION OR PLAY WITH IT AT ANY TIME. DO NOT INSERT POINTED METAL OBJECTS (CUTLERY OR UTENSILS) INTO THE SLITS IN THE APPLIANCE. DO NOT USE STEAM JETS FOR CLEANING THE APPLIANCE. THE STEAM COULD REACH THE ELECTRONICS, DAMAGING THEM AND CAUSING SHORT-CIRCUITS. DO NOT MODIFY THIS APPLIANCE. DO NOT SPRAY ANY SPRAY PRODUCTS NEAR THE ELECTRICAL APPLIANCE WHILE IT IS IN OPERATION.
Instructions for disposal 3. ENVIRONMENTAL RESPONSIBILITY 3.1 Our environmental care Pursuant to Directives 2002/95/EC, 2002/96/EC, 2003/108/EC, relating to the reduction of the use of hazardous substances in electrical and electronic appliances, as well as to the disposal of refuse, the crossed out bin symbol on the appliance indicates that the product, at the end of its useful life, must be collected separately from other refuse.
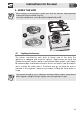
Instructions for the user 4. USING THE HOB Before turning on the burners, make sure that the burners, flame-spreader crowns and racks are fitted correctly. In the ultra-rapid burner, notch A must be aligned with pin B. A 4.1 B Lighting the burners The burner controlled by each knob is shown next to the knob. The appliance is equipped with electronic ignition. Simply press the knob and simultaneously turn it anticlockwise to the minimum flame symbol, until it lights.
Instructions for the user 4.2 Practical tips for using the burners For better burner performance and minimum gas consumption, pans with flat, even bases and with lids should be used, and their size should be in proportion to the burner (see “4.3 Pan diameters”). During cooking, in order to avoid burns or damage to the hob top and to the glass lid (when present), all pans or griddles must be positioned within the cooking hob perimeter and a minimum distance of 3-4 cm must be maintained from the knobs.
Instructions for the user 5. CLEANING AND MAINTENANCE Important: DO NOT USE STEAM JETS FOR CLEANING THE HOB. Before performing any operations requiring access to powered parts, disconnect the appliance from the power supply. 5.1 Cleaning the hob To keep the hob in good condition it should be cleaned regularly after use. Let it cool first. 5.1.1 Ordinary daily cleaning To clean and preserve surfaces, always use only specific products that do not contain abrasives or chlorine-based acids.
Instructions for the user 5.2 Cleaning the components 5.2.1 Knobs The knobs should be cleaned with lukewarm water and washing up liquid. For easier cleaning they can be removed by pulling them upwards. Dry thoroughly after cleaning. Do not use aggressive products containing alcohol or products for cleaning steel and glass when cleaning the knobs, as these products could cause permanent damage. 5.2.
Instructions for the user 5.2.5 Lid Clean the glass or steel lid, where mounted, with lukewarm water. Never use abrasive sponges or detergents. To clean the rear part of the cooktop, remove the lid unit by lifting it upwards. When finished cleaning, refit the cover making sure to insert it correctly. Before lifting up the lid, dry out any liquid that may have dripped. Never lower the lid when burners are on or still hot.
Instructions for the installer 6. POSITIONING IN THE COUNTER TOP The following operation requires building and/or carpentry work so must be carried out by a competent tradesman. Installation can be carried out on various materials such as masonry, metal, solid wood or plastic laminated wood as long as they are heat resistant (T 90°C). 6.1 Fixing to the supporting structure Create an opening with the dimensions shown in the figure in the top surface of the counte.
Instructions for the installer In case of installation on an empty kitchen unit with doors, a separation panel must be placed under the hob. Keep a minimum distance of 10 mm between the bottom of the hob and the surface of the panel, which must be easily extractable to allow sufficient access for any technical assistance.
Instructions for the installer 7. ELECTRICAL CONNECTION Make sure that the voltage and capacity of the power line conform to the data shown on the plate located under the casing. Do not remove this plate for any reason. The plug at the end of the supply cable and the wall socket must be of the same type and must conform to the applicable legislation on electrical installations. Make sure that the supply line is suitably earthed.
Instructions for the installer 8. GAS CONNECTION If the appliance is installed on an oven, you must avoid running the gas tube round the back of the oven in order to avoid overheating. Connection to the gas supply network can be made using a rigid copper hose or a flexible steel hose with a continuous wall and in compliance with the guidelines established by the applicable standard.
Instructions for the installer 8.1 Connection to LPG Use a pressure regulator and make the connection on the gas cylinder following the guidelines set out in the regulations in force. Make sure that the supply pressure complies with the values indicated in the paragraph “3.2 Burner and nozzle characteristics tables”. 8.2 Room ventilation The room containing the appliance should have an air supply in accordance with the standards in force.
Instructions for the installer 9. ADAPTATION TO DIFFERENT TYPES OF GAS Before carrying out the following operations, disconnect the appliance from the power supply. The cooker hob is preset for natural gas G20 (2H) at a pressure of 20 mbar. If other types of gas are to be used, the nozzles must be replaced and the primary air must be adjusted. In order to replace the nozzles and adjust the burners, the hob top must be removed as described below. 9.
Instructions for the installer 9.2 Adjustment for LPG Loosen screw A and push support B all the way. Using a a double head, remove nozzle C and replace it with the appropriate nozzle, following the instructions in the tables for the type of gas to be used. The nozzle tightening torque must be no more than 3 Nm. Reposition support B so that nozzle C is covered perfectly. Move the Venturi tube D to adjust the air flow until distance “X” is reached indicated in the chart in paragraph "5.
Instructions for the installer The hob is preset for natural gas G20 (2H) at a pressure of 20 mbar. To reset the appliance for operation with this type of gas, carry out the same steps as described in “9.2 Adjustment for LPG”, but select the nozzles and adjust the primary air for natural gas as indicated in the table below and in "9.4 Primary air adjustment”. After the adjustments have been carried out, restore the seals with sealing wax or equivalent material.
Instructions for the installer Reposition the components on the burner and slide the knobs onto the tap rods. Light the burner and set it on the minimum position. Extract the knob again and turn the adjustment screw inside or next to the tap rod (depending on the model) until the correct minimum flame is achieved. Refit the knob and verify that the burner flame is stable (when turning the knob rapidly from the maximum to the minimum position the flame must not go out). 9.5.
Contents 1. 2. 3. 4. 5. 6. 7. 8. 9. INSTRUCTIONS FOR USE..................................................... 26 SAFETY PRECAUTIONS........................................................ 28 ENVIRONMENTAL RESPONSIBILITY ................................... 30 USING THE HOB .................................................................... 31 CLEANING AND MAINTENANCE .......................................... 33 POSITIONING IN THE COUNTER TOP ................................. 36 ELECTRICAL CONNECTION .....
Instructions for the installer Over time the gas taps may become difficult to turn and get blocked. Clean them internally and replace the lubrication grease. This procedure must be carried out by a specialised technician.