Contents 1. 2. Safety and operating instructions __________________________ 2 Installation and hook-up _________________________________ 8 You are advised to read this manual carefully; it contains all the information you need about the right conditions for the proper, safe use of your dishwasher. INSTALLATION INSTRUCTIONS: these are intended for the qualified technician who must carry out the installation, hook-up and testing of the appliance.
User instructions 1. Safety and operating instructions THIS MANUAL FORMS AN INTEGRAL PART OF THE APPLIANCE; IT MUST ALWAYS BE KEPT INTACT TOGETHER WITH THE DISHWASHER FOR FUTIRE REFERENCE. BEFORE USING THE APPLIANCE, CAREFULLY READ ALL THE INSTRUCTIONS CONTAINED IN THIS MANUAL. THEY CONTAIN IMPORTANT INFORMATION FOR THE INSTALLATION, USE AND MAINTENANCE OF THE APPLIANCE. IN THE EVENT OF SALE OR TRANSFER, ENSURE THAT THE MANUAL ALWAYS ACCOMPANIES THE APPLIANCE.
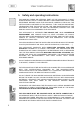
User instructions DURING THE INSTALLATION THE APPLIANCE MUST BE DISCONNECTED FROM THE NETWORK.. DO NOT INSTALL THE APPLIANCE IN A PLACE SUBJECT TO FREEZING. IF THE APPLIANCE IS INSTALLED ON A CARPETED OR COVERED FLOOR, ENSURE THAT THE OPENINGS ON ITS UNDERSIDE ARE NOT OBSTRUCTED. DO NOT INSTALL THE APPLIANCE NEAR EQUIPMENT WITH HIGH IRRADIATION TEMPERATURES (EG. GAS BURNERS, FIREPLACES, ETC.) AS THEY MAY CAUSE DAMAGE. IF THE APPLIANCE IS INSTALLED IN A COMPARTMENT ABOVE OR BELOW ANOTHER EQUIPMENT (EG.
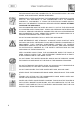
User instructions THE APPLIANCE MUST BE CONNECTED TO THE WATER SUPPLY BY NEW HOSES; OLD HOSES MUST NEVER BE REUSED. IMMEDIATELY AFTER INSTALLING THE DISHWASHER, PERFORM A QUICK TEST OF THE APPLIANCE. IF THE DISHWASHER FAILS TO OPERATE CORRECTLY, DISCONNECT IT FROM THE ELECTRICAL POWER SUPPLY AND CALL THE NEAREST TECHNICAL SERVICE CENTRE. DO NOT ATTEMPT TO REPAIR THE APPLIANCE. THIS DISHWASHER MUST BE USED BY ADULTS.
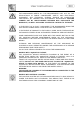
User instructions THE DISHWASHER MEETS ALL THE REQUIREMENTS SET OUT BY THE REGULATIONS IN FORCE CONCERNING SAFETY AND ELECTRICAL EQUIPMENT. ANY TECHNICAL CHECKS SHOULD BE CONDUCTED EXCLUSIVELY BY TRAINED AND AUTHORISED TECHNICIANS: REPAIRS CARRIED OUT BY UNAUTHORISED PERSONS WILL INVALIDATE THE WARRANTY, AS WELL AS POSING A POTENTIAL HAZARD TO THE USER. IN THE EVENT OF A FAULT, DISCONNECT THE DISHWASHER FROM THE ELECTRICAL POWER SUPPLY AND SHUT OFF THE WATER TAP.
User instructions IN ACCORDANCE TO ART. 26 OF THE LEGISLATIVE DECREE 14 MARCH 2014, NR. 49 “IMPLEMENTATION OF THE DIRECTIVE 2012/19/EU ON WASTE OF ELECTRICAL AND ELECTRONIC EQUIPMENT (WEEE)”. THE SYMBOL OF A CROSSED OUT WHEELIE BIN ON THE DEVICE OR PACKAGE SHOWS THAT THE PRODUCT MUST BE COLLECTED SEPARATE FROM OTHER WASTE, AT THE END OF ITS SERVICE LIFE.
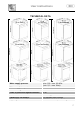
User instructions TECHNICAL DATA Water supply pressure Water supply temperature Protection against electric shock Class of protection against moisture Electrical characteristics Capacity 45 cm models: Capacity 60 cm models: min. 0,05 - max. 0,9 MPa (min. 0,5 – max. 9 bar) max.
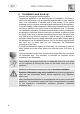
User instructions 2. Installation and hook-up Remove the polystyrene basket retainers. Position the appliance in the desired place of installation. The back or sides of the dishwasher may be placed up against walls or other furniture units. If the dishwasher is installed near a heat source, fit the special insulating panel to prevent overheating and malfunction of the appliance.
User instructions For free-standing models only: - Installing a hob on top of a free-standing dishwasher is absolutely forbidden. - To build in the dishwasher, the special kit must be purchased from authorised dealers or the After-Sales Service. - The tops of free-standing dishwashers can be removed to allow them to be installed underneath a worktop. This procedure must be carried out by authorised staff. 2.
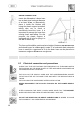
User instructions DRAIN CONNECTION Insert the dishwasher’s drain hose into a drain pipe having a diameter of at least 4 cm, or alternatively, place it inside the kitchen sink using the plastic support provided, taking care not to crush or excessively bend the hose. It is important to prevent the hose from coming loose and falling. For this purpose, the plastic support is equipped with a hole for tying it to the wall or water tap.
User instructions In the event of damage to the supply cord, have it replaced by the manufacturer or an Authorized Technical Service Centre in order to avoid any risk. Some components are live even with the ON/OFF button in the OFF position. Before maintenance work on the appliance, remove the plug or turn off the power supply at the wall switch.
User instructions FOR GREAT BRITAIN ONLY: THIS APPLIANCE MUST BE EARTHED. Fuse replacement If the mains lead of this appliance is fitted with a BS 1363A 13amp fused plug, to change a fuse in this type of plug use an A.S.T.A. approved fuse to BS 1362 type and proceed as follows: 1. 2. 3. Remove the fuse cover A and fuse B. Fit replacement 13A fuse into fuse cover. Refit both into plug.