GEBRUIKSAANWIJZING VAATWASSER
Inhoudsopgave 1. Aanwijzingen voor veiligheid en gebruik _____________________ 92 2. Installatie en inbedrijfstelling ______________________________ 94 2.1 Aansluiting op de waterleiding_________________________________________________ 94 2.2 Elektrische aansluiting_______________________________________________________ 95 3. Beschrijving van het bedieningspaneel______________________ 96 3.1 Het bedieningspaneel _______________________________________________________ 96 3.
Aanwijzingen 1. Aanwijzingen voor veiligheid en gebruik DEZE HANDLEIDING IS EEN WEZENLIJK ONDERDEEL VAN HET APPARAAT: HIJ DIENT ALTIJD IN ZIJN GEHEEL SAMEN BIJ HET APPARAAT TE WORDEN BEWAARD. VÓÓR DE INGEBRUIKNEMING BEVELEN WIJ AAN OM DE IN DEZE HANDLEIDING OPGENOMEN AANWIJZINGEN AANDACHTIG DOOR TE LEZEN. DE INSTALLATIE MOET DOOR BEVOEGD PERSONEEL WORDEN UITGEVOERD MET INACHTNEMING VAN DE GELDENDE NORMEN.
Aanwijzingen GEBRUIK GEEN TIJDENS HET TRANSPORT BESCHADIGDE APPARATEN! RAADPLEEG, BIJ TWIJFEL, UW WEDERVERKOPER. HET APPARAAT MOET WORDEN GEÏNSTALLEERD EN AANGESLOTEN OVEREENKOMSTIG DE DOOR DE FABRIKANT VERSTREKTE INSTRUCTIES OF DOOR BEVOEGD PERSONEEL.. HET APPARAAT MOET DOOR VOLWASSENEN WORDEN GEBRUIKT. ZORG ERVOOR DAT KINDEREN UIT DE BUURT BLIJVEN EN ER NIET MEE SPELEN. HOUD KINDEREN UIT DE BUURT VAN AFWASMIDDELEN EN DE GEOPENDE VAATWASSERDEUR.
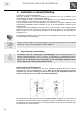
Instructies Voor de Installateur 2. Installatie en inbedrijfstelling Verwijder de polystyrol korfblokkeringen. Plaats het apparaat op de daarvoor bestemde. De vaatwasser kan met de zijkanten of de achterkant tegen meubels of wanden worden geplaatst. Als de vaatwasser naast een warmtebron wordt geplaatst moet een warmteïsolerende wand worden geplaatst om oververhitting en een slechte werking te voorkomen.
Instructies Voor de Installateur AANSLUITING OP DE AFVOER Plaats de afvoerslang in een afvoerpijp met een minimumdiameter van 4 cm; de slang kan ook in de gootsteen worden gehangen met behulp van de bijgesloten slanghouder, waarbij er echter voor moet worden opgelet dat hij niet wordt geknikt of afgeklemd. Het is belangrijk dat de slang niet kan losraken en vallen. Om deze reden heeft de slanghouder een gat waarmee hij met behulp van een touwtje aan de pijp of kraan kan worden bevestigd.
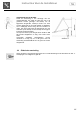
Instructies Voor de Gebruiker 3. Beschrijving van het bedieningspaneel 3.1 Het bedieningspaneel Alle bedieningsorganen en controle-instrumenten van de vaatwasser zijn aanwezig op het bedieningspaneel aan de bovenzijde. 1 2 3 4 AAN/UIT TOETS DRUKKNOP PROGRAMMAKEUZE DRUKKNOP GEPROGRAMMEERDE START DRUKKNOP SELECTIE SPAARPROGRAMMA'S DRUKKNOP DROGEN UITSLUITEN (alleen indien van toepassing) 5 DRUKKNOP ECO DROGEN (alleen indien van toepassing) 6 7 3.
TABEL VOOR CONTROLE-INSTITUTEN BEËINDIGING Het eind van het wasprogramma wordt kenbaar gemaakt door een kort akoestísch signaal en de indicatie "P0" zal op de DISPLAY verschijnen. ANNULERING VAN HET LOPENDE PROGRAMMA Om het lopende programma te annuleren moet u, na de deur te hebben geopend, het "P0" programma selecteren. Als u de deur weer sluit zal de vaatwasser het programma voortijdig beëindigen.
PROGRAMMATABEL INSTELLING VAN HET WASPROGRAMMA EN INSCHAKELEN VAN DE MACHINE Om het voor de te wassen vaat meest geschikte programma te selecteren verwijzen wij naar de onderstaande tabel, waar u het meest geschikte wasprogramma kunt vinden afhankelijk van de aard en de mate van bevuiling van de vaat.
Instructies Voor de Gebruiker UITSCHAKELING VAN HET AKOESTISCHE SIGNAAL EN REGELING VAN HET LAADSYSTEEM Dankzij het elektronische controlesysteem van de vaatwasser kunt u: het akoestische signaal dat alle programmeer- en functiehandelingen van de vaatwasser • begeleidt, uitschakelen; het vulsysteem van het water van de vaatwasser aanpassen aan de druk van het • waterleidingnet.
Instructies Voor de Gebruiker In de voor de HALVE BELADING bestemde korf kan een bestekcontainer terwijl de niet geselecteerde korf leeg moet blijven. worden geplaatst, LET OP: het heeft geen zin om de niet-geselecteerde korf te laden omdat de waterstraal uitsluitend de ingestelde korf zal bereiken. OM ENERGIE TE BESPAREN! … EN VOOR HET BEHOUD VAN HET MILIEU Probeer om de vaatwasser altijd volledig gevuld te gebruiken. • Was de vaat niet onder stromend water.
Instructies Voor de Gebruiker VERSCHUIVEN VAN HET PANEEL Om het paneel te laten zakken en de FRONTALE DISPLAY zichtbaar te maken moet u als volgt te werk gaan: controleer of de deur gesloten is; • druk het paneel naar beneden tot de display volledig zichtbaar is. Om het paneel weer in de • oorspronkelijke stand terug te brengen moet u dezelfde handeling andersom uitvoeren.
Instructies Voor de Gebruiker 4. Gebruiksinstructies Na de vaatwasser op correcte wijze te hebben geïnstalleerd zijn de volgende handelingen noodzakelijk om hem te kunnen gebruiken: Regeling van de ontharder; • Vullen met het regeneratiezout; • Vullen met glansspoelmiddel en afwasmiddel. • 4.1 Gebruik van de waterontharder De hoeveelheid kalk in het water (hardheidsgraad van het water) is verantwoordelijk voor de witte vlekken op de opgedroogde vaat, die, na verloop van tijd mat zullen worden.
Instructies Voor de Gebruiker ELEKTRONISCHE REGELING De voor deze parameter ingevoerde waarde zal aan de hand van de volgende tabel bepalen of aan het eind van de wascyclus een regenratie moet worden uitgevoerd.
Instructies Voor de Gebruiker TABEL HARDHEID VAN HET WATER HARDHEID VAN HET WATER Duitse graden (°dH) Franse graden (°dF) 0510 18 27 36 - 4 9 17 26 35 47 0-7 8 - 15 16 - 30 31 - 45 46 - 60 61 - 80 REGELING Staand nr. 1 GEEN ZOUT Staand nr. 1 Staand nr. 2 Staand nr. 3 Staand nr. 4 Staand nr. 5 Vraag het waterleidingbedrijf om de informatie betreffende de hardheidsgraad van het water. 4.
Instructies Voor de Gebruiker • • De hoeveelheid glansspoelmiddel moet worden verhoogd als de gewassen vaat mat is of ronde vlekken vertoont. Als de vaat daarentegen plakkerig aanvoelt of witte strepen vertoont moet de hoeveelheid glansspoelmiddel worden verminderd. VULLEN MET AFWASMIDDEL Om het deksel van het bakje te openen moet u drukknop P een weinig indrukken. Voeg het afwasmiddel toe en sluit het deksel zorgvuldig af. Tijdens het wassen zal het bakje automatisch worden geopend.
Instructies Voor de Gebruiker • Op de markt vinden we ook afwasmiddelen in de vorm van tabletten, waarvan wordt verklaard dat ze het gebruik van zouten of glansmiddel overbodig maken. In bepaalde gevallen kunnen dergelijke afwasmiddelen niet doeltreffend blijken, vooral indien gebruikt met korte cycli en/of lage wastemperaturen. Bij problemen met de prestaties (bijv.
Instructies Voor de Gebruiker 4.3 Waarschuwingen en algemene aanbevelingen Vóór de eerste ingebruikneming van de vaatwasser verdient het aanbeveling om eerst de onderstaande aanbevelingen met betrekking tot de aard van de te wassen vaat en de plaatsing ervan te lezen. Over het algemeen bestaan er geen beperkingen voor het wassen van de huishoudelijke vaat, maar in sommige gevallen moet met hun eigenschappen rekening worden gehouden.
Instructies Voor de Gebruiker 4.4 Gebruik van de korven De vaatwasser heeft een capaciteit van 14 couverts inclusief het opdienservies. DE ONDERSTE KORF De onderste korf ontvangt de maximale intensiteit van de werking van de onderste sproeiarm en is daarom bestemd voor de "moeilijkste" en vuilste vaat.
Instructies Voor de Gebruiker BESTEKCONTAINER Het bestek moet gelijkmatig over de container worden verdeeld, met het handvat naar beneden gericht waarbij u goed moet opletten dat u zich niet bezeert aan de lemmetten van de messen. De container is bestemd voor alle soorten bestek, uitgezonderd bestek waarvan de lengte de bovenste sproeiarm hindert.
Instructies Voor de Gebruiker BELADING VAN DE BOVENSTE KORF Plaats de vaat met de bovenkant naar voren gericht; kopjes en holle recipiënten moeten altijd met de opening naar beneden gericht worden geplaatst. Aan de linkerzijde van de korf kunnen op twee niveaus kopjes en glazen worden geplaatst. in het midden kunnen borden en schoteltjes verticaal in de speciale houders worden gezet.
Instructies Voor de Gebruiker 5. Schoonmak en onderhoud Vóór iedere ingreep moet u de elektrische voeding van het apparaat loskoppelen. 5.1 Waarschuwingen en algemene aanbevelingen Vermijd het gebruik van schurende of bijtende schoonmaakmiddelen. De buitenoppervlakken en de contradeur van de vaatwasser moeten met regelmatige tussenpozen met een zachte met een normaal schoonmaakmiddel voor geverfde oppervlakken bevochtigde doek worden schoongemaakt.
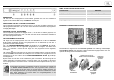
Instructies Voor de Gebruiker SCHOONMAKEN VAN DE FILTERGROEP Het verdient aanbeveling om regelmatig de centrale filter C te controleren en, indien • noodzakelijk schoon te maken.
Instructies Voor de Gebruiker KLEINE STORINGEN OPLOSSEN In sommige gevallen is het mogelijk om zelf eventuele kleine storingen met behulp van de onderstaande instructies te verhelpen.
Instructies Voor de Gebruiker 6. Oplossingen voor storingen in de werking De vaatwasser is uitgerust met een auto-diagnose systeem dat een vooraf geprogrammeerde reeks van mogelijke storingen van de vaatwasser kan opsporen en signaleren. TABEL VAN DOOR HET AUTO DIAGNOSE SYSTEEM GECONSTATEERDE STORINGEN STORING E1 E2 - E9 E3 E4 E5 E6 E7 E8 BESCHRIJVING De overstromingsbeveiliging (indien aanwezig) is in werking getreden. Het systeem dat het waterniveau in de vaatwasser beperkt heeft ingegrepen.
2 1 1 820 - 870 567 min. 567 598 60 2 52 0 75 - 165 130 60 1 90 3 Solo su alcuni modelli Certain models only Seulement sur certains modèles nur bei einige Modellen Sólo en algunos modelos alleen indien van toepassing 4 816-870 3 2 820870 4 6 5 min. 0,5 m max. 1,10 m 1/2” S N SF 3x16 3/4” 0,3-10 bar 0,3-10 bar 7 1,25 m 1,50 m 1,78 m 1,66 m min. 0,4 m 1,14 m 1,23 m 6 min. 0,00 m min.
7 8 LATO SUPERIORE BORD SUPERIEURE UPPER EDGE OBERKANTE SUPERFICIE INTERNA SURFACE INTERNE INNER SURFACE INNENFLACHE 9 8 10 9 Solo su alcuni modelli - Certain models only Seulement sur certains modèles - nur bei einige Modellen Sólo en algunos modelos - alleen indien van toepassing 11 12 10 Regolazione vite tensione molle (11) - Copertura foto con tappo in dotazione (12) Door spring Adjustement device (11) - Covering of hole using cap provided (12) Réglage des ressorts de la porte (11) - Couvertur