Table of Contents 1.1 1.2 1.3 1.4 1.5 10 General Description Cooktop Control panel Other parts Available accessories 2 Use 2.1 2.2 2.3 2.4 2.5 2.6 2.7 2.8 10 11 11 12 13 14 Instructions First use Using the accessories Using the cooktop Using the storage compartment Using the oven Cooking advice Programmer clock 3 Cleaning and maintenance 3.1 3.2 3.3 3.4 3.5 3.
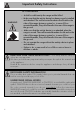
Important Safety Instructions TIP OVER HAZARD WARNING • A child or adult can tip the range and be killed. • Make sure that the anti-tip device has been properly installed and attached. The wall-mounted brackets should anchor the sides of the range (primary system) or, in case of floormounted brackets, they should anchor the rear of the range to the ground. • Make sure that the anti-tip device is re-attached when the range is moved.
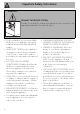
Important Safety Instructions WARNING EN • This appliance is intended for use in the home only. • Use this appliance only for its intended purpose. The manufacturer cannot be held liable for damage caused by improper use of this range. • This appliance complies with current safety regulations. Improper use of this range can result in personal injury and material damage. • Read all the instructions before installing or using the range for the first time.
Important Safety Instructions WARNING PRIMARY FASTENING SYSTEM: Visually check that the wall-mounted brackets are inserted into the appropriate lateral hooks (on both sides). • Proper installation is your responsibility. Make sure your appliance is properly installed and grounded by a qualified installer. • WARNING: NEVER use this appliance as a space heater to heat or warm the room. Doing so may result in carbon monoxide poisoning and overheating of the oven.
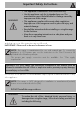
• DO NOT TOUCH SURFACE BURNERS OR THE INSIDE OF THE APPLIANCE: Heating elements may be hot even though they are dark in color. The oven cavity can be hot enough to cause burns. During and after use, do not touch areas near burners or the inside of the oven until they have had sufficient time to cool. Do not allow garments or any flammable material to come into contact with hot surfaces. If personal clothing or hair catches on fire, drop and roll immediately to extinguish the flames.
Important Safety Instructions • DO NOT USE ALUMINUM FOIL TO LINE ANY PART OF THE OVEN OR RANGETOP. Use of a foil liner can result in an electrical shock or fire hazard or obstruct the flow of heat and air. Foil is an excellent heat insulator, allowing heat to be trapped under it. This can interfere with cooking and can damage the enamel of the oven. • Prevent aluminum foil from contacting the heating elements. • Never leave the range unattended when using high heat settings.
• Make sure that your range is properly secured and the anti-tip device is correctly installed. Refer to the instructions inside the installation manual. • Do not stand or sit on the oven door or drawer. • Remove all packing materials and temporary labels from the oven and rangetop. • Record the Model and Serial number on Page 2 of this booklet. The Model and Serial numbers are on the Range ID plate. The ID Plates are visibly located on the back of the appliance and on the oven door frame.
Description 1 Description 1.
Description AUX = Auxiliary SR = Semi-rapid R = Rapid EN 1.2 Cooktop UR2 int = Ultra rapid internal crown UR2 est = Ultra rapid external crown 1.3 Control panel 1 Function knob 2 Indicator light The light function ( ) can be used when the oven is switched off. This light indicates a malfunction in the cooling system or temporary overheating. If the light remains constantly on, call an authorized repair service. The fan-assisted function ( ) can be used if the lower burner of the gas oven is lit.
Description 4 Cooktop burner knobs 1.4 Other parts Useful for lighting and adjusting the surface burners. Press and turn the knobs counter-clockwise to the value to light the relative burners. Turn the knobs to the zone between the maximum and minimum setting to adjust the flame. Shelves Return the knobs to the turn off the burners. position to 5 Programmer clock Useful for displaying the current time and programming the minute minder timer.
Description Oven tray EN 1.5 Available accessories Some models are not provided with all accessories. Ring reducer Useful when using small cookware. WOK ring Useful when using a wok. Rack Useful for collecting fat from foods placed on the rack above. The accessories intended to come into contact with food are made of materials that comply with the provisions of current legislation. Supplied and optional accessories can be requested from Authorized Assistance Centers.
Use 2 Use 2.1 Instructions High temperature inside the oven during use Danger of burns • Keep the oven door closed during cooking. • Protect your hands wearing heat resistant gloves when moving food inside the oven. • Do not touch the heating elements inside the oven. • Do not pour water directly onto very hot trays. • Do not allow children younger than 8 years old to come near the appliance when in operation.
Use • Do not spray any spray products near the oven. • Do not use or leave flammable materials near the oven or the storage compartment. • Do not use plastic kitchenware or containers when cooking food. • Do not put sealed cans or containers in the oven. • Do not leave the oven unattended during cooking operations where fats or oils could be released. • Remove all trays and racks which are not required during cooking. 2.
Use Tray rack Ring reducers The tray can be used two different ways: • Inside the rack (with the anti-tip stop facing upwards) to collect grease during cooking. • Resting on the rack (with the anti-tip stop facing downwards) to cook sweets, biscuits, pastries etc. The ring reducers have to be placed on the cooktop grates. Make sure they are properly placed.
2.4 Using the cooktop WARNING FIRE HAZARD • For your safety: do not allow the burner flame to extend beyond the edge of the pan. • Turn off all controls when the range is not in use. All the appliance's control and monitoring devices are located together on the front panel. The burner controlled by each knob is shown next to the knob. The appliance is equipped with an electronic ignition device. Simply press the knob and turn it counterclockwise to the maximum flame symbol, until the burner lights.
Use Correct positioning of the flame spreaders and burner caps Before lighting the cooktop burners, make sure that the flame spreaders are correctly positioned in their housings with their respective burner caps. Make sure that the holes in the flame spreaders (1) are aligned with the igniters (2) and thermocouples (3).
Use 2.5 Using the storage compartment The storage compartment is at the bottom right of the range. It can be used to store cookware or metallic objects necessary when using the appliance. 2.6 Using the oven EN Copper • Heats very quickly and evenly. Earthenware • Follow the manufacturer’s instructions. • Use low heat settings. Porcelain enameled steel or cast iron • See stainless steel or cast iron. Stainless steel • Heats quickly but unevenly.
Use Using the broiler Functions list High temperature inside the oven during use Danger of fire or explosion Oven The heat coming just from the bottom allows you to complete the cooking of foods that require a higher bottom temperature, without affecting their browning. Perfect for cakes, pies, tarts and pizzas. • Grilling processes must never last more than 30 minutes. Electronic spark ignition: 1. Open the oven door completely. 2. Press and turn the temperature knob clockwise to the symbol .
2.7 Cooking advice General advice • Use a convection function to achieve consistent cooking at several levels. • It is not possible to shorten cooking times by increasing the temperature (the food could be overcooked on the outside and undercooked on the inside). Advice for cooking meat • Cooking times vary according to the thickness and quality of the food and to consumer taste. • Use a meat thermometer when roasting meat, or simply press on the roast with a spoon.
Use Advice for defrosting and proofing • Place frozen foods without their packaging in a lidless container on the first shelf of the oven. • Avoid overlapping the food. • To defrost meat, use the rack placed on the second level and a tray on the first level. In this way, the liquid from the defrosting food drains away from the food. • The most delicate parts can be covered with aluminum foil. • For successful proofing, a container of water should be placed in the bottom of the oven.
Setting the time If the time is not set, the oven will not switch on. On the first use, or after a power failure, the digits will be flashing on the appliance's display. 1. Press the and keys at the same time. The dot between the hours and the minutes flashes. 2. The time can be set using or . Keep the key pressed in to increase or decrease rapidly. 3. Wait approx. 5 seconds without pressing any key in order for the function to activate. The current time and the symbols and will appear on the display. 4.
Use Minute minder timer The minute minder timer does not stop the cooking operation but rather informs the user when the set time has run out. The minute minder timer can be activated at any time. 1. Press . The display shows the digits and the indicator light flashing between the hours and the minutes. 2. Use the or key to set the required minutes. 3. Wait approx. 5 seconds without pressing any key to finish setting the minute minder. The current time and the symbols and appear on the display.
Cleaning and Maintenance Food Lasagne Static Oven Runner position from Temperature Time (Kg) the bottom (°C) (minutes) Weight Fan-assisted Oven Temperature Time (°C) (minutes) 5 3 230 - 240 50 - 60 230 - 240 45 - 50 Cannelloni 2.5 2 220 - 230 25 - 30 220 - 230 25 - 30 Pasta bake 2.5 2 220 - 230 25 - 30 220 - 230 25 - 30 Roast chicken 1.
Cleaning and Maintenance 3 Cleaning and maintenance 3.2 Cleaning the appliance 3.1 Instructions To keep the surfaces in good condition, they should be cleaned regularly after use. Let them cool first. WARNING ELECTRICAL SHOCK HAZARD • Before servicing, disconnect the appliance from the power supply. Improper use Risk of damage to surfaces • Do not use steam jets to clean the appliance.
Flame spreaders and burner caps 3.3 Removing the door For easier cleaning, the flame spreaders and the burner caps can be removed. Wash them in hot water and non-abrasive detergent. Carefully remove any encrustation, then wait until they are perfectly dry. Refit the flame spreaders making sure that they are correctly positioned in their housings with their respective burner caps. Visually checking pilot(s) and burner flames. For easier cleaning, the door can be removed and placed on a cloth.
Cleaning and Maintenance 3. To reassemble the door, put the hinges in the relevant slots in the oven, making sure that grooved sections A are resting completely in the slots. Lower the door and once it is in place remove the pins from the holes in the hinges. Removing racks/trays support frames Removing the rack/tray support frames enables the sides to be cleaned more easily. To remove the rack/tray support frames: 1. Unscrew the two fastening pins of the frame. 3.
Cleaning and Maintenance 4. Unscrew and remove the lamp. EN 3.6 Extraordinary maintenance WARNING ELECTRICAL SHOCK HAZARD • Before servicing, disconnect the appliance from the power supply. Replacing the internal light bulb 1. Completely remove all accessories from inside the oven. 2. Remove the racks/trays support frames. 3. Remove the bulb cover using a tool (e.g. a screwdriver). 5. Replace the lamp with one of the same type (25W). 6. Refit the cover.
Cleaning and Maintenance Installing and removing the seal Minimum adjustment To remove the seal: • Unhook the clips in the 4 corners and in the centre, then pull the seal. For natural Gas: Light the burner and turn the knob to the minimum position . Remove the gas tap knob and turn the adjustment screw at the side of the tap rod until the desired minimum flame is achieved.