WASHER DRYER INSTRUCTIONS MANUAL EN 1
EN Contents 1. The new washing system 3 2. Safety warnings 4 3. Installation instructions 7 4. Description of controls 14 5. Washing instructions 18 6. Drying instructions 24 7. Cleaning and maintenance 26 8. Troubleshooting 28 9. Control panel symbols 30 This appliance is marked according to the European directive 2002/96/EC on Waste Electrical and Electronic Equipment WEEE).
EN 1. THE NEW WASHING SYSTEM This new washer dryer is the outcome of years of research. The leading-edge design and the quality of the production processes used to manufacture this product ensure it will give you many years of excellent service. Its concept satisfies all current and future washing and drying requirements. Its low water, power and detergent consumption help protect the environment and reduce running costs to a minimum. Water and power consumption has been reduced in all programmes.
EN 2. SAFETY WARNINGS Attention! These warnings are given for safety reasons. Please read them carefully before installing and using the appliance. This manual forms an integral part of the appliance and must therefore be kept intact together with the machine. Before using the appliance, carefully read all the instructions contained in this manual. Installation must be performed by a qualified technician in compliance with the regulations in force.
EN Do not wash petrol-soaked garments in the washer dryer. Make sure there are no inflammable items (e.g.: lighters, matches, etc.) in pockets before washing. If volatile fluids have been used to clean garments, make sure that the substances have been removed before loading them in the washing machine. Before loading garments for washing, make sure the pockets are empty, the buttons securely fixed and the zips closed. Do not wash frayed or torn garments.
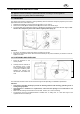
EN For Great Britain only Warning: this appliance must be earthed. Fuse replacement If the mains lead of this appliance is fitted with a BS 1363A 13amp fused plug, to change a fuse in this type of plug use an A.S.T.A. approved fuse to BS 1362 type and proceed as follows: 1. Remove the fuse cover (A) and fuse (B) 2. Fit replacement 13A fuse into fuse cover 3.
EN 3. INSTALLATION INSTRUCTIONS Important ! The appliance must be installed by a specialised technician according to current regulations. This washer dryer is very heavy. Take care when lifting it. 3.1 UNPACKING The inside of the machine comprises a moving assembly which is blocked for transport purposes by the screws (A) located at the rear of the washer dryer. 1. 2. 3. Release the assembly by removing these screws with a 13 mm wrench.
EN 3.3 ADDITIONAL IMPORTANT INSTALLATION INSTRUCTIONS 1. 2. 3. Carefully read the installation instructions in point 3 on page 6 of the washer dryer installation manual. After the initial instructions have been adhered to. I.e. removing transit bolts and fitting the adjustable feet etc. Using a spirit level, make sure that the washer dryer is completely level and the overall height of the legs, including the rubber foot and the locking nuts, is no greater than 25mm maximum.
EN 3.5 DRAIN CONNECTION 1. Insert the end of the drain hose into a drain pipe having an internal diameter of at least 4 cm and a height ranging between 50 and 90 cm, or attach it (using the relative curved plastic profile) to a basin or bath tub. 2. Always check that the end of the drain hose is securely attached in order to prevent the repulsive force of the water from moving it out of position. Attention! • Do not bend or obstruct the hose as this will reduce the flow of water.
EN 3.7 FITTING THE FURNITURE DOORS Once the washer dryer has been correctly installed and commissioned, the furniture door can be fitted following the dimensions on the template and the instruction enclosed in the washer dryer packaging. Please note that only furniture doors of a thickness between 16mm and 21mm are compatible with this washer dryer. Important – The machine complies with the current safety provisions governing electrical equipment.
EN 3.7.2 Use of the furniture door fixing template Proceed in the following way when applying the wooden panel to the washing dryer: 1. 2. 3. 4. 5. 3.7.3 1. 2. 3. 4. When fitting the furniture door utilising the door template you will need to make sure that the bottom and the top of the furniture door will line up with the adjacent cabinet furniture doors.
EN 5. 3.7.4 Fix the panel to the washing machine following the instructions shown below Adjusting the hinges If, after applying the panel to the washing machine, it is slightly inclined or off-centre with respect to the front of the machine, correct its position by adjusting the mobile part of the hinges (see above). 3.7.5 Recessing the appliance Push the washing machine into its recess.
EN 3.7.6 Fitting the plinth The base plinth for kitchen furniture must be removable in the area in front of the washer dryer to allow access for routine maintenance of the drain pump if it becomes clogged with buttons, fasteners, or similar objects, and for our engineers to be able to remove the washer dryer for service. Please note: our engineers will not remove plinths that have been fixed into position by glues or mastics, or where removal could cause third-party damage.
EN 4. DESCRIPTION OF CONTROLS 4.1 CONTROL PANEL All the commands and controls of the appliance are assembled together on the front panel.
EN A Open door button Press the button to open the door. Chapter 5 – Washing instructions – explains how the door works and how to use it.
EN I Select spin speed and drying time for delicates button Press the button repeatedly to select the required spin speed. The following spin speeds are available: • 0000: spin disabled and stop with tub full. The machine does not perform the final spin and ends the washing programme with water in the tub. To drain the water, see the explanations shown in paragraph 5.
EN Economy cycle button - e Press this button for cottons programmes, the machine will perform an extended wash at 35°C (biological step) thereby offering good washing performance combined with power saving. The machine then continues the cycle at the selected temperature. N.B.: Press the economy cycle button to obtain a maximum washing temperature of 60° C and the elimination of the pre wash cycle.
EN 4.2 DETERGENT TRAY This is located to the left of the control panel. Pull it out to open. The tray comprises four compartments which are marked as follows “1”: pre-wash detergent “2”: main wash detergent “ ” or “3”: fabric softener, starch, etc. (treatment products). Compartment “4” is used for bleach. If there is a cover marked , this means that bleach cannot be used with this model of machine. If bleach can be used with the machine, there is no cover. 5. WASHING INSTRUCTIONS 5.
EN 5.2 OPENING THE DOOR The machine is fitted with a safety device that prevents the door from opening while it is working. 1. 2. Before opening the door, wait 1 or 2 minutes after the programme ends (“End” LED on) to allow the safety device to disengage. Make sure there is no water in the tub and that the drum is not moving. Open the door by pressing the “Open door” button on the front panel and pulling it open.
EN Water hardness Hardness level Soft Moderately hard Hard Very hard French degree fH Up to 15° 15° - 25° 25° - 40° Over 40° German degree dH Up to 8° 8° - 14° 14° - 22° Over 22° 5.6 DOSING POWDER DETERGENTS Normally dirty washing 1. Choose a programme without prewash. 2. Pour the total quantity of detergent indicated on the packs into compartment “2” of the detergent tray. Very dirty washing 1. Choose a programme with prewash. 2.
EN Intensive washing programme for resistant cotton, coloured or hemp fabrics. Delicate washing programmes for delicate artificial synthetic fibres, blends or linen fabrics. They prevent the formation of creases that are difficult to remove during ironing. Wool programme only for garments marked “pure wool” washable, treated, shrink proof. Other types of wool should be hand washed or dry-cleaned.
EN 5.10.3 DELAYED START (ONLY FOR MODELS FEATURING THIS FUNCTION) Press the delayed start button ( ). The relative LED located above the button lights up. The display visualises the time remaining (hours/minutes) before the selected washing programme starts: the display initially shows 0 hours 0 minutes for all programmes. Press the button repeatedly. The Start delay increases by 30 minutes each time it is pressed for the first 12 hours. After that it increases to 60 minutes up to 24 hours.
EN 5.13 END OF PROGRAMME The washing programmes are automatically completed, the display shows END and the “Time remaining” LED lights up. 1. 2. 3. 4. 5. Turn the programmes knob to OFF to switch off the machine. Open the door. Remove the washing from the drum. Leave the door ajar in order to allow the inside of the washer dryer to dry. Turn off the water tap.
EN 6. USING THE MACHINE FOR DRYING PURPOSES 6.1 GENERAL INFORMATION During drying cycles it is essential that the water tap is open and that the drain hose is correctly positioned. With this machine it is possible to set wash-only programmes, dry-only programmes and wash-dry programmes. For the latter programmes, the cycle shifts automatically from washing to drying without the controls being touched and the cycle continues after washing.
EN During the selection of the drying programme the LED of the normal drying programme stays on. This programme indicates an intense drying cycle and is meant for resistant items and cottons. If a delicate drying cycle is required (less intensive drying, suitable for delicates and synthetics), press the Delicate Drying button. In this case the delicate drying programme LED is shown. After selecting a drying programme (normal or delicate), press the Drying selection button within 5 seconds. 6.
EN 7. CLEANING AND MAINTENANCE Important – Before cleaning or servicing the machine, remove the plug from the socket. 7.1 EXTERNAL CLEANING • • • • • Regular and constant cleaning will keep your appliance looking like new. Clean the outer surfaces with soap and water and then dry thoroughly with a soft cloth. Clean parts in plastic with a damp cloth. Do not scratch with sharp objects and do not use solvents or abrasive products as these will damage the surface.
EN 3. Pull out the drain hose “A”. Attention: if the hose is hot it means the water is hot or boiling. Place a tray on the floor and remove the plug “B” to drain the water. Depending on the quantity of water, it may be necessary to empty the tray several times. When no more water comes out, push the hose back in and screw back the plug “B”. 4. Unscrew the cover of the pump “D” by turning it anti-clockwise. Clean the pump body and remove any foreign bodies.
EN 8. TROUBLESHOOTING This product complies with current safety regulations governing electrical equipment. For safety reasons, all technical inspections or repairs must be performed by qualified technicians in order to prevent hazardous situations for users. If the machine does not work, before calling the Service Centre and spending money unnecessarily, check that the operations indicated in this troubleshooting table have been performed.
EN 11 The machine does not spin The unbalanced load sensor has triggered because the washing is not uniformly distributed inside the drum. If the washing is wet at the end of the cycle, distribute it well inside the basket and repeat just the spin cycle. 12 Draining water from the drum In the event of a power failure or a fault in the appliance, the water inside the drum can be drained as described in paragraph 6.
EN 9.