
User Guide


5-20 — Memory Mode Smith Corona Corporation
5. Press Spacebar twice to move the cursor to Form, and press Return.
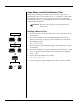
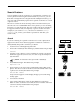
The display illustrated below will appear. The cursor will be in the
first typing position.
This display gives line and space locations of your print hammer in
decimal format.
6. Automatically insert your form.
IMPORTANT: Precisely align the paper at the left paper alignment
mark, and use auto insert; otherwise alignment may
be incorrect during printing. Also, do not use the
platen knob to adjust the paper.
7. Position the print hammer on the form’s fill-in positions. (Be sure to
use only the cursor keys, Spacebar, Return, Back Space, and the keys
described in “Micro Alignment” to position the print hammer.)
8. Type any text that will remain constant. Text will print on the form
and appear on the display. When you recall the file to fill in the same
form again, this text will automatically print when you are using the
form file.
9. Press Code + Stop (S) to enter Stop Codes in areas that will change
each time the form is used (see “Stop Codes”). If you mistakenly
enter a Stop Code or text, you may use Correct, WordEraser, or
LineEraser to make your corrections. To erase a previous stop code
and/or text, locate cursor to previous sections.
NOTE: To prevent text from extending over into other areas of
the form, type spaces after the Stop Code. The total
number of characters permitted to be entered at a Stop
Code will then be limited to the number of spaces
immediately after the Stop Code.
10. Press Code + Close (C) to save the file when you are done.
NOTE: Only one page can be created for a Forms Layout
document. To fill in a multiple page form, new files must
be created for each page.
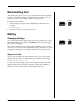
End of Page Pitch Line Impression Keyboard
Line: 6.00 Space: 8.00