
A350 - Troubleshooting-Guide


|
21
3D Printing Module Clashes against the Print Sheet
during Calibration
Possible Causes
• You are using an old version of the firmware.
• Thesensor isn't seated right.
Actions
1. Download and installthe latest version offirmwarefrom
https://forum.snapmaker.com/t/snapmaker-2-0-firmware-updates-and-downloads/5443/12.
See if this solves
the problem. If not, follow the steps below to test your probe sensor.
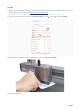
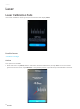
2. Start auto-calibration on the Touchscreen. The 3D Printing Module will go back to its home position and then
move down.
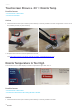
3. Put a palette knife to test the probe sensor as shown in this video:
https://youtu.be/Z47V802sSnc.If the
probe sensor works, the 3D Printing Module will stop moving.
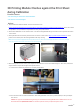
Note: The first picture highlights where the probe sensor is.When the nozzle approaches the Print Sheet,red light
willcome out from the nozzle, as shown in the second picture.
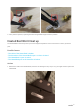
4. Now if the probe sensor works, then maybe it's because the sensor isn't seated right. In this case, follow the
steps below to adjust the height of the probe sensor.
4.1 Check if the aluminum platform is correctly assembled.
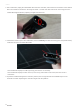
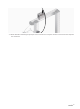
4.2 Turn off the machine and assemble the 3D Printing Module as shown in picture below; it lets you adjust
the sensor.
Caution: For purpose of troubleshooting, the way you assemble the Printing Module here is different from the one
demonstrated in the Quick Start Guide. You should only do this when you adjust the probe sensor.