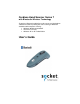
Cordless Hand Scanner Series 7 with Bluetooth® Wireless Technology Featuring a Bluetooth enabled bar code scanner and SocketScan software for wirelessly adding bar code scanning to Bluetooth enabled mobile computers running: • Windows Mobile 2003/2003SE • Palm OS 5.
July 2005 Document # 6410-00233 F Copyright Notice Copyright © 2005 Socket Communications, Inc. All rights reserved. Socket, the Socket logo and Mobility Friendly are registered trademarks of Socket Communications, Inc. Cordless Hand Scanner with Bluetooth Wireless Technology is a trademark of Socket Communications, Inc. Bluetooth and the Bluetooth logos are trademarks owned by Bluetooth SIG, Inc., U.S.A. and licensed to Socket Communications, Inc.
Table of Contents 1 | INTRODUCTION About the Software About Combining Scanning with Bluetooth System Requirements, Package Contents Product Registration, Hardware Features 2 | SETUP FOR WINDOWS MOBILE STEP 1: Install Batteries and Attach Tether STEP 2: Charge the Scanner STEP 3: Uninstall Other Scanning Software STEP 4: Install the Software STEP 5: Configure Scanner Settings STEP 6: Connect Scanner to Pocket PC via Bluetooth STEP 7: Scan Data into Your Application OPTIONAL: Select Symbologies OPTIONAL: Con
APPENDICES A | SPECIFICATIONS 60 B | SAFETY AND USAGE TIPS 62 C | BAR CODE LABEL SPECIFICATIONS 64 D | ENABLING OR DISABLING SYMBOLOGIES 65 E | DECODE ZONE 68 F | TROUBLESHOOTING 69 G | TECHNICAL SUPPORT 71 LIMITED WARRANTY 72 REGULATORY COMPLIANCE 74 4
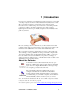
1 | Introduction If you need to collect bar coded data but don't want to be tied to your mobile or desktop computer, Socket's Cordless Hand Scanner (CHS) Series 7 with Bluetooth wireless technology is just what you're looking for. This innovative device combines the power of laser bar code scanning with the convenience of Bluetooth wireless technology in a single compact, lightweight device that is ergonomically designed to fit comfortably in the palm of your hand.
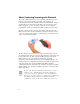
About Combining Scanning with Bluetooth The Cordless Hand Scanner represents an optimal combination of proven laser bar code scanning technology and state-of-the-art Bluetooth connectivity. Because of the problems inherent in the intermittent storage of scanned data in on-board memory if the Bluetooth connection is lost, the CHS is designed to operate only when connected to the host, with the powerful Class 1 radio providing the maximum possible connection range.
System Requirements Your mobile computer should meet these minimum requirements: • Any of the following operating systems: − Windows Mobile 2003/2003SE − Palm OS 5.2 or later − Windows XP or Tablet XP • Any of the following Bluetooth stacks: − Socket Drakar v1.4 (from Socket SDIO and CF Connection Kits) − IVT BlueSoleil v1.4.7 or later (from Socket CF Connection Kit with Adapter or Socket Class 1 USB Adapter) − Widcomm v1.
Product Registration Socket highly recommends that all customers register their Socket products. Product registration is required for technical support. Register online at: www.socketcom.com/prodreg Hardware Features Rechargeable Battery and AC Adapter Recharge the internal battery by using the included AC adapter. The adapter rating is 5V, 2A, positive pole center. A fully charged battery should provide roughly 8 hours of normal operation. WARNING: Charge ONLY NiMH batteries in the CHS.
Status Indicator LED LED Bluetooth Status (Blue) Good Read (Green) Battery Status (Red) LED Activity 1 blink per second Meaning Bluetooth radio is on, but not connected. 1 blink per 5 seconds Bluetooth radio is on, connection established. Green Data successfully scanned and transmitted to host device. 1 blink per second Less than 20% of battery life remaining. Solid red Batteries are charging. Off when connected to charger Batteries are fully charged.
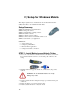
2 | Setup for Windows Mobile This chapter explains how to install and use the Cordless Hand Scanner (CHS) with a Bluetooth enabled Pocket PC 2003. Setup Summary STEP 1: Install batteries and attach tether. STEP 2: Charge the scanner. STEP 3: Uninstall other scanning software. STEP 4: Install the software. STEP 5: Configure scanner settings. STEP 6: Connect scanner to Pocket PC via Bluetooth. STEP 7: Scan data into your application. OPTIONAL: • Select symbologies. • Configure prefix/suffixes.
STEP 2: Charge the Scanner Use the included AC adapter to charge the Cordless Hand Scanner. The scanner’s NiMH batteries must be charged for at least 4 hours before the first use. The Battery Status LED will emit a solid red light while charging, and turn off when the batteries are fully charged. WARNING: Do not attempt to charge alkaline batteries — this may cause alkaline batteries to leak and damage the CHS.
STEP 4: Install the Software 1. Use ActiveSync and a serial/Ethernet/USB cable or cradle to make an active connection between the mobile computer and a host PC. 2. Insert the installation CD into your host PC. 3. Use My Computer or Windows Explorer to access your CD-ROM drive. In the CD, click on SETUP.EXE. 4. Follow the instructions on your screen to begin the installation process for Windows CE (also compatible with Windows Mobile 2003). • Read the instructions in the Welcome screen, then click Next.
5. In the File Download screen click Run. 6. If a Security Warning screen appears, click Run. 7. The SocketScan for Windows CE Setup Program will begin. Follow the instructions on your screen to install the software. 8. When software installation is complete, disconnect the Pocket PC from the host PC. Soft reset the Pocket PC by pressing the reset button.
STEP 5: Configure Scanner Settings 1. Start the Socket CHS configuration utility. Tap Start | Settings | System | Socket CHS. 2. In the General screen, check the box Enable Socket CHS Support. 3. In the Port configuration field, select the Bluetooth hardware that you are using with your Pocket PC. Depending on which option you select, additional fields may appear. Device information will also appear on the screen if you have previously connected to the CHS.
Microsoft: You must assign the CHS as your favorite. Tap on the Favorite button to initiate a Bluetooth device search. When the CHS is found, select it from the list and tap OK. 4. Tap on the Scanner tab.
• Trigger Operation: − Scan always: Select if you would like the CHS to scan whether or not it has a Bluetooth connection to the host device. − Scan only when connected to host: Select if you would like the CHS to detect a Bluetooth connection to the host device before it scans. Scanning will be a few milliseconds slower. This option allows the CHS to be triggered remotely if needed.
STEP 6: Connect Scanner to Pocket PC via Bluetooth 1. Turn on the Cordless Hand Scanner. Press the small power button for five seconds, until you see the LED turn blue. The LED should blink blue once every second to show that the Bluetooth radio is on but not connected. If the LED begins blinking red, the battery needs to be recharged. 2. Prepare the Bluetooth hardware for your Pocket PC. Make sure the Bluetooth radio is turned on.
3. Start SocketScan. Tap Start | Programs | SocketScan. 4. The SocketScan icon should appear in the task tray (visible in the Today screen), indicating that your device is not currently connected to the CHS. Tap on the icon. In the pop-up menu, select Connect CHS. Your Pocket PC cannot connect to the CHS if another device is assigned as the favorite/default Bluetooth serial device. If needed, remove any such settings.
The Cordless Hand Scanner will appear as Socket CHS [xxxxxx], where the characters in brackets are the last 6 characters of the scanner’s Bluetooth MAC address. Socket stack Widcomm stack, Fujitsu Pocket LOOX If multiple Cordless Hand Scanners were detected, identify yours by checking the MAC address printed on a label in the battery compartment. Your screen may vary if you are using different Bluetooth hardware/software. 6.
7. Your device will automatically connect to the CHS. If a passkey is requested, enter 1234. To indicate the connection, the CHS will beep once, and the SocketScan icon will change to show an image of the scanner. Note: If you are using the Socket SDIO or CF card, the Socket Bluetooth icon in the task tray will also begin blinking to indicate that the devices have connected. If the Pocket PC suspends or the CHS is taken out of range, the Bluetooth connection will be lost.
STEP 7: Scan Data into Your Application 1. Start the Windows application that you want to receive the data (e.g., Excel, Notepad, etc.). Make sure a document or spreadsheet is open. 2. Press the trigger button and scan the code. For example, try this bar code: When data is read and transmitted to the host, the laser will turn off. Depending on the settings you chose in the Socket CHS configuration tool, the scanner may beep and/or the LED may flash green.
OPTIONAL: Select Symbologies The applet makes it quick and convenient to modify which symbologies you want the scanner to recognize. By default, the scanner is set to recognize nine of the most common symbologies. 1. Tap on the SocketScan icon. In the pop-up menu, tap Symbology Selector... 2. In the screen that appears, check the symbologies you wish to enable. Uncheck those you wish to disable. Tap ok. Symbologies not supported by the CHS will be grayed out.
OPTIONAL: Configure Prefix/Suffixes The SocketScan applet lets you specify prefix and/or suffix characters to be added automatically to the data you scan. This helps to further eliminate manual data entry. 1. Tap on the SocketScan icon. In the pop-up menu, tap Prefix/Suffix. You can configure prefix/suffixes whether or not the CHS is connected to your Pocket PC. 2. In the pop-up menu, select Prefix/Suffix... 3.
OPTIONAL: Run Scan Demo Scan Demo makes it easy to determine the symbology, number of characters, and decoded data (in either ASCII or Hex) of any bar code supported by the scanner. This is especially useful if you encounter a bar code that the scanner will not decode by default. 1. Tap on the SocketScan icon. In the pop-up menu, tap Scan Demo. This will close SocketScan and open Scan Demo as a separate application. Accessing Scan Demo disconnects the Bluetooth link.
OPTIONAL: Configure Automatic Connections You can only configure automatic connections for Pocket PCs using either Socket’s SDIO/CF Connection Kit or a built-in Bluetooth stack. The first time you connect your Pocket PC to the CHS, you will be prompted to enable automatic connections. Afterwards, you can follow the appropriate instructions below to modify settings for automatic connections anytime. Socket SDIO or CF Connection Kit: 1. From the Bluetooth Devices folder, tap Tools | My Favorites 2.
Built-in Bluetooth Stack: 1. Start the Socket CHS configuration utility. Tap Start | Settings | System | Socket CHS. 2. The General screen should already display the correct Bluetooth settings, already used to connect the Pocket PC to the CHS. Device information about the CHS you previously connected to should also be displayed. 3. Check the Automatically connect to CHS box to have your Pocket PC automatically connect to the CHS whenever you start SocketScan. Tap ok.
3 | Setup for Palm This chapter explains how to install and use the Cordless Hand Scanner (CHS) with a Bluetooth enabled device running Palm OS 5.2 or later. Setup Summary STEP 1: Install batteries and attach tether. STEP 2: Charge the scanner. STEP 3: Uninstall other scanning software. STEP 4: Install the software. STEP 5: Connect scanner to PDA via Bluetooth. STEP 6: Scan data into your application. OPTIONAL: • Configure scan settings. • Select symbologies. • Test bar codes.
STEP 2: Charge the Scanner Use the included AC adapter to charge the Cordless Hand Scanner. The scanner’s NiMH batteries must be charged for at least 4 hours before the first use. The Battery Status LED will emit a solid red light while charging, and turn off when the batteries are fully charged. Do not attempt to charge alkaline batteries — this may cause alkaline batteries to leak and damage the CHS. The red Battery Status LED will not function properly if standard AAA alkaline batteries are being used.
STEP 4: Install the Software 1. Use HotSync and a serial/Ethernet/USB cable or cradle to connect your device to a host PC. 2. Insert the installation CD into your host PC. 3. Use My Computer or Windows Explorer to access your CD-ROM drive. In the CD, click on SETUP.EXE. 4. Follow the instructions on your screen to begin the installation process for Palm. • Read the instructions in the Welcome screen, then click Next. • In the Main Page, click Install Software. • In the Installation screen, click Palm OS.
5. In the File Download screen click Run. 6. If a Security Warning screen appears, click Run. 7. The SocketScan Installation program will begin. Follow the instructions on your screen to install the software. 8. When software installation is complete, disconnect the device from the host PC. Soft reset the device by pressing the reset button.
STEP 5: Connect Scanner to PDA via Bluetooth 1. Turn on the Cordless Hand Scanner. Press the small power button for five seconds, until you see the LED turn blue. The LED should blink blue once every second to show that the Bluetooth radio is on but not connected. If the LED begins blinking red, the battery needs to be recharged. 2. Start SocketScan. Tap Home. In the upper right corner, make sure All is selected. Scroll down and tap on the SocketScan icon. 3.
5. If you have not yet enabled your Bluetooth hardware, a message will ask if you wish to do so. Tap OK. 6. Your device will begin searching for Bluetooth enabled devices in range. After it finishes searching, select the Socket CHS from the list of discovered devices and tap OK. The Cordless Hand Scanner will appear as Socket CHS [xxxxxx], where the characters in brackets are the last 6 characters of the scanner’s Bluetooth MAC address.
8. When the scanner connects to your device, the CHS will beep once. The main screen of SocketScan will also indicate that the scanner is enabled, and the Configure, Symbologies, and Test buttons will appear at the bottom of the screen. If the PDA suspends, the CHS will automatically re-connect once you turn on the PDA again. If the CHS is taken out of range, or if the Bluetooth connection is otherwise lost, to resume operation you must enable it again in SocketScan.
STEP 6: Scan Data into Your Application 1. Start the Palm application that you want to receive the data (e.g., Memo). Make sure a document or spreadsheet is open. Note: You cannot scan data into Palm Note Pad, because it is a graphics-based program. 2. Press the trigger button and scan the code. For example, try this bar code: When data is read and transmitted to the host, the laser will turn off.
OPTIONAL: Configure Scan Settings 1. Make sure the main screen of SocketScan reports that the CHS is enabled. Tap Configure. You can configure prefix/suffixes whether or not the CHS is connected to your device. 2. The Configure screen will appear. Enter any settings, as desired: • Trigger Mode: Select Local to directly trigger the scanner whenever you press the trigger button. Select Remote to have the scanner verify a connection to your PDA before it activates the laser.
• Insert Special: First tap in the Prefix or Suffix field to indicate where you would like to enter special data, such as a date stamp, time stamp, tab, etc. Then tap on the Insert Special drop-down menu and select the type of special data to enter. • Prefix: Tap to enter characters you would like appended before scanned data (128 character maximum). Besides special data items, only printable ASCII characters can be used.
OPTIONAL: Select Symbologies The feature makes it easy to modify which symbologies you want the scanner to recognize. By default, the scanner is set to recognize eight of the most common symbologies. 1. In the main screen of SocketScan, tap Symbologies. 2. In the screen that appears, check the symbologies you wish to enable. Uncheck those you wish to disable. Tap OK. Enabling all possible symbologies will make the decode process slightly longer.
OPTIONAL: Test Bar Codes SocketScan includes a Test feature that makes it easy to determine the symbology, number of characters, and decoded data (in either ASCII or Hex) of any bar code supported by the scanner. This is especially useful if you encounter a bar code that the scanner will not decode by default. 1. In the main screen of SocketScan, tap Test. 2. The Test Scan screen will appear. If desired, check the View as Hex box to view scanned data in hexadecimal format.
4 | Setup for Windows XP This chapter explains how to install and use the Cordless Hand Scanner (CHS) with a Bluetooth enabled computer running Windows XP. Setup Summary STEP 1: Install batteries and attach tether. STEP 2: Charge the scanner. STEP 3: Uninstall other scanning software. STEP 4: Install the software. STEP 5: Connect scanner to computer via Bluetooth. STEP 6: Configure scanner settings. STEP 7: Scan data into your application. OPTIONAL: • Assign sound and prefix/suffixes.
STEP 2: Charge the Scanner Use the included AC adapter to charge the Cordless Hand Scanner. The scanner’s NiMH batteries must be charged for at least 4 hours before the first use. The Battery Status LED will emit a solid red light while charging, and turn off when the batteries are fully charged. WARNING: Do not attempt to charge alkaline batteries — this may cause alkaline batteries to leak and damage the CHS.
STEP 4: Install the Software 1. Insert the installation CD into your host PC. 2. Use My Computer or Windows Explorer to access your CD-ROM drive. In the CD, click on SETUP.EXE. 3. Follow the instructions on your screen to begin the installation process for Windows XP. • Read the instructions in the Welcome screen, then click Next. • In the Main Page, click Install Software. • In the Installation screen, click Windows XP.
4. In the File Download screen click Run. Note: Screens for Internet Explorer 6.0 are shown. 5. If a Security Warning screen appears, click Run. 6. The SocketScan for Windows XP Setup program will begin. Follow the instructions on your screen to install the software.
STEP 5: Connect Scanner to Computer via Bluetooth The very first time you connect the CHS to your computer, you must manually connect via your Bluetooth software. Afterwards, you will be able to connect directly from SocketScan by right-clicking on the SocketScan icon and selecting Connect CHS. If desired, you can also configure the devices to automatically connect whenever within range. 1. Turn on the Cordless Hand Scanner. Press the small power button for five seconds, until you see the LED turn blue.
2. Follow the appropriate instructions for your Bluetooth hardware and software to discover and connect to the CHS. Socket Connection Kit with BlueSoleil software: • Insert the Socket card into your computer, using a CF-to-PC Card adapter, or insert the Class 1 USB Adapter to the USB port. • Start BlueSoleil. Click on the BlueSoleil icon on your desktop, or click Start | All Programs | IVT BlueSoleil | BlueSoleil. • Click My Bluetooth | Security.
WIDCOMM: To determine if your computer uses a WIDCOMM Bluetooth stack, check the stack version in your Bluetooth software. Refer to the documentation for your Bluetooth hardware/software for instructions on discovering and connecting to the CHS. Many Bluetooth USB adapters use the WIDCOMM stack. Although the name may be different, the Bluetooth manager screen will resemble the one shown below. • Perform a Quick Connect to a Bluetooth Serial Port. Click on the Bluetooth icon in the task tray.
Microsoft Windows XP Service Pack 2: Refer to the documentation for your Bluetooth hardware/software for instructions on discovering and connecting to the CHS. • Use the Add Bluetooth Device Wizard to discover and connect to the Cordless Hand Scanner. Click on the Bluetooth icon in the task tray. In the pop-up menu, click Add a Bluetooth Device.
Other Bluetooth Hardware/Software: Refer to the documentation for your Bluetooth hardware/software for instructions on discovering and connecting to the CHS. Although the CHS may operate correctly with other Bluetooth stacks, Socket has only confirmed compatibility with the Socket, Widcomm, and Microsoft SP2 Bluetooth stacks. • During the device discovery, the Cordless Hand Scanner will appear as Socket CHS [xxxxxx] The characters in brackets are the last 6 characters of the scanner’s Bluetooth MAC address.
STEP 6: Configure Scanner Settings 1. Start SocketScanXP by clicking on the icon on your desktop. Otherwise, you can click: Start | All Programs | SocketScanXP | SocketScanXP. 2. The SocketScan icon should appear in the task tray at the bottom of your screen, indicating that your computer has not detected a scanner. Right-click on the icon. In the pop-up menu, click Settings. 3. Click on the CHS tab. Check the box Enable Socket CHS support. 4.
• Widcomm: Select if your computer uses the Widcomm Bluetooth stack. Many third-party USB Bluetooth adapters use the Widcomm stack. The COM Port field will not appear for Widcomm. • Microsoft SP2: Select if your computer uses Microsoft’s Windows XP Service Pack 2 Bluetooth stack. In the COM Port field, select the Outgoing COM port number assigned to the CHS. • Other: Select if using an add-on Bluetooth adapter not made by Socket. In the COM Port field, select the Serial COM port assigned to the CHS (i.e.
• Good read indication on CHS: Select how you would like the scanner to indicate that data has been successfully scanned and transmitted to the host device. (This is separate from good read indications from the computer, which are configured in the General screen). − Beep: If you would like the CHS to beep to indicate good reads, indicate the frequency. If using the CHS in a noisy environment, you may want to adjust the frequency as needed.
After you configure the correct Bluetooth hardware settings in SocketScan, the Connect CHS menu option allows you to connect to the CHS directly from SocketScan, instead of manually connecting via your Bluetooth software. The Connect CHS option will not appear unless you checked the box Enable CHS Support in the SocketScanXP settings. SocketScan will not be able to connect to the CHS if you have another device assigned as your favorite or default Bluetooth serial device. If needed, remove any such settings.
STEP 7: Scan Data into Your Application 1. Start the Windows application that you want to receive the data (e.g., Excel, Notepad, etc.). Make sure a document or spreadsheet is open. 2. Press the trigger button and scan the code. For example, try this bar code: When data is read and transmitted to the host, the laser will turn off. Depending on the settings you chose in the SocketScanXP settings, the scanner may beep and/or the LED may flash green.
3. After a successful scan, data should appear in your document. For example, after you scan the code above into an Excel spreadsheet, data should appear in the first cell. Wait for the “Good Scan” indication before you scan another bar code. If you try to scan too fast, the device can lock up until you stop scanning. For information about bar code scanning applications, please visit: www.socketcom.
OPTIONAL: Assign Sound and Prefix/Suffix Settings You can configure these settings whether or not the CHS is connected to your computer. 1. In SocketScanXP Settings, click on the General tab. 2. Adjust any settings as desired: Good read notification sound: Select which sound you would like your computer to use to indicate good readings of data. By default, your computer will beep. • If you would like your computer to play a .WAV file, select Play a .WAV file and click Browse to indicate the file location.
OPTIONAL: Configure Advanced Bluetooth Settings The SocketScanXP utility enables you configure advanced Bluetooth settings of the CHS, including the Bluetooth friendly name and security settings. 1. In SocketScanXP Settings, click on the CHS tab. The Trigger and Barcodes tabs will only appear if you are connected to the CHS. 2. At the bottom of the CHS screen, the CHS battery level will be indicated by a status bar. Click Advanced. 3.
CHS Security Settings: Enter a PIN code and/or any authentication or encryption settings. If desired, click Delete Bonding to delete any bonding/pairing information in the CHS. After making any changes, click OK. 6. If you modified any security settings, you will be prompted to turn your CHS off and back on to make the changes take effect. Read the message and click OK. Turn the CHS off and back on again. 7. When you return to the CHS Advanced Settings screen, click Close. 8.
OPTIONAL: Assign a Trigger Button The SocketScanXP utility enables you to assign one of your computer’s function keys to trigger the CHS. 10. In SocketScanXP Settings, click on the Trigger tab. The Trigger and Barcodes tabs will only appear if you are connected to the CHS. 11. Select the function key you would like to use as a trigger key. Click OK. 12. As prompted, exit and restart SocketScanXP to have your changes take effect.
OPTIONAL: Select Symbologies The SocketScanXP utility makes it easy to modify which symbologies you want the scanner to recognize and decode. 1. In SocketScanXP Settings, click on the Barcodes tab. The Trigger and Barcodes tabs will only appear if you are connected to the CHS. 2. Check the symbologies you wish to enable. Uncheck those you wish to disable. Click OK. Enabling all possible symbologies will make the decode process slightly longer. 3.
OPTIONAL: View Version Information 1. In SocketScanXP Settings, click on the About tab. The Trigger and Barcodes tabs will only appear if you are connected to the CHS. 2. View the control panel applet (CPL) and CHS firmware version information. Click OK.
Appendix A Specifications Physical Characteristics Size: 125l x 31h x 35w (mm) 4.9l x 1.2h x 1.4w (in.) Total Mass: approx. 90 g (0.2 lb) Power Source: Two AAA NiMH rechargeable batteries Expected Battery Life with Normal Operation (connected via Bluetooth and minimum 2,000 bar code scans): 8 hours Operating Temp: 32 to 120°F (0 to 50°C) Operating System Support: • Windows Mobile 2003/2003SE, XP, XP Tablet Edition • Palm OS v5.
About Bluetooth Range The Cordless Hand Scanner features a powerful Class 1 Bluetooth radio to provide the maximum possible range. As with all wireless technologies, the connection range can vary widely depending on many factors such as the brand and placement of the host device, the type and size of physical obstacles and the presence and activity level of competing radio transmissions.
Appendix B Safety and Usage Tips About Bluetooth and Health Bluetooth wireless technology allows you to use short-range radio signals to connect a variety of devices, such as bar code scanners, mobile phones, Pocket PCs, notebook computers, printers, LAN access points, and many other devices at home or work. These radio signals replace the cables that have traditionally connected these devices. Bluetooth products have small radio transmitters and receivers.
Efficient Use For optimum performance, please make sure that there is no metal surrounding your Cordless Hand Scanner. Driving RF energy may affect some electronic systems in motor vehicles, such as car stereo, safety equipment, etc. Check with your vehicle manufacturer to be sure that the Cordless Hand Scanner will not affect the vehicle’s electronics. Aircraft • Turn off your Cordless Hand Scanner before boarding any aircraft.
Appendix C Bar Code Label Specifications All bar code symbols/labels should satisfy the appropriate AIM Uniform Symbology Specification. Background Substrate: The bar code symbol should be printed on material (media) that is reflective and has a matte (not glossy) finish. A background diffuse reflectance of at least 70% to 80% is desirable for optimum contrast. Retro-reflective media should be used to obtain decode distances greater than 36 inches.
Appendix D Enabling or Disabling Symbologies The Cordless Hand Scanner is pre-set to automatically detect and decode (auto-discriminate) the most common bar code symbologies. To enable or disable symbologies, simply use SocketScan’s Symbology Selector. Notes: • The length of some symbologies will change after Symbology Selector is used. See Table 1. • With more symbologies enabled, the scanner must work harder to search through all the possible combinations.
Table 2.
For more information on bar codes, symbologies, labels or other bar code related topics, visit any of the following web sites: a. www.aimglobal.org/technologies/barcode/ b. www.aimglobal.org/aimstore/stackedsymbologies.htm c. www.adams1.com d. www.bizfonts.com e. www.barcode-us.com/info_center/upc.htm (UPC Codes) f. www.barcode-us.com/info_center/bookinfo.htm (Bookland EAN) g. www.dataid.com/bcsymbology.htm h. www.aaabarcodes.com i. www.snx.com/mechanics.html j. www.pscnet.com/html/aabcsymbologies.
Appendix E Decode Zone The decode zones for the Cordless Hand Scanner is shown below. The minimum element width (“X Dimension” or bar code “size”) is the width in thousandths of an inch (mils) of the narrowest element (bar or space) in the symbol. The figures shown are the typical scanning distances (depths of field) for selected bar code sizes. The maximum usable length of a bar code symbol (Width of Field) at any given range is also shown.
Appendix F Troubleshooting For help on SocketScan, tap Start | Help on a Pocket PC, or tap on the icon on a Palm device. SYMPTOM: icon in the task tray of my I get the “No Scanner Detected” Windows device and can’t trigger the laser or scan any bar codes. POSSIBLE REASON SOLUTION Your mobile computer is not connected to the Cordless Hand Scanner. Make sure the Cordless Hand Scanner is on and in range and has enough battery power. Try to reconnect.
SYMPTOM: While scanning with the CHS, I turned off the Pocket PC, or my Pocket PC entered suspend mode. Now my Pocket PC won’t turn on again. POSSIBLE REASONS SOLUTION This is a known problem with the Widcomm stack (built into HP h221X iPAQ Pocket PCs with ROM version 1.00). Soft reset the Pocket PC by pressing the reset button. SYMPTOM: While scanning with the CHS, I turned off the Pocket PC, or my Pocket PC entered suspend mode. Now the CHS won’t reconnect to my Pocket PC.
Appendix G Technical Support If you have trouble installing or using the Cordless Hand Scanner with Bluetooth Wireless Technology, contact Socket’s technical support department for assistance. IMPORTANT! To obtain personal assistance from a Socket technical support engineer, you must first register your product online at www.socketcom.com/prodreg. After you register your product and log in, click on the Technical Support tab, then click New Trouble Ticket to submit an online request for technical support.
Limited Warranty Socket Communications Incorporated (Socket) warrants this product against defects in material and workmanship, under normal use and service, for the following period from the date of purchase: Cordless Hand Scanner: Two years Incompatibility is not a defect covered by Socket’s warranty.
Limited Software Warranty LIMITED WARRANTY. SOCKET warrants that the original disk or CD ROM is free from defects for 90 days from the date of delivery of the SOFTWARE. CUSTOMER REMEDIES. SOCKET’S entire liability and your exclusive remedy shall be, at SOCKET’S option, either (a) return of the price paid or (b) replacement of the SOFTWARE which does not meet SOCKET’S Limited Warranty and which is returned to SOCKET with a copy of your receipt.
Regulatory Compliance The Socket Cordless Hand Scanner is designed to be compliant with the rules and regulations in locations where they are sold and will be labeled as required. This product is type approved — users are not required to obtain license or authorization before using. This product has been certified as conforming to technological standards.
This equipment generates and radiates radio-frequency energy. To comply with FCC RF exposure compliance requirements, the following antenna installation and device operating configurations must be satisfied: (1) Users are not permitted to make changes or modify the system in any way, and (2) connecting external antennas to the Cordless Hand Scanner is prohibited. This device and its antenna must not be co-located or operated with any other antenna or transmitter.
CE Marking & European Union Compliance Products intended for sale within the European Union are marked with a CE Mark which indicates compliance to applicable Directives and European Normes (EN), as follows.
Battery Warning: • Your device contains a rechargeable NiMH battery. Never throw the battery into a fire, as that could cause the battery to explode. • Never short-circuit the battery by bringing the terminals in contact with another metal object. This could cause personal injury or a fire, and could also damage the battery. • Never dispose of used battery with other ordinary solid wastes. Batteries contain toxic substances.
© Socket Communications, Inc. 7/2005 Printed in U.S.A.