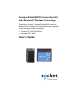
CompactFlash/SDIO Connection Kit with Bluetooth® Wireless Technology Featuring a Socket CompactFlash/SDIO card and Windows CE software for adding Bluetooth capability to the following mobile computers: • Pocket PC 2000/2002/2003 • Handheld PC 2000 User’s Guide
Table of Contents CHAPTER 1 INTRODUCTION Overview Contents of the Connection Kit Installation and Usage Steps Summary CHAPTER 2 BASIC SETUP STEP 1: Register the Card STEP 2: Prepare Network Information STEP 3: Install the Software STEP 4: Complete the Bluetooth Setup Wizard STEP 5: Insert the Card STEP 6: Get Connected! STEP 7: Dial-up to Your Network CHAPTER 3 FEATURES Turn Radio Transmitter ON/OFF Bluetooth ActiveSync Bluetooth LAN Access Bluetooth Faxing CHAPTER 4 ADVANCED FEATURES 4 4 5 6 7 7 7 7 8
APPENDIX A SPECIFICATIONS CompactFlash Card SDIO Card APPENDIX B SAFETY AND USAGE TIPS 71 71 72 73 APPENDIX C AUTOMATIC PHONE CONNECTIONS 77 APPENDIX D TROUBLESHOOTING 78 APPENDIX E SUPPORT RESOURCES 81 Technical Support Users’ Forum 81 82 LIMITED WARRANTY 83 COPYRIGHT NOTICE 85 REGULATORY COMPLIANCE 86 CompactFlash Card SDIO Card 86 89 3
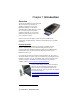
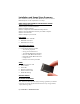
Chapter 1 Introduction Overview The Socket CF/SDIO Connection Kit with Bluetooth Wireless Technology for Windows CE makes it easy to add Bluetooth capability to a Pocket PC 2000/2002/2003 or HPC 2000. It’s perfect for connecting any of these mobile computers wirelessly to your favorite Bluetooth enabled phone, LAN access point, computer or printer. Socket’s card is the only plug-in card to incorporate all Bluetooth components, including antenna, within the CompactFlash Type I or SDIO form factor.
Software Features For quickly connecting your mobile computer to a Bluetooth enabled phone, use the Get Connected! Wizard. Afterwards, you can use the Socket Dialer to directly dial a number from your Contacts list. In addition to phones, Socket’s software also makes it easy to connect to devices like computers, access points, and printers. The ActiveSync option guides you through connecting and synchronizing with a computer.
Installation and Usage Steps Summary Basic installation and operation of the Bluetooth Card for use with a Bluetooth phone can be completed in seven steps.
Chapter 2 Basic Setup This chapter covers the minimum steps you must complete to install and use the Bluetooth Card. STEP 1: Register the Card Socket highly recommends that all users register their product. Registered users receive priority for technical support. You can register the card online at: www.socketcom.com/prodreg/. STEP 2: Prepare Network Information Consult with your network administrator/MIS technician to obtain any necessary settings for your network (e.g.
STEP 4: Complete the Bluetooth Setup Wizard 1. After you install the software, the Socket Bluetooth Setup Wizard will automatically launch on your mobile computer. Tap Next>. 2. Give your mobile computer a friendly name. Tap Next>.
3. If your mobile computer has fewer than 6 COM ports free, the Disable IrDA? Screen will appear. If desired, disable IrDA to free more ports. Tap Next>. Note: This will disable the IR port on a Pocket PC. To readjust the IrDA settings, go to Start | Settings | System| IrDA. Some devices do not allow you to disable IrDA. 4. In the next screen, choose which two ports and services you plan to use most. After making your selections, tap Next>. Note: You cannot disable the Bluetooth Phone port. 5.
STEP 5: Insert the Card Important! Do NOT insert the card upside down or shove the card in too hard. Damage may occur! Pocket PC 2003 only: Wait for the device reset to finish before you insert the card! Insert the card into your mobile computer’s slot. Make sure the card is right-side up, with the blue label on top. • Insert a CompactFlash or SDIO card directly into a slot of its size. • If using a PC Card slot, first insert the Bluetooth CF Card into a CompactFlash-to-PC Card adapter.
STEP 6: Get Connected! The Get Connected! Wizard guides you through a one-time setup process that prepares the mobile computer and phone for Bluetooth connections. The wizard varies depending on what phone you want to connect to. Ericsson, Nokia 6210, NTT DoCoMo, Sony Phones 1. Tap on the Bluetooth task tray icon (visible from the Today screen for Pocket PCs). In the pop-up menu, select Get Connected! 2. Follow the Bluetooth “Get Connected!” Wizard.
4. When the search is complete, a list of the discovered Bluetooth phones will appear. Choose the phone you wish to connect to, and tap Select. A service discovery phase will begin, about 5-10 seconds. 5. As prompted in the next screen, prepare your phone for bonding. For instructions on setting your phone to “Bondable” or “Pairable” mode, refer to your phone manual. Have your passkey ready, then tap Next>. 6. In the next screen, enter the passkey. Tap Reply.
Motorola Timeport 270C, Nokia 3650/6310/7650/8910/8910i 1. Tap on the Bluetooth task tray icon (visible from the Today screen for Pocket PC devices). In the pop-up menu, select Get Connected! 2. Follow the Bluetooth “Get Connected!” Wizard. In the second screen, use the drop-down list to select your Bluetooth phone. The wizard will provide tailored instructions for your phone. Note: The screens below are for the Nokia 7650. 3.
5. The next two screens describe procedures you can only complete outside of the wizard. Read through each screen but do not complete the described procedures until you exit the wizard. Directions for these procedures are provided in STEP 7: Dial-up to Your Network, starting on the next page. The two procedures are: Bonding with your phone — This must be completed in order to complete the Bluetooth connection and involves dial-up networking.
STEP 7: Dial-up to Your Network Complete the following steps to create a new Bluetooth connection. Before setting up dial-up networking, prepare yourself with dial-up information and other necessary settings for your office network or ISP. Pocket PC 2000/2002 1. Pocket PC 2000 — Go to Start | Settings | Connections | Modem. In the next screen, tap New Connection… Pocket PC 2002 — Go to Start | Settings | Connections. Tap on the Connections icon. In the top field, select Internet Settings.
2. In the next screen, enter a name for the dial-up connection. For the modem, select Bluetooth Phone. For the Baud Rate, select 115200. Tap Advanced… Note: Remember what you name the connection. You will need it when you start the connection. 3. The Port Settings screen will appear. If needed, tap on the TCP/IP and/or Name Servers screens to enter any necessary settings for your office network or ISP. Tap ok. 4. Tap Next. 5. In the Phone number field, enter the dial-up number. Tap Next. 6.
7. Now you are ready to start the connection. Pocket PC 2000 — Go to Start | Programs | Connections. Tap on the Bluetooth connection you just set up. Make sure the dialing settings are correct. Tap Connect. Pocket PC 2002 — In the Connections screen, under Internet Settings, tap Connect. In Network Log On, verify the dialing settings. Tap OK. 8.
9. To use a different Bluetooth phone for dial-up networking, you can use the same connection setup, but you must make the new phone your favorite. Just run the Get Connected! Wizard again, select the new phone, and make it your new Favorite when prompted. Alternatively, you can use the Bluetooth Devices folder to change your favorite phone (see Chapter 4 for instructions).
Pocket PC 2003 Note: These instructions are for a standard dial-up connection to an Internet Service Provider (ISP). If you want to connect to a work network and/or VPN/proxy server, please refer to your Pocket PC 2003 documentation for instructions. 1. Go to Start | Settings | Connections | Connections. 2. In the next screen, tap on the Select Networks button. Tap Select Networks 3.
4. Tap on the Tasks tab. In most cases, you should tap Add a new modem connection under My ISP. 5. In the next screen, enter the following: • Enter a name… Enter a name, such as “ISP via Bluetooth” • Select a modem: Bluetooth Phone. Tap Next. 6. In the next screen, enter the dial-up number exactly how it should be dialed from your Bluetooth phone. Include the country and area code if needed.
7. In the next screen, enter the User name and Password. Tap on the Advanced button. 8. In the General screen, enter the following settings: • Baud rate: 115200 • Wait for dial tone before dialing: Unchecked Uncheck 9. If your network uses DHCP, tap ok. In the last screen, tap Finish. If you need to enter IP addresses, tap on the TCP/IP and Servers tabs to enter the necessary settings. Tap ok. In the last screen, tap Finish.
METHOD 1: TAP ON THE CONNECTION ICON a) Tap on the Connection icon in the navigation bar at the top of the screen. It should have an “X” to show that you are not connected. b) A bubble should appear with the dial-up connection you just created. Verify the phone number, then tap on the phone number. The phone will try to connect. Note: • Multiple connections may be listed. Tap on the phone number of the connection you want to dial. • If the connection you want is not listed, tap on Settings.
• If you did not save the dial-up password, the Network Log On screen may appear. Enter the Password and tap OK. d) The device will begin dialing. Connection icon: (Navigation bar at top of screen) Indicates an active dial-up or network connection e) To use a different Bluetooth enabled phone for dial-up networking, you can use the same connection setup, but you must make the new phone your favorite.
METHOD 2: DIAL AUTOMATICALLY FROM THE APPLICATION Note: After you have set up a dial-up connection, the Connection Manager will automatically try to connect whenever you insert the card and try to use Pocket Internet Explorer, Pocket Inbox, or any other program that uses a dial-up connection. a) Start the program that uses a dial-up connection. Enter a request for receiving and/or transmitting information (e.g., in Pocket Internet Explorer, enter a new URL and tap “Go”).
• If you did not save the dial-up password, the Network Log On screen may appear. Enter the Password and tap OK. c) When the Pocket PC starts calling, you should see the call status on both the Pocket PC screen and phone display. After the Pocket PC connects, it will receive/transmit the information as requested (e.g., Pocket Internet Explorer will display the requested website).
Handheld PC 2000 1. Go to Start | Programs | Communication | Remote Networking | Make New Connection. 2. In the next screen, enter a name for the Bluetooth connection. Select Dial-Up Connection. Tap Next>. 2. Select Bluetooth Phone for the modem. Tap Configure… 3. The Port Settings screen will appear. For Baud Rate, select 115200. Tap on the Call Options tab. 5. Uncheck Wait for dial tone before dialing. Tap OK.
6. If needed, tap on TCP/IP to enter any special network settings for your office network or ISP. Tap OK. In the next screen, tap Next>. Enter the dial-up number for your office network or ISP. Tap Finish. 7. Now you are ready to start the connection. Go to Start | Programs | Communication | Remote Networking. Tap on your new Bluetooth connection. Enter the correct User Name and Password. Tap Connect. 8.
Chapter 3 Features This chapter explains how to turn the Bluetooth ON/OFF and how to use the Bluetooth ActiveSync and Bluetooth LAN Access options. Turn Radio Transmitter ON/OFF You may want to turn off the radio transmitter to save power or if you are entering an area with radio restrictions (e.g., an airplane). should 1. After you insert the Bluetooth Card, the Bluetooth icon appear in the task tray (visible from the Today screen for Pocket PCs). Tap on the icon. 2.
Bluetooth ActiveSync This section explains how to use the Bluetooth ActiveSync feature. It helps you quickly and easily ActiveSync to a notebook or desktop computer with ActiveSync v3.x installed. 1. Tap on the Bluetooth icon ActiveSync. . In the pop-up menu, select Bluetooth Note: If you installed Socket OBEX, the menu will also list Transfer via Bluetooth. 2. The next screens will vary depending on if your Bluetooth Devices folder contains any computers, and if one is chosen as your favorite.
SCENARIO #2: Your Bluetooth Devices folder contains no favorite desktop computer. (a) When you tap on Bluetooth ActiveSync, a screen will appear that allows you to choose which computer to connect to in your Bluetooth Devices folder. Choose a computer from the list and tap Select, or tap Find to search for another computer. Note: If the computer you want to connect to is not listed, tap Find to begin a search. Proceed as described in Scenario #3 on the next page.
SCENARIO #3: Your Bluetooth Devices folder contains no computers. (a) When you tap on Bluetooth ActiveSync, a Bluetooth Device Search will automatically begin. Note: You can also start the device search by tapping Find in the Bluetooth Devices screen. See Scenario #2 on the previous page. (b) After the search is complete, select the computer you wish to ActiveSync with and tap Select. If the computer is not listed, make sure the computer id discoverable and tap Refresh to search again.
Bluetooth LAN Access This section explains how to use the Bluetooth LAN Access feature to quickly and easily connect to a Bluetooth-enabled LAN access point. 1. Tap on the Bluetooth icon. In the pop-up menu, select Bluetooth LAN Access. Note: If you installed Socket OBEX, the menu will also list Transfer via Bluetooth. 2. The next screens will vary depending on if your Bluetooth Devices folder contains any access points, and if one is chosen as your favorite.
(b) Your mobile computer will try to connect to the selected access point. (c) If your LAN requires a passkey, a screen will appear, asking for the passkey. Enter the passkey, then tap ok. (d) After a successful connection is made, the status screen will report Connected. (e) Now you are ready to access your LAN for Internet access, files, etc. SCENARIO #2: Your Bluetooth Devices folder contains a favorite access point.
SCENARIO #3: Your Bluetooth Devices folder has no access points. (a) When you tap Bluetooth LAN Access, the mobile computer will automatically begin to search for new Bluetooth devices. Note: You can also start the device search by tapping Find in the Bluetooth Devices screen. See Scenario #2 on the previous page. (b) After the search is complete, select the access point you wish to connect to. Tap Select. If the access point is not listed, tap Refresh to search again.
Bluetooth Faxing Many Bluetooth phones and other types of Bluetooth-enabled devices support faxing. This chapter explains how to use such a device with the Bluetooth Card and your mobile computer for wireless faxing. The Socket Bluetooth Connection Kit does not include faxing software. You must obtain Bluetooth faxing software separately from a third party. 1. If using a Bluetooth phone, use the Get Connected! Wizard to connect to the phone.
3. Make sure a COM port is enabled for faxing. • Tap on the Bluetooth icon. Select Advanced Features, then My Bluetooth Device. Tap on the COM Ports tab. • In the COM Ports screen, make sure Bluetooth Fax is checked. • Note the COM port number assigned to faxing. You may need this to configure your fax software. Tap ok. 4. Assign your Bluetooth phone as your favorite fax. • In the Bluetooth Devices folder, tap Tools | My Favorites. • Tap on the FAX tab.
5. Now you are ready to use your fax software. While configuring the fax connection, select either Bluetooth FAX or the COM port assigned to Bluetooth faxing.
Chapter 4 Advanced Features This chapter explains optional steps you may choose to perform while installing and/or using the Bluetooth Card.
Set up Your Bluetooth Card Note: If you use the Get Connected! Wizard, which is recommended for normal usage, then this step is not necessary. This step would be used to change the friendly name of your mobile computer. should 1. After you insert the Bluetooth Card, the Bluetooth icon appear in the task tray (visible from the Today screen for Pocket PCs). Tap on the icon. 2. In the pop-up menu, select Advanced Features, then My Bluetooth Device.
• Check Use Authentication to enable the Use Encryption option.
Assign COM Ports Follow these steps to view and/or modify the Bluetooth COM ports. 1. Tap on the Bluetooth icon (in the Today screen for Pocket PCs). Select Advanced Features then My Bluetooth Device. Note: If you installed Socket OBEX, the menu will also list Transfer via Bluetooth. 2. The My Bluetooth Device screen will appear. Tap on the COM Ports tab. 3. As needed, view and/or enable/disable the Bluetooth COM port assignments. Tap ok. Note: The Bluetooth Phone port cannot be disabled.
Discover Bluetooth Device(s) Follow these steps to discover other Bluetooth devices nearby, including non-phone devices. The Device Discovery Wizard is a more detailed alternative to using the Bluetooth “Get Connected!” Wizard or Bluetooth ActiveSync or Bluetooth LAN Access options. The Device Discovery Wizard allows you to discover any type of Bluetooth device. 1. If not open, launch the Bluetooth Devices folder: Tap on the Bluetooth icon (in the Today screen for Pocket PCs).
6. In the next screen, tap Finish.
Bond with Discovered Device(s) Follow these steps to bond with an already discovered Bluetooth device. In most cases, bonding is for establishing secure communications with a Bluetooth-enabled phone. This is a more detailed alternative to using the Bluetooth “Get Connected! Wizard.” Important! • Do not try to bond with a Motorola Timeport 270C or Nokia 6310! • Do not use this method to bond with a printer! The third-party printing software included on the installation CD also handles bonding. 1.
4. The Bluetooth Device Bonding Wizard will launch. Follow the wizard to bond with your selected device. 5. As prompted, make sure the Bluetooth device that you want to bond with is in Bondable mode. 6. If the remote device is set up to accept bonding, a Bluetooth Passkey screen will appear. To continue bonding, enter the correct passkey and tap Reply. 7. When you have successfully bonded with the other device, tap Finish.
View Device Properties Follow these steps to view the properties of an already discovered device. 1. If not open, launch the Bluetooth Devices folder. Tap on the Bluetooth icon (in the Today screen for Pocket PCs). Select Advanced Features then Bluetooth Devices. For HPC 2000s, you can also tap on the Bluetooth Devices folder directly on the desktop. 2. Select a device. Tap on the Properties icon select Properties.
Set up Your Favorite Device Follow these steps to set up default devices in the Bluetooth Devices folder. Note: The Get Connected! Wizard automatically assigns the favorite phone. 1. Tap on Tools and select My Favorites. 2. Tap on the tab for the type of device you would like to set a favorite for. If needed, use the arrow buttons to scroll and find the tab you need. Note: Tabs will appear only for COM ports you have enabled.
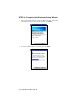
Change Views You can switch between the Large Icons or Details views for the Bluetooth Devices folder. 1. In Bluetooth Devices, tap on View. 2. In the pop-up menu, choose between Large Icons or Details. Large Icons view Details view Note: In Details view, scroll right to see the current Bonded status.
Delete a Device from the Folder If you no longer plan to connect with it, you can delete a device from the Bluetooth Devices folder. 1. If not open, launch the Bluetooth Devices folder. 2. Pocket PCs only: Tap and hold your stylus on the device you wish to delete. In the pop-up menu, select Delete. 3. Alternatively, after selecting a device, tap on the Delete icon Or tap on Device then select Delete. . 4. A Confirm screen will appear. Tap Yes.
Chapter 5 Socket OBEX This chapter explains how to use the Socket OBEX (object exchange) application to trade business cards, contacts or files with another Bluetooth device that supports OBEX.
Exchange Business Cards 1. Make sure both Bluetooth devices have a business card assigned to it. Note: If each device does not have a business card assigned to it, you will not be able to exchange business cards. To assign a business card to your mobile computer, do the following: • Tap on the Bluetooth icon. In the pop-up menu, tap Advanced Features | My Bluetooth Device. • Tap on the Object Sharing tab. Under My business card, tap Assign… • In the next screen, select your business card and tap ok.
2. Make sure the other Bluetooth device is set up to receive a contact. The device must support the OBEX Object Push profile. Note: If the other device is also using the Socket Bluetooth Connection Kit, you can set it up to receive a contact by tapping the Bluetooth icon. In the pop-up menu, tap Transfer via Bluetooth | Receive Contact or File. 3. Now you are ready to exchange business cards. Tap on the Bluetooth icon. In the pop-up menu, tap Transfer via Bluetooth | Exchange Business Cards. 4.
Send a Contact 1. Make sure the other Bluetooth device is set up to receive a contact. It must support the OBEX Object Push server profile. Refer to the documentation that came with the device for instructions. Note: If the other device is also using the Socket Bluetooth Connection Kit, you can set it up to receive a contact by tapping the Bluetooth icon. In the pop-up menu, tap Transfer via Bluetooth | Receive Contact or File. 2. Now you are ready to send a contact. Go to your Contacts folder. 3.
5. If your mobile computer has no devices in the Bluetooth Devices Folder, then it will begin to search for Bluetooth devices nearby. 6. Select the Bluetooth device you wish to send the contact(s) to. If the desired device is not listed, tap Find. 7. Your mobile computer will process and send the contact(s).
Send a File 1. Make sure the other Bluetooth device is set up to receive a file. It must support the OBEX Object Push server profile. Refer to the documentation that came with the device for instructions. Note: If the other device is also using the Socket Bluetooth Connection Kit, you can set it up to receive a file by tapping the Bluetooth icon. In the pop-up menu, tap Transfer via Bluetooth | Receive Contact or File. 2. Now you are ready to send a file. Tap on the Bluetooth icon.
5. In the next screen, tap on the file you wish to send. You can use the Folder and Type drop-down menus to search for your file. Also, you can scroll horizontally to view the folder, date, size, type, and location of each file. 6. Your mobile computer will send the file.
Browse Remote Device The Bluetooth File Explorer lets your mobile computer share files with another Bluetooth device. The other device must support the OBEX File Transfer server profile. This section covers the following file transfer operations: • Prepare for file transfer • Send/receive file(s) or folder(s) • Create a folder • Delete file(s) or folder(s) • Refresh remote view • Connect/disconnect • Exit the program Note: “Local device” refers to the mobile computer you are running the Socket OBEX from.
4. Select the Bluetooth device you wish to browse. If the desired device is not listed, tap Find. 5. Your mobile computer will begin to establish a file sharing connection. 6. After the devices successfully connect, the Bluetooth File Explorer will appear. Half of the screen shows contents of the remote device, while the other half shows contents of your device (the local device). The very bottom of the screen reports the connection status.
Send/Receive File(s) or Folder(s) 1. Select the file(s) or folder(s) that you wish to transfer. You can only select items from one device per transfer session. Single-tap items to select them for transfer. Double-tap on a folders to open it and see its contents. Note: A copy of the selected items will be transferred, not the original. 2. There are two different ways to initiate the transfer. • Tap on the File menu. Select Send to remote or Get from remote, as applicable.
Create a Folder 1. Tap on the File menu. Select Remote device or Local device, wherever you want to create a folder, then tap Create remote folder or Create local folder, as applicable. 2. Alternatively, on Pocket PCs, you can tap and hold your stylus on an item in either the remote or local device that you wish to put in a new folder. In the pop-up menu, select Create folder. 3. In the next screen, enter a name for your new folder. Tap OK. 4.
Delete File(s) or Folder(s) 1. Select item(s) that you wish to delete. You can only delete item(s) from one device at a time. 2. Tap on the File menu. Select Remote device or Local device, wherever the item(s) are located, then tap Delete remote item(s) or Delete local item(s), as applicable. 3. Alternatively, on Pocket PCs, you can tap and hold your stylus an item in either the remote or local device that you wish to put in a new folder. In the pop-up menu, select Delete folder. 4.
Connect/Disconnect To connect to the remote device, do the following: 1. Make sure the remote device has file sharing enabled. 2. Start the connection process by either of two methods: 3. • Tap on the Device menu. Select Connect. • Tap on the Connect icon . In the next screen, select the device you wish to connect to. Tap Select. Your mobile computer will attempt to connect to the device selected. To disconnect from the remote device, do the following: 1.
Receive Contact or File 1. Tap on the Bluetooth icon. In the pop-up menu, tap Transfer via Bluetooth | Receive Contact or File. 2. The Receive Contact or File status screen will appear. Your mobile computer will wait two minutes for the contact or file. 3. After successfully connecting to the remote device, the screen will report Connected then disappear. The new contact or file should now be on your device. 4. If two minutes passes before you receive the item, tap Wait Again. 5.
Chapter 6 The Socket Dialer This chapter explains how to assign a dialing prefix and use the Socket Dialer to dial a number directly from your Contacts list. The Socket Dialer makes it quick and easy to perform dial-up networking. If you have not done so already, be sure to run the Dialer Installer from the Socket Bluetooth Card Installation CD. While installing the program, you can also assign the dialing prefix.
Use the Socket Dialer 1. To use the dialer, the mobile computer must already be connected to the Bluetooth phone. You can use the Get Connected! Wizard to do this. Also, the Bluetooth phone must be selected as your favorite. 2. Pocket PC devices — Go to Start | Contacts. HPC 2000 — Click on the Contacts icon from the desktop. 3. Tap and hold your stylus on the contact you wish to dial to. In the popup menu, select Dial Contact. Alternatively, you can tap on Tools and select Dial Contact. 4.
5. Your mobile computer will connect to your phone and begin dialing. Note: The Socket Dialer can dial a phone number containing any of the 17 following non-numeric characters: * # + . / ! @ - \ space A B C D T P W Additionally, the following string can be included in a phone number: (‘,’) The Socket Dialer can not dial a phone number containing non-numeric characters other than those listed above. Socket recommends that you follow the standard Microsoft Outlook format for phone numbers.
Chapter 7 Bluetooth Printing This chapter explains how to print from a Bluetooth-enabled printer, using either of two options. If you have a HPC 2000, you can print directly from Pocket Word or Pocket Excel. If you have a Pocket PC, you can install the PrintPocketCE software included on the installation CD to print from your device. HPC 2000 only: With the right settings, you can print directly from Pocket Word or Pocket Excel. 1. In the Print screen, select your Bluetooth printer and Bluetooth COM port.
Pocket PC 2000 or Pocket PC 2002: You can print using the PrintPocketCE program included on the Socket Bluetooth Card Installation CD. The Socket Bluetooth Connection Kit includes a 30-day trial version of PrintPocketCE. For a full version, please visit: www.fieldsoftware.com If you have not done so already, be sure to install the PrintPocketCE program. To find the install for this program on the installation CD, go to the Third Party folder, then the Field Software folder. 1. Start the printing program.
• • Tap on the Doc/Excel/Email Options menu and select another type of printing (e.g., Go to email printing). Use the folders drop-down menu to switch between folders. 4. The next screens let you adjust the printer settings. Make sure the correct printer is chosen. For Port, choose Bluetooth: Socket CF Card. Make any other necessary printer settings. Note: For a Pocket Excel file, the first screen lets you adjust printing properties. Tap Continue to select the correct printer and port.
If needed, tap on More Settings to adjust margins, form feed, and other settings. Tap OK to return to the main printing screen. When done adjusting the settings, tap Start Printing. 5. The mobile computer will search for a Bluetooth printer. After the search, the Bluetooth Devices folder will appear. Select the Bluetooth printer, then tap Select . If the mobile computer fails to detect the Bluetooth printer, make sure the printer is on, discoverable, and in range. Tap Find to repeat the search. 6.
Appendix A Specifications CompactFlash Card Physical Characteristics: Dimensions: 36.4 x 42.8 x 3.3 mm Mass: 10 g Power Consumption (3.
SDIO Card Physical Characteristics: Dimensions: 40 x 24 x 2.1 mm Mass: 4 g (maximum) Power Consumption (3.
Appendix B Safety and Usage Tips About Bluetooth and Health Bluetooth wireless technology allows you to use short-range radio signals to connect a variety of devices, such as mobile phones, Pocket PCs, notebook computers, printers, LAN access points, and many other devices at home or work. These radio signals replace the cables that have traditionally connected these devices. Bluetooth products have small radio transmitters and receivers. Output power is normally very low, only 1 mW (1/1000 of a watt).
Efficient Use For optimum performance, please make sure that there is no metal surrounding your Bluetooth Card. Driving RF energy may affect some electronic systems in motor vehicles, such as car stereo, safety equipment, etc. Check with your vehicle manufacturer’s representative to be sure that your Bluetooth Card will not affect the electronic system in your vehicle. Aircraft • Turn off your Bluetooth Card antenna before boarding any aircraft.
SDIO Card Product Care and Usage • The SDIO Bluetooth Card is susceptible to physical damage. Do not hit the corners of the card or forcefully pull the card out of your device, or permanent damage can occur! • Do not disassemble, modify or repair this unit. There is danger of fires, electrical shock, damage to the unit, and injury. Any repair is impossible. Do not remove the label and do not paste other labels. It may cause malfunction.
• Do not use the unit near a microwave oven or in areas where there is a risk of electrical shock, static electricity or electromagnetic interference. • Do not use the Bluetooth Card in a place with risk of strong vibration. • Do not use benzene or paint thinner to clean the Bluetooth Card. Restrictions • The Bluetooth SDIO Card was not designed to be used with systems directly responsible for sustaining human life. Avoid using this product with such systems (e.g.
Appendix C Automatic Phone Connections Some Bluetooth enabled phones let you set up automatic connections with devices they have successfully bonded with, without requiring you to manually enter a password every time you try to connect. If you would like to set up automatic connections between your phone and your mobile computer, follow the appropriate instructions below for your specific phone. Motorola Timeport 270C: • On the phone, press MENU. • Scroll to Settings, then press SELECT.
Appendix D Troubleshooting SYMPTOM: • I cannot connect to a device in my folder. POSSIBLE REASONS The services for the devices have not been discovered. SOLUTION In the Bluetooth Devices folder, tap on the Properties icon. Tap on the Services tab. In the Services screen, tap on the Update button. SYMPTOM: • When I use the Get Connected! Wizard to connect to my phone, I get a screen that says Partial Success. POSSIBLE REASONS The phone is not in Bondable mode. The passkey is incorrect.
SYMPTOM: • My mobile computer cannot find any Bluetooth devices nearby. POSSIBLE REASONS You are too far from other Bluetooth devices. The Bluetooth device(s) nearby are not turned on. The Bluetooth device(s) are not in discoverable mode. SOLUTION Move closer to the other Bluetooth device(s), within a range of 10 meters. Turn on the Bluetooth device(s) you wish to find. Set the Bluetooth device(s) to discoverable mode. If needed, consult the device’s documentation for help.
SYMPTOM: • I can’t make my Ericsson R520 phone discoverable. POSSIBLE REASONS You attempted to bond with the phone, and when the phone presented a “pairing query,” you entered No. This prevents the phone from being discoverable until it is reset. SOLUTION Reset the phone by removing its battery.
Appendix E Support Resources Technical Support If you have trouble installing or using the Bluetooth Connection Kit, contact Socket’s technical support department. IMPORTANT! To obtain technical support for your product, you must first register your product online at www.socketcom.com/prodreg. Once you have registered your product, you can contact Socket’s technical support department by doing either of the following: • Submit an email inquiry through the online support system.
Users’ Forum If you would like to discuss the Socket Bluetooth Connection Kit with other users, visit Socket’s users’ forum at: www.socketforum.com Note: Socket may, but is not obligated to, monitor or review any areas on the Site where users transmit or post Communications or communicate solely with each other, including but not limited to the user forum, and the content of any such Communications.
Limited Warranty Socket Communications Incorporated (Socket) warrants this product against defects in material and workmanship, under normal use and service, for the following period from the date of purchase: Plug-in card: Three years Incompatibility is not a defect covered by Socket’s warranty.
Limited Software Warranty LIMITED WARRANTY. SOCKET warrants that the original disk or CD ROM is free from defects for 90 days from the date of delivery of the SOFTWARE. CUSTOMER REMEDIES. SOCKET’S entire liability and your exclusive remedy shall be, at SOCKET’S option, either (a) return of the price paid or (b) replacement of the SOFTWARE which does not meet SOCKET’S Limited Warranty and which is returned to SOCKET with a copy of your receipt.
June 2003 Document # 6410-00171 K Copyright Notice Copyright © 2003 Socket Communications, Inc. All rights reserved. Socket, the Socket logo and Mobility Friendly are registered trademarks of Socket Communications, Inc. Bluetooth Card is a trademark of Socket Communications, Inc. Bluetooth and the Bluetooth logos are trademarks owned by Bluetooth SIG, Inc., U.S.A. and licensed to Socket Communications, Inc. All other brand and product names are trademarks of their respective holders.
Regulatory Compliance CompactFlash Card The Socket Bluetooth Card is designed to be compliant with the rules and regulations in locations where they are sold and will be labeled as required. This product is type approved — users are not required to obtain license or authorization before using. Radio Frequency Interference Requirements This device complies with part 15 of the FCC rules and Industry Canada RSS 210.
If this equipment does cause harmful interference to radio or television reception, which can be determined by turning the equipment off and on, the user may try to correct the interference by one or more of the following measures: • Reorient or relocate the receiving antenna of the radio or television. • Increase the distance separating the equipment and the receiver. • Connect the equipment to an outlet on a different branch circuit than that of the receiver.
Applicable Standards: • EN 55 022 – Limits and Methods of Measurement of Radio Interference Characteristics of Information Technology Equipment. • EN 50 082-1 – Electromagnetic Compatibility – General Immunity Standard, Part 1: Residential, Commercial, Light Industry. • IEC 801.2 – Electromagnetic Compatibility for Industrial Process Measurement and Control Equipment, Part 2: Electrostatic Discharge Requirements. • IEC 801.
SDIO Card The Socket Bluetooth Card is designed to be compliant with the rules and regulations in locations where they are sold and will be labeled as required. This product is type approved — users are not required to obtain license or authorization before using. This product has been certified as conforming to technological standards. Therefore, the following actions are punishable by law: • Disassembly or modification of this product. • Removal of identification labels on the back of this product.
Radio Frequency Interference Requirements (Industry Canada) To prevent radio interference to the licensed service, this device is intended to be operated indoors and away from windows to provide maximum shielding. Equipment that is installed outdoors is subject to licensing. This equipment generates, uses, and can radiate radio frequency energy and, if not installed and used in accordance with the instruction manual, may cause harmful interference to radio communications.
Printed in U.S.A.