
User's Manual


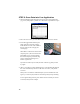

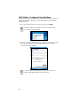
Table Of Contents
- Copyright Notice
- 1 | Introduction
- 2 | Setup for Windows Mobile
- Appendix A Specifications
- Appendix B Safety and Usage Tips
- Appendix C Bar Code Label Specifications
- Appendix D Enabling or Disabling Symbologies
- Appendix E Decode Zone
- Appendix F Troubleshooting
- Appendix G Technical Support
- Limited Warranty
- Regulatory Compliance

STEP 3: Configure Scanner Settings
1. Tap Start | Settings | System tab | Socket Scanner Settings.
Alternatively, tap Start | Programs | SocketScan. Go to the Today screen.
Tap the SocketScan icon
at the bottom of the screen. In the pop-up
menu, tap Settings.
2. Tap on the CS tab at the bottom of the screen. Check
Enable Cordless Scanner support.
Under Bluetooth Port Configuration, if your device
has a built-in Bluetooth radio, your Bluetooth stack
will be reported (e.g., Widcomm). If you installed
Connect!Agent and would like to use it, select
Connect!Agent from the list. If your device does not
have a built-in Bluetooth radio, select Socket to use
your device with the Socket SD/CF Bluetooth card.
3. Tap on the CS HW tab. Enter the following settings:
• Trigger: Select whether you would like the CRS to
scan only when a Bluetooth connection to the
device is detected. If you require the CRS to detect
a Bluetooth connection before each scan, scanning
will be a few milliseconds slower.
• Good Read Indicator: Select how you would like
the CRS to indicate that it has successfully read
data.
• Battery Level: No progress bar should appear since
you are not connected to the CRS.
• Disable Auto Power Off mode: The CRS
automatically shuts off if there is no Bluetooth
connection for 20 minutes. Check to disable.
4. Tap on the CRS tab. Select which button on the
CRS you would like to use to trigger the
scanner.
5. After entering settings, tap ok to save the
changes.
14