
User's Manual
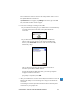
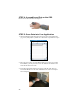
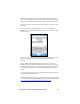
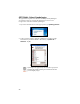
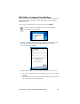
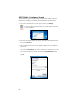
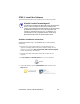
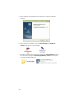
Table Of Contents
- Copyright Notice
- _
- 1 | Introduction
- Scanner Versions
- About the Software
- About Combining Scanning with Bluetooth
- System Requirements
- Package Contents
- _
- 2 | Hardware Preparation
- 3 | Setup for Windows Mobile
- _
- Setup Summary
- STEP 1: Install the Software
- STEP 2: Configure Scanner Settings
- STEP 3: Connect CRS to Host Device with Bluetooth
- STEP 4: Assemble and Put on the CRS
- STEP 5: Scan Data into Your Application
- OPTIONAL: Select Symbologies
- OPTIONAL: Configure Prefix/Suffixes
- OPTIONAL: Configure Sound
- OPTIONAL: Run Scan Demo
- 4 | Setup for Windows XP
- _
- Setup Summary
- STEP 1: Install the Software
- STEP 2: Configure Bluetooth Settings
- STEP 3: Configure Scanner Settings
- STEP 4: Start SocketScan and Connect to CRS
- STEP 5: Assemble and Put on the CRS
- STEP 6: Scan Data into Your Application
- OPTIONAL: Assign Sound and Prefix/Suffix Settings
- OPTIONAL: Configure Advanced Bluetooth Settings
- OPTIONAL: Assign a Remote Trigger Button
- OPTIONAL: Select Symbologies
- _
- Appendix A Specifications
- Appendix B Safety and Usage Tips
- Appendix C Bar Code Label Specifications
- Appendix D Enabling or Disabling Symbologies
- _
- Appendix E Decode Zone
- _
- Appendix F Troubleshooting
- _
- Appendix G Technical Support
- Limited Warranty
- Regulatory Compliance

5. The installation wizard will launch. Follow the wizard to install the
software.
6. After software installation, icons for SocketScanXP and Socket CS
Connect will appear on your desktop.
7. If desired, install Connect!Agent by opening the Connect!Agent folder in
the CD and launching the Connect!AgentXPSetup_S.exe file. Follow the
wizard to install the software.
30