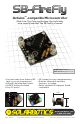
SB-FireFly Arduinotm-compatible Microcontroller What if the Tiny Cylon and Arduino Uno had a baby, what would it look like? The SB-FireFly of course! Build Time: 10mins Skill Level: Beginner (1/5) Can load code from Arduino IDE (with in-circuit programmer) ATtiny85 development board CR2032 battery included Only 15 parts! ISP header for easy reprogramming Build as eWearable necklace, keychain, or badge. Easily hackable & Digispark Shield compatible 0.75" 1.00" Actual size! www.
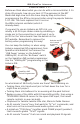
SB-FireFly Manual Introduction BLIFNAR. Blinky. LED-thingy. These all describe the SB-FireFly. This coin-cell powered microcontroller runs three LEDs through selectable light blinking sequences with smooth transitions. The SB-FireFly features an Arduino-accommodating ATtiny85 microcontroller, so with a minor adjustment to your Arduino programming IDE, you can reprogram it to suit your whim. It also features a cleverly hidden 3-pin expansion port usable for hacking.
SB-FireFly Manual Parts List 1 x SB-FireFly printed circuit board (PCB) 1 x Pre-programmed Attiny85 with 8Mhz internal oscillator 2 x Green SBLED 1 x Blue SBLED 1 x SWT10 switch (mode/power pushbutton) 1 x 47ohm resistor (yellow / violet / black) for LED current limiter 1 x 10kohm resistor (brown / black / orange) for reset pull-up 1 x 8-pin DIP carrier 1 x ISP 3x2 male header (programming) 1 x 2032 coin cell battery 1 x 2032 coin cell battery holder 1 x 6 pin Female Header 1 x 3
SB-FireFly Manual Construction! Soldering - The Essentials: The most important skill needed to successfully construct your device is soldering. Soldering is melting a special metal (called, um..., “solder”) between two components to make an electrical connection. We can also use solder like glue, to build things out of metals. Please note: You must make sure to use electrical solder, and not plumbers solder, which is used for piping and really isn’t good for electronics.
SB-FireFly Manual Construction! Now that you know how to solder and you’ve inventoried all the parts, it’s time to put this little blinky bug together! Step 1 - DIP Socket: The DIP socket is just a carrier for the microcontroller that makes it easy to remove than desoldering every pin. Install it with the half-moon notch matching the one printed on the PCB. Flip it over, and bend a few pins over with your thumbnail so the DIP socket stays put while you finish soldering it in from the back.
SB-FireFly Manual Construction! Step 3 - Resistors: First thing to do is to bend the leads right over 90° close to the resistor body, so they fit into their spot on the PCB. Next, install the 10k resistor (colors: Brown / Black / Orange) to location ‘R1’, and solder it in. Don’t mix these up! Your SB-FireFly will still work, but barely! Bend these... ...
SB-FireFly Manual Construction! Step 6 - The Battery Holder: If you manage to get this wrong, we’ll be impressed. Not amazed, but impressed. Just install it on the backside so it matches the outline, and solder it in from the top side. Step 7 - LEDs: Blinky parts! First thing to do is figure out which is which, and how to install them. LEDs don’t work in reverse, so pay attention to the flat spot on the side of the clear lens, and install it so it matches the flat spot printed on the circuit board.
SB-FireFly Manual Construction! Step 8 - Installing the IC: Braaains... Yes, we’re using a fairly powerful tiny microcontroller to blink lights (but we’ll leverage that into more cool applications later!). See the dot on the corner of the ATtiny85? Match it with the one semi-hidden under the DIP carrier - it’s on the same side as the half-moon notch. Pinch the pins in a bit, and insert the ATtiny into the DIP carrier. Done! See the dot? Dots are important. Dots keep you from putting the IC in backwards.
SB-FireFly Manual Construction! FireFly - Digispark shield compatibility configuration: Continue from here if you’d like to use your Firefly for other fun and devious applications. First install and solder in the headers. The male 2x3 header is installed over the open hardware logo. The female 3 pin header goes to the left of the switch and the female 6 pin header is situated to the left of the male 2x3 header.
SB-FireFly Manual Hacking It! Before we think about what you can do with a microcontroller, 5 tristate I/O pinouts, how do you hack it? The geniuses at the MIT Media lab High-Low tech site have step-by-step instructions programming the ATtiny microcontroller using the popular Arduino 1.0.1 IDE. The hack requires that it runs on the 8Mhz internal oscillator (which it already does). If you want to use an Arduino-as-ISP trick, you modify a $3.
The SB-FireFly started as a after-dark art project in Calgary and has turned into a fun in-house project. It has also been used at the local science center for an evening buildfest. The included CR2032 coin cell battery has been tested to run the board in FireFly mode continuously for 24 hours before the blue fades out, and over 36 hours for the green. When not running, it sleeps, drawing only 0.