
Installation Guide


be used. The rest of the drill guides (located at the bottom, back and sides of the
enclosure, each with two sizes: ¾'' and 1'') should remain sealed.
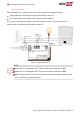
Figure 10: AC wiring drill guide
3.
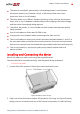
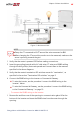
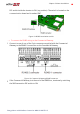
Install the bracket on a wall or pole, with the semi-circles facing downward, as
shown below. Verify that the bracket is firmly attached to the mounting surface.
Figure 11: Mounting bracket
4.
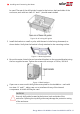
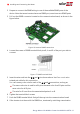
Mount the meter: Attach the enclosure back brackets to the mounted bracket using
the four supplied screws. Tighten the screws with a torque of 9 N*m / 6.6 lb*ft.
Figure 12: Back brackets
5.
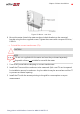
Open one or more conduit drill guides as required for the installation - each with
two sizes: ¾'' and 1'', taking care not to interfere with any of the internal
components. A Unibit drill may be used.
CAUTION!
Use only drill guides located at the bottom, back and sides of the
enclosure. Opening the top drill guides may damage the protection rating
of the enclosure.
Energy Meter with Modbus Connection MAN-01-00270-1.3
14 Installing and Connecting the Meter