
Installation Guide


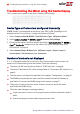
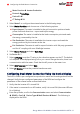

Meter Function è Inverter Production
Protocol èSolarEdge
Device ID è 1
CT Rating è 5A
3.
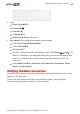
Select Meter 2 to configure the external meter in the following steps:
4. Select Meter Function, and choose one of the following options:
Export+Import: The meter is installed at the grid connection point and reads
pulses from both directions - export and import energy.
Consumption: The meter is installed at the load consumption point and reads
the energy consumed by the site.
Site Production: The meter is installed at the inverter output and reads the
energy produced by the inverters at the site.
Ext. Production: The meter is used for export limitation with 3rd party generators
and for AC coupling with non-SolarEdge inverters.
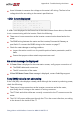
5. Select Meter Protocol, and select SolarEdge.
6. Set Device ID: 2.
7. Select CT Rating to set the CT rating to the value that appears on the CT. The default
is 5 Amperes. If the displayed rating is 0 or you cannot change the value, there is no
communication with the meter. Check that the AC power to the meter is on.
8. Select Grid Topology and select Wye.
9. Select PT Scaling and set the potential transformer ratio.
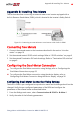
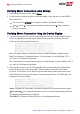
Configuring Dual-Meter Connection Using the Device Display
The built-in RGM is pre-configured as a production meter and its settings should not be
changed. Verify the pre-configured parameters of the RGM and configure the
parameters of the external meter as described below.
1. Verify that the inverter AC is turned ON.
2. If the meter is connected to an AC breaker, verify it is turned ON (the meter LEDs are
lit or blinking).
3.
Enter Setup mode, scroll to the Communication menu and select Communication
è RS485-x Conf. è Device Type è Multi Devices è Meter 1. The following is
displayed for the RGM:
Energy Meter with Modbus Connection MAN-01-00270-1.3
36 Configuring the Dual-Meter Connection