
Installation Guide


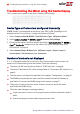


Verifying Meter Connection using SetApp
1. From the SetApp main menu, select Status.
2. In the Communications section of the Status page, check the value of the RS485-x
field, which lists:
The connection protocol (for example, Modbus, SE Master, SE Slave)
"x of y", where x is the number of meters configured, and y is the number of
meters connected.
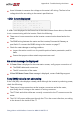
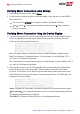
Verifying Meter Connection Using the Device Display
1. Press the Enter button or the LCD external button until the Communication status
screen is displayed as shown below. When two meters are connected, a screen
similar to the following should appear:
D e v P r o t # #
R S 4 8 5 - 1 < M L T > < 0 2 > < 0 2 >
R S 4 8 5 - 2 < - - - > < - - > < - - >
Z i g B e e < - - - > < - - > < - - >
Dev: The type of device configured to this port. MLTindicates multiple meters.
Prot: The number of configured meters. For dual meters, it should display "02". If
not, refer to
Troubleshooting
below.
## : The number of communicating meters. For dual meters, it should display "02". If
not, refer to
Troubleshooting
below.
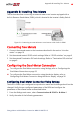
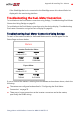
2.
Press the Enter button or the LCD external button until reaching the Meter status
screen showing the total energy [Wh]. There is a status screen for each meter
function. For example, for an export+import meter and a production meter, there
will be three status screens: for export, import and production. The following is an
example of an export meter:
E x p o r t M e t e r
S t a t u s : < O K >
< E r r o r M e s s a g e >
T o t a l [ W h ] : X X X X X X X
Status: Displays OK if the meter is communicating with the communication board.
<Error message>: If an internal meter error occurs, it will be displayed here. Refer to
Troubleshooting the Meter
on page 29.
Total [Wh]: The amount of Watts per hour of the designated meter.
Energy Meter with Modbus Connection MAN-01-00270-1.3
38 Verifying the Meter Connection