OWNERS MANUAL Installation, Operation & Maintenance Guide MODELS: SOLE-30/SOLE-42
This Page Intentionally Left Blank
Gas Connection Basics ..........................................................................6 Natural Gas Connections .......................................................................7 Propane (LP) Gas Connections...............................................................8 Propane (LP) Tank Requirements ..........................................................9 Installation Location & Clearances .......................................................10 Built-In Installations .................
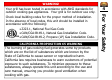
3 Read the Lighting Instructions in this manual before attempting to light your grill. For Your Safety WARNING! WARNING! Read and adhere to the Basic Safety Guidelines outlined in this manual. WARNING! DO NOT store or use flammable liquids or vapors such as gasoline near your grill. WARNING! DO NOT store unconnected propane tanks or tanks not currently in use near your grill. WARNING! If you smell gas: 1. Shut off the gas to your grill. 2. Extinguish any flames. 3.
WARNING! CALIFORNIA PROPOSITION 65 WARNING The burning of gas cooking fuel generates some by-products which are on the list of substances which are known by the State of California to cause cancer or reproductive harm. California law requires businesses to warn customers of potential exposure to such substances. To minimize exposure to these substances, always operate this unit according to the use and care manual, ensuring you provide good ventilation when cooking with gas.
Basic Safety Guidelines: For Your Safety 5 It is important to follow these rules to avoid fire hazard, property damage or bodily injury from improper installation or usage of your grill. For your safety, read all rules carefully and check local codes: DO NOT install your grill in recreational vehicles, mobile homes, trailers, boats, etc. Your grill is for outdoor installation and use only. Always install your grill by following the installation instructions and local codes.
Gas Connection Basics 6 Only use the type of gas indicated on the rating plate. DO NOT connect an unregulated gas line to your grill. Both your grill and its shut-off valve must be disconnected from the supply line during any system pressure testing where test pressures may exceed 1/2 Psi (3.5kPa). Your grill must be isolated from the gas supply line, by closing its manual shut-off valve, during any pressure testing where test pressures may be equal to or less than 1/2 Psi (3.5kPa).
7 Appliance Pressure (Natural Gas) Inlet Pressure (Natural Gas) Installation Natural Gas Connection Assemble pipe fittings as shown: 4” W.C. 5” - 14” W.C. Apply pipe compound on male joints only. Ensure regulators proper orientation for gas flow.
Propane (LP) Gas Connection Appliance Pressure (LP Gas) Inlet Pressure (LP Gas) 10” W.C. 11” - 14” W.C. After assembly, turn tank valve on and turn control valves on your grill to the HI position for 10 to 15 seconds to purge the line of air. Inspect the supply hose before each use. If there is evidence of excessive abrasion, wear or cuts to the hose it must be replaced prior to operation of your grill. Replacement hose assembly shall be that specified by the manufacturer.
LP Tank Requirements Installation 9 The LP gas cylinder must be constructed and marked in accordance with the specifications for LP gas cylinders of the U.S. Department of Transportation (DOT) and designed for use with a QCC-1 quick disconnect system only. The cylinder must be provided with a shut-off valve terminating in an L.P. gas supply cylinder valve outlet specified, as applicable, for connection No. QCC-1. The cylinder must be provided with a listed overfilling prevention device.
Installation Location & Clearances Choose a location where the flow of air on the front of your grill is not obstructed. 10 Installation Due to high temperatures, place your grill out of traffic and keep away from clothing, furniture, etc. Keep the gas line connection as short as possible. Do not install in recreational vehicles, mobile homes, trailers, boats, etc.
Built-In Installation Installation 11 For non-combustible masonry enclosure installation, follow the cut out dimensions as shown. Bottom of grill must be supported on both sides and back or full width with opening as shown for gas connection.
Electrical Requirements Electrical outlet for Rotisserie motor must be installed to the left side of the grill. • ANSI/NFPA 70, National Electrical Code • CSA C22.1, Canadian Electrical Code Keep all electrical supply cords and fuel supply lines away from heated surfaces. Halogen Light (42” Only) The grill is provided with a three-prong grounding plug for your protection against shock hazard. Connect 115V power to the grill with a grounded cord.
Leak Testing Installation 13 All gas lines and connections must be tested for leaks after refill, installation or service. All leaks must be corrected immediately. Open the shut-off valve and apply soap & water solution to all joints. The formation of bubbles indicates a gas leak.
Burner Adjustments The flame should be full length of the burner, blue and stable. The air intake should be adjusted ONLY if the flame is lifting off of the ports or has yellow tipping. If flame is lifting, turn the air shutter clockwise reducing this intake. The screw should be loosened before turning the air shutter. If the flame has yellow tipping, the air shutter should be turned counter clockwise allowing more air in. This will stabilize the flame.
Lighting Instructions & Grill Operation Operation 15 Before Lighting: • Check gas line/hose for signs of wear, abrasion or cuts. If evidence of deterioration is visible, replace the part prior to use. • If you smell gas, check for leaks. If odor continues, immediately call for service. • Keep your face and body away from the grill top when lighting. Grill and Rotisserie Burner Lighting: 1. Open lid before lighting. Make sure all burners are in the OFF position. 2.
Rotisserie Operation (if Equipped) Turn the control knobs to HI. Rotisserie cooking can be done with grill burners as well as with the Rotisserie burner. The skewer slides in from the side with the tip sliding into the motor shaft adapter. The slot on the handle side should be on the side support panel edge. Use the prongs to hold the meat; tightening the thumbscrew on the prong hubs to secure in place. When ready, turn the switch on the motor box to the ON position. The skewer will rotate slowly.
Cleaning Your Grill Maintenance 17 Your Bar-B-Q grill works better and lasts longer if properly cleaned and maintained. Clean the grill immediately after every use. Turn grill off before starting to clean. Protect your hand with a good mitt when cleaning the hot grill. Use a wire brush, dip in water and scrub the grill to soften and loosen food spills. The food spills will fall into the crumb pan. DO NOT use Aerosol cleaners on hot grill surface.
General Maintenance Keep your grilling area clear and free from combustible materials, gasoline and other flammable vapors and liquids. Keep the ventilation openings of the cylinder enclosure free and clear from debris. Visually check burner flames. There are many different stainless steel cleaners available. Always use the mildest cleaning procedure first, scrubbing in the direction of the grain.
Parts Removal & Replacement Maintenance 19 Front Panel: 1. 2. 3. 4. 5. Pull Knobs Out Remove Screws (4) Pull Panel Out Slightly Disconnect Wires from Switch Replace in Reverse Order Grill Burner: 1. Remove Top Grates, Briquettes & Shields 2. Remove Screw at Rear of Burner and Slide Out 3. Clean and Replace in Reverse Order Grill Sparker: 1. 2. 3. 4. Remove Top Grates, Briquettes & Shields Unscrew Sparker Bracket from inside Disconnect Wire Replace in Reverse Order Rotisserie: 1. 2. 3. 4.
Solution Burner Will Not Light Check gas supply to burner by manually lighting the burners (bypassing the igniter). Check Electrode for visible damage & replace if necessary. Improper Burner Flame Check burner gas inlet area for blockage and clear. Check orifice hoods for clogging and clean. Check and adjust the air shutter. Check gas pressure & regulator. Check gas supply or tank.
Parts Identification 21
Replacement Bulb: Your Grill uses a Halogen (Q20T3/CL) bulb.