_'_j_Ii_yG, CI_ ' _i_j,_ Model No. SG-PAC-08E4 Reference No.
Thank you for choosing a Soleus Air Powered by Gree Portable Air Conditioner. This owner's manual will provide you with valuable information necessary for the proper care and maintenance of your new product. Please take a few moments to thoroughly read the instructions and familiarize yourself with all the operational aspects of your new Portable Air Conditioner. For your own records, please attach a copy of your sales receipt to this manual.
LCDI POWER CORD AND PLUG This air conditioner is equipped with an LCDI (Leakage Current Detection and Interruption) power cord and plug as required by US National Electric Code 440.65. This cord consists of a length of shielded flexible cord with no termination on the load side and a LCDI attachment plug on the line side.
PRODUCT DIAGRAM Control Panel Louver Guides Louvers Casters Remote Control Holder Power Cord Filters Upper Air Exhaust Air intake Vent Lower Air intake
PACKAGE CONTENTS Portable Air Conditioner Exhaust Hose (1) Exhaust Hose Adapter Window Kit Adapter (1) (1) Hose Adapter (1) Remote Control & AAA Window Window Batteries Kit - 3 Sliding Kit Joint Drain Hose Assembly Owner's Manual Panels (drain (2 batteries) (1 single pipe, hose panel, clamp, 2 extension hose clip, rubber panels) plug, & screw) SPECIFICATIONS • The cooling capacity is measured at an ambient • Noise level is measured • Power consumption is measured • These
PARTS & WINDOW KIT ASSEMBLY PARTS EXHAUST HOSE & ADAPTERS Exhaust Hose Adapter Exhaust Hose Wood Screws Hose Adapter ASSEMBLY Adjustable (4) Window Slider (3) & INSTALLATION INSTALLATION When the unit is operating When the unit is operating MOUNTING as an air conditioner or dehumidifier, the window kit and exhaust hose must be installed. in fan mode, the window kit and exhaust hose do not need to be installed.
SINGLE HOSE WINDOW |ns ||ation FOR SINGLE KIT INSTALLATION of the HOSE PORTABLE AIR When installing the exhaust hose, try and keep it as flat as possible. The less angles and bends in the hose, the better the unit will perform. If bending or an angle is necessary, use single 90 ° angles like the pictures above.
CONTROL CONTROL PANEL, DISPLAY, & OPERATING INSTRUCTIONS PANEL & LED DISPLAY BUCKET FULL LIGHT COOL MODE LIGHT r REMOTE RECEIVER MODE BUTTON CONTROL PANEL OPERATING LED DISPLAY _, TEMP SELECT BUTTON FAN MODE LIGHT POWER BUTTON INSTRUCTIONS 1) Power On and Off - Press the POWER button once more to turn the unit off. s) DRY MODE LIGHT button once to manually turn the unit on.
REMOTE CONTROL OPERATING INSTRUCTIONS NOTE: Heat mode is not available on the SG-PAC-08E4 MODE BUTTON POWER SELECT BUTTONS SWING BUTTON (Not Available on SG-PAC-08E4) FAN BUTTON SLEEP BUTTON TIMER BUTTON J _J 1) Power On and Off - Press the ON/OFF (POWER) button once to manually turn the unit on. Press the Power button once snore to turn the unit off. When you manually power the unit on and off by pressing the ON/OFF button, the preset timer will be cancelled.
REMOTE 5) CONTROL OPERATING INSTRUCTIONS (Cont.) Auto-on Timer: When the air conditioner is off, it can be set to automatically turn on in 30 minutes to 24 hours at the previous set mode and fan setting. To set the Auto-on Timer, press the TIMER button on the unit or remote control. Each touch of the +/buttons on the remote will change the timer setting in 30 minute increments (.5 hours). The T-ON and H lights will blink while the Auto-on Timer is being set.
DRAINING COLLECTED WATER When the temperature or humidity is too high, the air conditioner may not be able to evaporate all of the water as quickly as needed. All moisture that is unable to be evaporated is placed in a small bank up water tank inside the unit. When this tank is completely full, an alarm will sound, the compressor will shut off, and the bucket full icon will light up on the control panel. To manually empty the tank, please follow the instructions below.
MAINTENANCE Note: Make sure power is off and the power cord is not plugged into an electrical performing any maintenance on the unit. outlet prior to Clean or replace filter - If the air filter is blocked with a dust, the airflow volume may reduce. recommended to clean the filter once every two weeks or as needed. 1) Remove the filter from the filter compartment on the back of the unit. 2) Wash the air filter by immersing it gently into warm water with a neutral detergent.
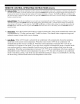
Ill IIII TROUBLESHOOTING POSSIBLE CAUSES The air conditioneris unpluggedor not connected well. SOLUTIONS io Make sure the air conditioner plug is pushed completely into the outlet Check the house fuse!circuit breaker box and replace the fuse or reset the breaker. The fuse is blownfcircuit breaker is tripped. Power Failure o g The current interrupter device is tripped. The unit wilt automatically re-start when power is restored. There is a protective time delay (approx.
TROUBLESHOOTING (CONT.) POSSIBLE CAUSES Low Voltage Protection The backup water tank is full SOLUTIONS • Unplug for 10 minutes and then turn on the unit. If "E5" is still displayed, contact customer service. Drain the water tank If the "H8" I still displayed after the water tank has been emptied, contact customer service.
WARRANTY One Year Limited Warranty Soleus International Inc. warrants the accompanying Soleus Air Powered by Gree Portable Air Conditioner to be free of defects in material and workmanship for the applications specified in its operation instruction for a period of ONE (1) year from the date of original retail purchase in the United States. If the unit exhibits a defect in normal use, Soleus International Inc.