Installation Manual /Guide d’installation /Manual de Instalación ENCORE /ZIF G3 or G4 ™
Installation Manual Manuel d’installation/Manual de Instalación ENCORE /ZIF G3 or G4 ™
Fr Es Manuel d’installation de la carte de mise à jour processeur Encore™/ZIF G3 ou G4 © 2000 Sonnet Technologies, Inc. Révision 2001. Tous droits réservés. Manual de instalación Tarjeta actualizadora de procesador Encore™/ZIF G3 o G4 © 2000 Sonnet Technologies, Inc. Revisado 2001. Todos los derechos reservados. Sonnet Technologies, Inc. 15 Whatney Irvine, Californie 92618-2808, États-Unis Sonnet Technologies, Inc. 15 Whatney Irvine, California 92618-2808, E.U.
En Installation Manual Encore™/ZIF G3 or G4 Processor Upgrade Cards © 2000 Sonnet Technologies, Inc. Revised 2001. All rights reserved. Sonnet Technologies, Inc. 15 Whatney Irvine, California 92618-2808 USA Toll Free Sales: 1-800-786-6260 Sales: 1-949-587-3500 Fax: 1-949-457-6350 Customer Service: 1-949-472-2772 (Monday–Friday, 8 am–5 pm Pacific Time) Customer Service E-mail: support@sonnettech.com U.S.A. Sales E-mail: sales@sonnettech.com International Sales E-mail: intl.sales@sonnettech.com Website: www.
Fr Es Contenido Table des matières Préface vi Modèles d‘ordinateur Macintosh compatibles vi vi Modelos Macintosh compatibles vi Procedimientos iniciales vii Consulte las notas “Read Me” vii Visite nuestro sitio Web vii Tome las precauciones correspondientes vii Consultez les instructions du manuel vii Familiarícese con las instrucciones vii 1 Instalation sur Power Macintosh 1-1 Macintosh G3 All-In-One 1 Instalación en computadoras Power Macintosh G3 All-in-one 1-1 Avant de commencer
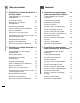
En Contents Preface vi System Compatibility vi Getting Started vii Check Read Me Notes vii Visit Our Website vii Take Precautionary Measures vii Familiarize Yourself With the Instructions vii 1 Power Macintosh G3 All-in-one Installation 1-1 Operating System Compatibility 1-1 You Should Have 1-1 Installation Overview 1-2 Install Software 1-3 Shut Down and Open Computer 1-5 Remove Logic Board Brace 1-5 Disconnect Logic Board Cables 1-6 Remove Heatsink 1-8 Remove Processor Card
Fr Es Table des matières 2 Installation sur Power Macintosh 2-1 G3 Bleu & Blanc Compatibilité avec les systèmes d'exploitation 2 Instalación en computadoras Power Macintosh Blue & White 2-1 2-1 Compatibilidad con sistemas operativos Contenu du coffret 2-1 Contenidos del paquete 2-1 Résumé de la procédure d’installation 2-2 Resumen de instalación 2-2 Instale el software 2-3 Installation du logiciel 2-3 Apague y abra la computadora 2-6 Arrêt et démarrage de l’ordinateur 2-6 Retire el d
En 2 Contents Power Macintosh G3 Blue & White Installation 2-1 Operating System Compatibility 2-1 You Should Have 2-1 Installation Overview 2-2 Install Software 2-3 Shut Down and Open Computer 2-6 Remove Heatsink 2-6 Remove Processor Card 2-7 Install Encore/ZIF Processor Upgrade Card 2-7 Reattach Heatsink 2-8 Close Computer 2-8 Turn On Computer 2-8 3 Power Macintosh G3 Desktop Installation 3-1 Operating System Compatibility 3-1 You Should Have 3-1 Installation Overview 3-2 I
Fr Es Contenido Table des matières 4 Installation sur Power Macintosh 4-1 G3 Tower et Server 4-1 4-1 4 Instalación en computadoras Power Macintosh G3 torre y servidor 4-1 Contenu du coffret 4-1 Compatibilidad con sistemas operativos Résumé de la procédure d’installation 4-2 Contenidos del paquete 4-1 Resumen de instalación 4-2 Installation du logiciel 4-3 Instale el software 4-3 Arrêt et démarrage de l’ordinateur 4-5 Apague y abra la computadora 4-5 Retrait du radiateur 4-5 Retire
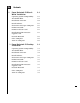
En Contents 4 Power Macintosh G3 Tower and Server Installation 4-1 Operating System Compatibility 4-1 You Should Have 4-1 Installation Overview 4-2 Install Software 4-3 Shut Down and Open Computer 4-5 Remove Heatsink 4-5 Remove Processor Card 4-6 Install Encore/ZIF Processor Upgrade Card 4-6 Reattach Heatsink 4-7 Close Computer 4-7 Turn On Computer 4-8 5 Power Macintosh G4 (PCI Graphics) Installation Operating System Compatibility 5-1 5-1 You Should Have 5-1 Installation Overview
Es Fr 7 Informations supplémentaires sur le logiciel 7 Información sobre el software 7-1 Sonnet Processor Upgrade Extension 7-1 Sonnet G4 Enabler 9 7-1 Sonnet Processor Upgrade Extension 7-1 Sonnet G4 Enabler 9 7-1 Sonnet Nonvolatile RAM Patch 7-1 Sonnet Nonvolatile RAM Patch 7-1 G4 Firmware Patch 7-1 G4 Firmware Patch 7-1 G4 Firmware Patch Remover 7-2 G4 Firmware Patch Remover 7-2 Metronome 7-2 Metronome 7-2 8-1 8 Guía de resolución de problemas 8-1 8 Guide de dépannage 9 Gar
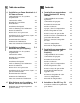
En 7 Learning About the Software 7-1 Sonnet Processor Upgrade Extension 7-1 Sonnet G4 Enabler 9 7-1 Sonnet Nonvolatile RAM Patch 7-1 G4 Firmware Patch 7-1 G4 Firmware Patch Remover 7-2 Metronome 7-2 8 Troubleshooting Guide 8-1 9 Limited Warranty 9-1 10 Contacting Customer Service 10-1 v
Fr Préface Prefacio Ce manuel présente l’installation logicielle et matérielle des cartes de mise à jour processeur Encore/ZIF permettant d’accélérer l’ordinateur Power Macintosh®. Este manual explica cómo instalar el hardware y el software de las tarjetas actualizadoras de procesador Encore/ZIF para que pueda acelerar su computadora Power Macintosh®. La présente documentation présuppose que vous connaissez les principes de base du fonctionnement de l’ordinateur et du système d’exploitation Macintosh®.
En Preface This manual explains how to install the hardware and software for Encore/ZIF processor upgrade cards so that you can accelerate your Power Macintosh®. This documentation assumes you have a working knowledge of the Macintosh® and its operating conventions. If you are unfamiliar with the Macintosh, see your computer’s documentation.
Fr Avant de commencer Es Procedimientos iniciales Consultez le fichier ReadMe/LisezMoi Consulte las notas “Read Me” Pour obtenir les toutes dernières informations concernant l’installation de produit, reportez-vous au fichier ReadMe/LisezMoi qui s’affiche lors de l’installation du logiciel depuis la CD Crescendo/Encore Install livrée avec le produit.
En Getting Started Check Read Me Notes For the most current information regarding this product’s installation, see the Read Me Notes displayed when you install software from the Crescendo/Encore Install CD packaged with your product. Visit Our Website The latest software updates and online support files are available from the Sonnet website at www.sonnettech.com.
Chapitre 1 Capítulo 1 Installation sur Power Macintosh G3 All-in-one Instalación en computadoras Power Macintosh G3 All-in-one Ce chapitre contient les instructions d’installation des cartes de mise à jour processeur Encore/ZIF sur le système Power Macintosh G3 All-in-one. Este capítulo contiene instrucciones para instalar las tarjetas actualizadoras de procesador Encore/ZIF en una computadora Power Macintosh G3 All-in-one.
Chapter 1 Power Macintosh G3 All-in-one Installation This chapter contains instructions for installing Encore/ZIF processor upgrade cards into a Power Macintosh G3 All-in-one computer. Operating System Compatibility At this printing, Encore/ZIF processor upgrade cards are compatible with Mac OS 8 through OS 9.1. Mac OS 9.x is required for G4 AltiVec use. For up-to-date Mac OS compatibility, check our website.
Fr Es Résumé de la procédure d’installation Resumen de instalación Ce document est destiné aux utilisateurs ayant déjà installé des mises à jour Sonnet ou du matériel Macintosh. Si vous installez ce genre de matériel pour la première fois, nous vous conseillons vivement de suivre les instructions d’installation détaillées. Este resumen es para las personas que ya tienen experiencia en la instalación de productos de actualización Sonnet o que conocen el hardware de Macintosh.
En Installation Overview This overview is intended for those with prior experience installing Sonnet upgrade products or Macintosh hardware. We strongly recommend following the full installation instructions if this is your first installation of this hardware. Installing the Encore/ZIF card takes a few easy steps: 1) Install Mac OS 9.
Es Fr Remarque technique : Avant de procéder à l’installation, prenez connaissance des instructions ci-après. En raison de la fragilité des broches de la carte, son installation doit être réalisée avec le plus grand soin. La garantie accompagnant le produit ne couvre pas l’endommagement des broches. Si vous ne pensez pas pouvoir mettre en place le matériel, contactez un technicien qualifié. Nota de asistencia: Familiarícese con las siguientes instrucciones antes de comenzar la instalación.
En Support Note: Please familiarize yourself with the following instructions before beginning the installation. This product has fragile pins that can be easily damaged. Careful installation is required. Broken pins are not covered under warranty. If you feel you are unable to install the computer hardware, please contact a qualified computer technician. For the installation of the Encore into a Power Macintosh All-in-one, Sonnet strongly recommends that a qualified technician performs the installation.
Es Fr cliquez sur le bouton Options puis, dans l’écran affiché, cochez la case Perform Clean Installation (Effectuer une nouvelle installation). Cliquez sur le bouton Select (Sélectionner). Affichez les écrans suivants jusqu’à ce que vous atteignez la fenêtre Install Software (Installer le logiciel). Cliquez sur le bouton Customize (Personnaliser). Dans la fenêtre Custom Installation and Removal (Installation et suppression personnalisées), cliquez sur le menu déroulant en regard de Mac OS 9.x.
En reach the Install Software window. Click the Customize button. In the Custom Installation and Removal window click the pop-up menu to the right of Mac OS 9.x. Change the “Recommended Installation” to “Customized Installation.” The Select Mac OS 9.x Features to Install window will appear shortly. Change “Recommended Installation” to “Universal Installation” from the pop-up menu. Click OK, Start, then Continue to complete the installation.
Fr Es Arrêt et démarrage de l’ordinateur Apague y abra la computadora 1. Arrêtez votre ordinateur Power Macintosh. Si l’ordinateur est resté allumé pendant longtemps, laissez-le refroidir pendant quelques minutes avant de lancer l’installation. 2. Débranchez les câbles des périphériques et d’alimentation électrique de l’arrière de l’ordinateur et placez la machine dans un endroit facilement accessible. 3.
En screw screw Shut Down and Open Computer 1. Shut down your Power Macintosh. If the computer has been on for any length of time, wait a few minutes for it to cool before beginning the installation. screw screw 2. Disconnect the power and peripheral cables from the back of the computer and move it to an area where you can freely work. Figure 1; Figura 1 logic board 3.
Es Fr 3. Retirez la vis du bas du support (Figure 5). Veillez à ne pas laisser tomber la vis dans l’ouverture à l’avant du support. 4. Retirez le support de la carte logique (Figure 6). Placez le support et la vis en lieu sûr. Déconnexion des câbles de la carte logique 1. Pour retirer la carte de processeur G3 en toute facilité, vous devez déconnecter les câbles d’alimentation et SCSI (Figure 7) de la carte logique.
En logic board brace 3. Unscrew the bottom brace screw (Figure 5). Be careful not to lose the screw since it can easily drop into the opening of the case in front of the brace. bottom brace screw 4. Remove the brace from across the logic board (Figure 6) and temporarily set the brace and screws aside. Figure 5; Figura 5 Disconnect Logic Board Cables 1.
Fr 1-7 Es 3. Déconnectez le câble SCSI principal (Figura 9). 3. Desconecte el cable SCSI principal (Figura 9). 4. Déconnectez le câble SCSI secondaire (Figure 10), se trouvant à gauche de la carte logique. 4. Desconecte el cable SCSI secundario (Figura 10), ubicado del lado izquierdo de la tarjeta lógica. 5. Déplacez délicatement les câbles SCSI pour accéder au câble d’alimentation de la carte logique (Figure 11). 5.
En main SCSI cable 3. Disconnect the main SCSI cable (Figure 9). 4. Disconnect the secondary SCSI cable (Figure 10), located to the left hand side of the logic board. 5. Carefully move the SCSI cables aside to reveal the logic board power cable (Figure 11). 6. Disconnect the logic board power cable (Figure 12).
Fr 7. Une fois les câbles de la carte logique déconnectés, vous pouvez accéder sans problème à la carte de processeur G3 (Figure 13). Retrait du radiateur 1. Identifiez le radiateur de processeur sur la carte logique (Figure 14). Placez le petit tournevis à lame plate entre le loquet et l’emplacement ZIF (Figure 14). Si votre ordinateur est sous garantie, veillez à ne pas briser accidentellement le sceau du cavalier adjacent à l’emplacement ZIF.
En G3 processor card (with heatsink) 7. Once the logic board cables are disconnected, you should have easy access to the G3 processor card (Figure 13) on the logic board. Remove Heatsink 1. Locate the processor heatsink on the logic board (Figure 14). Place a small flat blade screwdriver between the latch and the ZIF socket (Figure 14). If your computer is under warranty, take caution not to accidentally break the seal located on a jumper next to the ZIF socket.
Fr Es Installation de la carte de mise à jour processeur Encore/ZIF Instale la tarjeta actualizadora de procesador Encore/ZIF 1. En veillant à la tenir par les bords, retirez la carte de mise à jour processeur Encore (Figure 17) de son emballage antistatique. Enlevez délicatement la mousse de protection des broches de la carte. Utilisez cette mousse pour la protection de la carte de processeur G3 retirée de l’ordinateur, glissez la carte dans l’emballage antistatique et placez-la en lieu sûr. 2.
En Encore/ZIF card Install Encore/ZIF Processor Upgrade Card 1. Remove the Encore processor upgrade card (Figure 17) from the anti-static package, making sure to handle the card by the edges. Gently peel the pin protection foam off the Encore card. Transfer the foam to the G3 processor card you removed from the computer. With the foam attached, place it into the anti-static package and store it in a safe place. anti-static package Figure 17; Figura 17 2.
Fr Es Reconnexion du radiateur Vuelva a conectar el disipador de calor Reconnectez le radiateur. Placez le loquet métallique le long du centre dentelé du radiateur. Fixez le radiateur en rattachant l’une des extrémités du loquet métallique à l’une des petites languettes de l’emplacement ZIF. Rattachez l’autre extrémité du loquet ; il s’encastrera sur la languette de l’emplacement ZIF (Figure 21). Conecte el disipador de calor.
En Reattach Heatsink Reattach the heatsink. Place the metal latch along the indented center of the heatsink. Secure the heatsink by attaching one end of the metal latch to one of the small ZIF socket tabs. Attach the other end of the metal latch; it will snap into place on the ZIF socket tab (Figure 21). latch ZIF socket tab Figure 21; Figura 21 Reattach Logic Board Cables 1. Reattach the logic board cables to their appropriate connectors on the logic board.
Es Fr 5. Reconnectez le câble d’alimentation des unités internes (Figure 25). 5. Vuelva a conectar el cable de alimentación de las unidades internas (Figura 25). 6. Une fois la reconnexion terminée, les câbles devraient se présenter comme illustré dans la Figure 26. 6. Después de haber conectado los cables nuevamente, éstos deberían aparecer aproximadamente como se indica en la Figura 26.
En internal drive(s) power cable 5. Reconnect the internal drive(s) power cable (Figure 25). 6. After the cables are reconnected, they should appear approximately like the picture shown in Figure 26. • Internal drive(s) power cable (Figure 26-Label A) Figure 25; Figura 25 • Main SCSI cable (Figure 26-Label B) • Secondary SCSI cable (Figure 26-Label C) D • Logic board power cable (Figure 26-Label D) B Replace Logic Board Brace 1.
Fr Es Fermeture de l’ordinateur Cierre la computadora 1. Faites glisser la carte logique dans l’ordinateur (Figure 29). 1. Deslice la tarjeta lógica en la computadora (Figura 29). 2. Replacez et vissez les quatre vis de fixation (Figure 30). 2. Reemplace y apriete los cuatro tornillos de seguridad (Figura 30). 3. Replacez l’ordinateur dans votre zone de travail, et rebranchez le cordon d’alimentation et les câbles de périphériques. 3.
En logic board Close Computer 1. Slide the logic board into the computer (Figure 29). 2. Replace and tighten the four security screws (Figure 30). 3. Return the computer to your computing area and reconnect the power and peripheral cables to the computer. Figure 29; Figura 29 screw screw 4. Affix the Powered by Sonnet label to the front of your computer. Turn On Computer 1. Turn on your Power Macintosh. Your newly accelerated machine should boot as normal. 2.
Chapitre 2 Capítulo 2 Installation sur Power Macintosh G3 Bleu & Blanc Instalación en computadoras Power Macintosh G3 Blue & White Ce chapitre contient les instructions d’installation des cartes de mise à jour processeur Encore/ZIF sur le système Power Macintosh G3 Bleu & Blanc. Este capítulo contiene instrucciones para instalar las tarjetas actualizadoras de procesador Encore/ZIF en una computadora Power Macintosh G3 Blue & White.
Chapter 2 Power Macintosh G3 Blue & White Installation This chapter contains instructions for installing Encore/ZIF processor upgrade cards into a Power Macintosh G3 Blue & White computer. Operating System Compatibility At this printing, Encore/ZIF processor upgrade cards are compatible with Mac OS 8 through OS 9.1. Mac OS 9.x is required for G4 AltiVec use. For up-to-date Mac OS compatibility, check our website.
Fr Es Résumé de la procédure d’installation Resumen de instalación Ce document est destiné aux utilisateurs ayant déjà installé des mises à jour Sonnet ou du matériel Macintosh. Si vous installez ce genre de matériel pour la première fois, nous vous conseillons vivement de suivre les instructions d’installation détaillées. Este resumen es para las personas que ya tienen experiencia en la instalación de productos de actualización Sonnet o que conocen el hardware de Macintosh.
En Installation Overview This overview is intended for those with prior experience installing Sonnet upgrade products or Macintosh hardware. We strongly recommend following the full installation instructions if this is your first installation of this hardware. Installing the Encore/ZIF card takes a few easy steps: 1) Install Mac OS 9.
Es Fr Remarque technique : Avant de procéder à l’installation, prenez connaissance des instructions ci-après. En raison de la fragilité des broches de la carte, son installation doit être réalisée avec le plus grand soin. La garantie accompagnant le produit ne couvre pas l’endommagement des broches. Si vous ne pensez pas pouvoir mettre en place le matériel, contactez un technicien qualifié.
En Support Note: Please familiarize yourself with the following instructions before beginning the installation. This product has fragile pins that can be easily damaged. Careful installation is required. Broken pins are not covered under warranty. If you feel you are unable to install the computer hardware, please contact a qualified computer technician. We recommend that you make a backup of important information on your hard drive prior to installing new hardware or software.
Es Fr Customize (Personnaliser). Dans la fenêtre Custom Installation and Removal (Installation et suppression personnalisées), cliquez sur le menu déroulant en regard de Mac OS 9.x. Remplacez Recommended Installation (Installation re-commandée) par Customized installation (Installation personnalisée). L’écran Select Mac OS 9.x Features to Install (Sélectionner les fonctions Mac OS 9.x à installer) s’affiche brièvement.
En installation.” The Select Mac OS 9.x Features to Install window will appear shortly. Change “Recommended Installation” to “Universal Installation” from the pop-up menu. Click OK, Start, then Continue to complete the installation. After the software is installed, quit the Mac OS Install application and restart your computer from the hard drive where Mac OS 9.x is installed. 2. Insert the Sonnet Installer CD into the CDROM drive. Double click the Crescendo/Encore Install icon.
Es Fr vous pouvez toujours le désinstaller et restaurer le microprogramme Apple (n’oubliez pas que dans ce cas l’ordinateur Bleu & Blanc ne pourra pas démarrer un processeur G4). Le programme d’installation affiche une boîte de dialogue (Figure 1) comportant les instructions détaillées pour l’installation du module correctif.
En The installer will then begin a firmware patch. Current Apple firmware blocks a G4 processor from booting in a Power Macintosh G3 Blue & White. The installer will patch this firmware to remove the G4 block. (The Sonnet patch may be uninstalled, restoring the Apple firmware; however, your Blue & White would subsequently not boot a G4.) The installer will present a dialog box (Figure 1) with step-by-step instructions for installing the firmware patch.
Fr Es Arrêt et démarrage de l’ordinateur Apague y abra la computadora 1. Arrêtez votre ordinateur Power Macintosh. Si l’ordinateur est resté allumé pendant longtemps, laissez-le refroidir pendant quelques minutes avant de lancer l’installation. 2. Débranchez les câbles des périphériques et d’alimentation électrique de l’arrière de l’ordinateur et placez la machine dans un endroit facilement accessible. 3. Localisez le verrou de sécurité à l’arrière de l’ordinateur (Figure 2). Il doit être enfoncé. 4.
En Shut Down and Open Computer security lock 1. Shut down your Power Macintosh. If the computer has been on for any length of time, wait a few minutes for it to cool before beginning the installation. 2. Disconnect the power and peripheral cables from the back of the computer and move it to an area where you can freely work. Figure 2; Figura 2 side panel 3. Locate the security lock at the back of the computer (Figure 2). If it is not already pressed in, do so now. release latch 4.
Fr Es Retrait de la carte de processeur Retire la tarjeta de procesador Pour débloquer le levier de l’emplacement ZIF (Figure 6), appuyez sur le levier vers le bas et poussez-le en dehors de la languette latérale. Une fois le levier éloigné de la languette, faites-le pivoter de 90° vers le haut. Retirez ensuite délicatement la carte de processeur existante de l’emplacement ZIF.
En ZIF socket lever Remove Processor Card To unlatch the ZIF socket lever (Figure 6), push the lever down and then out to clear the side tab. Once the level is clear of the side tab, rotate the lever up 90˚. Gently lift the existing processor card up and out of the ZIF socket. processor card Figure 6; Figura 6 Install Encore/ZIF Processor Upgrade Card 1. Remove the Encore processor upgrade card from the anti-static package, making sure to handle the card by the edges (Figure 7).
Es Fr 4. En appliquant une pression légère avec le doigt, maintenez la carte Encore en position horizontale sur l’emplacement ZIF et abaissez le levier de l’emplacement en appuyant sur celui-ci jusqu’à son blocage sous la languette latérale (Figure 10). 4. Con una ligera presión digital, sujete la tarjeta Encore a la altura del zócalo ZIF y baje la palanca de dicho zócalo presionando hacia abajo hasta que la palanca se enganche debajo de la lengüeta lateral del zócalo (Figura 10).
En use light finger pressure 4. With light finger pressure, hold the Encore level in the ZIF socket and lower the ZIF socket lever by pressing down until the lever hooks under the side tab on the ZIF socket (Figure 10). ZIF socket lever Encore/ZIF card Reattach Heatsink Reattach the heatsink (Figure 11). Place the metal latch along the indented center of the heatsink. Secure the heatsink by attaching one end of the metal latch to one of the small ZIF socket tabs.
Chapitre 3 Capítulo 3 Installation sur Power Macintosh G3 de bureau Instalación en computadoras Power Macintosh G3 de escritorio Ce chapitre contient les instructions d’installation des cartes de mise à jour processeur Encore/ZIF sur le système Power Macintosh G3 de bureau. Este capítulo contiene instrucciones para instalar las tarjetas actualizadoras de procesador Encore/ZIF en una computadora Power Macintosh G3 de escritorio.
Chapter 3 Power Macintosh G3 Desktop Installation This chapter contains instructions for installing Encore/ZIF processor upgrade cards into a Power Macintosh G3 Desktop computer. Operating System Compatibility At this printing, Encore/ZIF processor upgrade cards are compatible with Mac OS 8 through OS 9.1. Mac OS 9.x is required for G4 AltiVec use. For up-to-date Mac OS compatibility, check our website.
Fr Es Résumé de la procédure d’installation Resumen de instalación Ce document est destiné aux utilisateurs ayant déjà installé des mises à jour Sonnet ou du matériel Macintosh. Si vous installez ce genre de matériel pour la première fois, nous vous conseillons vivement de suivre les instructions d’installation détaillées. Este resumen es para las personas que ya tienen experiencia en la instalación de productos de actualización Sonnet o que conocen el hardware de Macintosh.
En Installation Overview This overview is intended for those with prior experience installing Sonnet upgrade products or Macintosh hardware. However, we strongly recommend following the full installation instructions if this is your first installation of this hardware. Installing the Encore/ZIF card takes a few easy steps: 1) Install Mac OS 9.
Es Fr Remarque technique : Avant de procéder à l’installation, prenez connaissance des instructions ci-après. En raison de la fragilité des broches de la carte, son installation doit être réalisée avec le plus grand soin. La garantie accompagnant le produit ne couvre pas l’endommagement des broches. Si vous ne pensez pas pouvoir mettre en place le matériel, contactez un technicien qualifié.
En Support Note: Please familiarize yourself with the following instructions before beginning the installation. This product has fragile pins that can be easily damaged. Careful installation is required. Broken pins are not covered under warranty. If you feel you are unable to install the computer hardware, please contact a qualified computer technician. We recommend that you make a backup of important information on your hard drive prior to installing new hardware or software.
Es Fr installation). Cliquez sur le bouton Select (Sélectionner). Affichez les écrans suivants jusqu’à ce que vous atteignez la fenêtre Install Software (Installer le logiciel). Cliquez sur le bouton Customize (Personnaliser). Dans la fenêtre Custom Installation and Removal (Installation et suppression personnalisées), cliquez sur le menu déroulant en regard de Mac OS 9.x. Remplacez Recommended Installation (Installation recommandée) par Customized installation (Installation person-nalisée).
En installation.” The Select Mac OS 9.x Features to Install window will appear shortly. Change “Recommended Installation” to “Universal Installation” from the pop-up menu. Click OK, Start, then Continue to complete the installation. After the software is installed, quit the Mac OS Install application and restart your computer from the hard drive where Mac OS 9.x is installed. 2. Insert the Sonnet Installer CD into the CDROM drive. Double click the Crescendo/Encore Install icon.
Fr Es Arrêt et démarrage de l’ordinateur Apague y abra la computadora 1. Arrêtez votre ordinateur Power Macintosh. Si l’ordinateur est resté allumé pendant longtemps, laissez-le refroidir pendant quelques minutes avant de lancer l’installation. 2. Débranchez les câbles des périphériques et d’alimentation électrique de l’arrière de l’ordinateur et placez la machine dans un endroit facilement accessible. 2.
En cover Shut Down and Open Computer 1. Shut down your Power Macintosh. If the computer has been on for any length of time, wait a few minutes for it to cool before beginning the installation. 2. Disconnect the power and peripheral cables from the back of the computer and move it to an area where you can freely work. 3. With the front of the computer facing you, remove the cover from your Power Macintosh.
Fr Es Retrait du radiateur Retire el disipador de calor Identifiez le radiateur de processeur sur la carte logique (Figure 5). Placez le petit tournevis à lame plate entre le loquet et l’emplacement ZIF (Figure 5). Si votre ordinateur est sous garantie, veillez à ne pas briser accidentellement le sceau du cavalier adjacent à l’emplacement ZIF. Appuyez avec le doigt sur la partie supérieure du loquet et appuyez avec le tournevis sur le côté de celui-ci jusqu’à son déblocage de l’emplacement ZIF.
En heatsink Remove Heatsink Locate the processor heatsink on the logic board (Figure 5). Place a small flat blade screwdriver between the latch and the ZIF socket (Figure 5). Press down on the top of the latch with your finger while you press the screwdriver against the side of the latch until you see the latch unhook from the ZIF socket tab. Unhook the latch on the other side of the heatsink and remove the latch.
Fr 3. Notez également que l’un des angles de l’emplacement ZIF ne présente pas d’orifice (Figure 9). Alignez l’emplacement 1 de la carte Encore sur l’angle sans orifice de l’emplacement ZIF et insérez la carte. Si vous constatez une résistance, retirez la carte pour vérifier qu’aucune broche n’a été pliée. Après vérification, réalignez la carte sur l’emplacement et insérez-la délicatement. ATTENTION : La garantie ne couvre pas l’endommagement des broches. 4.
En Encore/ZIF card 3. The ZIF socket has a corner without a hole (Figure 9). Align and lower the Encore card so that position 1 on the Encore matches with the corner of the ZIF socket without the hole. If you encounter any resistance, raise the card and check for bent pins; then, realign the card over the socket and gently lower it again. Be very careful! Broken pins are not covered under warranty. ZIF socket corner without hole Figure 9; Figura 9 4.
Es Fr 2. Faites pivoter le dispositif interne dans le châssis de l’ordinateur (Figure 13). 2. Gire el ensamblaje interno para regresarlo a su lugar original (Figura 13). 3. Bloquez les loquets du bloc d’alimentation interne dans leur position d’origine (Figure 14). 3. Fije los pestillos del conjunto interno en sus posiciones originales (Figura 14). 4. Replacez le capot plastique sur le boîtier (Figure 15). 4. Gire la cubierta plástica sobre la caja (Figura 15). 5.
En 2. Rotate and lower the internal assembly back into the computer’s case (Figure 13). internal assembly 3. Lock the internal assembly latches into their original position (Figure 14). 4. Rotate the plastic cover onto case (Figure 15). 5. Replace the case cover onto your computer (Figure 16). Figure 13; Figura 13 latch 6. Affix the Powered by Sonnet label to the front of your computer. Return the computer to your computing area and reconnect the power and peripheral cables to the computer.
Chapitre 4 Capítulo 4 Installation sur Power Macintosh G3 Tower et Server Instalación en computadoras Power Macintosh G3 torre y servidor Ce chapitre contient les instructions d’installation des cartes de mise à jour processeur Encore/ZIF sur le système Power Macintosh G3 Tower et Server. Compatibilité avec les systèmes d’exploitation À la mise sous presse de ce document, les cartes de mise à jour processeur Encore/ZIF prennent en charge toutes les versions de système Macintosh, allant de Mac OS 8.
Chapter 4 Power Macintosh G3 Tower and Server Installation This chapter contains instructions for installing Encore/ZIF processor upgrade cards into a Power Macintosh G3 Tower or Server computer. Operating System Compatibility At this printing, Encore/ZIF processor upgrade cards are compatible with Mac OS 8 through OS 9.1. Mac OS 9.x is required for G4 AltiVec use. For up-to-date Mac OS compatibility, check our website.
Fr Es Résumé de la procédure d’installation Resumen de instalación Ce document est destiné aux utilisateurs ayant déjà installé des mises à jour Sonnet ou du matériel Macintosh. Si vous installez ce genre de matériel pour la première fois, nous vous conseillons vivement de suivre les instructions d’installation détaillées. Este resumen es para las personas que ya tienen experiencia en la instalación de productos de actualización Sonnet o que conocen el hardware de Macintosh.
En Installation Overview This overview is intended for those with prior experience installing Sonnet upgrade products or Macintosh hardware. However, we strongly recommend following the full installation instructions if this is your first installation of this hardware. Installing the Encore/ZIF card takes a few easy steps: 1) Install Mac OS 9.
Es Fr Remarque technique : Avant de procéder à l’installation, prenez connaissance des instructions ci-après. En raison de la fragilité des broches de la carte, son installation doit être réalisée avec le plus grand soin. La garantie accompagnant le produit ne couvre pas l’endommagement des broches. Si vous ne pensez pas pouvoir mettre en place le matériel, contactez un technicien qualifié.
En Support Note: Please familiarize yourself with the following instructions before beginning the installation. This product has fragile pins that can be easily damaged. Careful installation is required. Broken pins are not covered under warranty. If you feel you are unable to install the computer hardware, please contact a qualified computer technician. We recommend that you make a backup of important information on your hard drive prior to installing new hardware or software.
Es Fr installation). Cliquez sur le bouton Select (Sélectionner). Affichez les écrans suivants jusqu’à ce que vous atteignez la fenêtre Install Software (Installer le logiciel). Cliquez sur le bouton Customize (Personnaliser). Dans la fenêtre Custom Installation and Removal (Installation et suppression personnalisées), cliquez sur le menu déroulant en regard de Mac OS 9.x. Remplacez Recommended Installation (Installation re-commandée) par Customized installation (Installation person-nalisée).
En installation.” The Select Mac OS 9.x Features to Install window will appear shortly. Change “Recommended Installation” to “Universal Installation” from the pop-up menu. Click OK, Start, then Continue to complete the installation. After the software is installed, quit the Mac OS Install application and restart your computer from the hard drive where Mac OS 9.x is installed. 2. Insert the Sonnet Installer CD into the CDROM drive. Double click the Crescendo/Encore Install icon.
Fr Es Arrêt et démarrage de l’ordinateur Apague y abra la computadora 1. Arrêtez votre ordinateur Power Macintosh. Si l’ordinateur est resté allumé pendant longtemps, laissez-le refroidir pendant quelques minutes avant de lancer l’installation. 1. Apague su computadora Power Macintosh. Si la computadora ha estado encendida por un periodo de tiempo largo, espere que se enfríe unos minutos antes de comenzar la instalación. 2.
En Shut Down and Open Computer 1. Shut down your Power Macintosh. If the computer has been on for any length of time, wait a few minutes for it to cool before beginning the installation. 2. Disconnect the power and peripheral cables from the back of the computer and move it to an area where you can freely work. side panel Figure 1; Figura 1 latch 3. With the front of the computer facing you, open your Power Macintosh by removing the side panel (Figure 1). 4.
Fr Es Retrait de la carte de processeur Retire la tarjeta de procesador Pour débloquer le levier de l’emplacement ZIF (Figure 5), appuyez sur le levier vers le bas et poussez-le en dehors de la languette latérale. Une fois le levier éloigné de la languette, faites-le pivoter de 90° vers le haut. Retirez ensuite délicatement la carte de processeur existante de l’emplacement ZIF.
En ZIF socket lever Remove Processor Card To unlatch the ZIF socket lever (Figure 5), push the lever down and then out to clear the side tab. Once the level is clear of the side tab, rotate the lever up 90˚. Gently lift the existing processor card up and out of the ZIF socket. ZIF socket processor card Figure 5; Figura 5 Install Encore/ZIF Processor Upgrade Card 1. Remove the Encore processor upgrade card from the anti-static package, making sure to handle the card by the edges (Figure 6).
Es Fr 4. En appliquant une pression légère avec le doigt, maintenez la carte Encore en position horizontale sur l’emplacement ZIF et abaissez le levier de l’emplacement en appuyant sur celui-ci jusqu’à son blocage sous la languette latérale (Figure 9). 4. Con una ligera presión digital, sujete la tarjeta Encore a la altura del zócalo ZIF y baje la palanca de dicho zócalo presionando hacia abajo hasta que la palanca se enganche debajo de la lengüeta lateral del zócalo (Figura 9).
En 4. With light finger pressure, hold the Encore level in the ZIF socket and lower the ZIF socket lever by pressing down until the lever hooks under the side tab on the ZIF socket (Figure 9). Reattach Heatsink Reattach the heatsink (Figure 10). Place the metal latch along the indented center of the heatsink. Secure the heatsink by attaching one end of the metal latch to one of the small ZIF socket tabs. Attach the other end of the metal latch; it will snap into place on the ZIF socket tab.
Es Fr 3. Bloquez les loquets du bloc d’alimentation interne dans leur position d’origine (Figure 13). 4. Refermez le panneau latéral de l’ordinateur (Figure 14). 5. Replacez l’ordinateur dans votre zone de travail, et rebranchez le cordon d’alimentation et les câbles de périphériques. 6. Collez l’étiquette « Powered by Sonnet » sur la face avant de l’ordinateur. 3. Fije los pestillos del conjunto interno en sus posiciones originales (Figure 13). 4. Empuje el panel lateral hacia la computadora (Figura 14).
En latch 3. Lock the internal assembly latches into their original position (Figure 13). 4. Push the side panel back towards the computer (Figure 14). latch 5. Return the computer to your computing area and reconnect the power and peripheral cables to the computer. Figure 13; Figura 13 6. Affix the Powered by Sonnet label to the front of your computer. Turn On Computer side panel 1. Turn on your Power Macintosh. Your newly accelerated machine should boot as normal. 2.
Chapitre 5 Capítulo 5 Installation sur Power Macintosh G4 (PCI Graphics) Instalación en computadoras Power Macintosh G4 (PCI Graphics) Ce chapitre contient les instructions d’installation des cartes de mise à jour processeur Encore/ZIF sur le système Power Macintosh G4 (PCI Graphics). Este capítulo contiene instrucciones para instalar las tarjetas actualizadoras de procesador Encore/ZIF en una computadora Power Macintosh G4 (PCI Graphics).
Chapter 5 Power Macintosh G4 (PCI Graphics) Installation This chapter contains instructions for installing Encore/ZIF processor upgrade cards into a Power Macintosh G4 (PCI Graphics) computer. Operating System Compatibility At this printing, Encore/ZIF processor upgrade cards are compatible with Mac OS 8 through OS 9.1. Mac OS 9.x is required for G4 AltiVec use. For up-to-date Mac OS compatibility, check our website.
Fr Es Résumé de la procédure d’installation Resumen de instalación Ce document est destiné aux utilisateurs ayant déjà installé des mises à jour Sonnet ou du matériel Macintosh. Si vous installez ce genre de matériel pour la première fois, nous vous conseillons vivement de suivre les instructions d’installation détaillées. Este resumen es para las personas que ya tienen experiencia en la instalación de productos de actualización Sonnet o que conocen el hardware de Macintosh.
En Installation Overview This overview is intended for those with prior experience installing Sonnet upgrade products or Macintosh hardware. However, we strongly recommend following the full installation instructions if this is your first installation of this hardware. Installing the Encore/ZIF card takes a few easy steps: 1) Install Mac OS 9.
Es Fr Remarque technique : Avant de procéder à l’installation, prenez connaissance des instructions ci-après. En raison de la fragilité des broches de la carte, son installation doit être réalisée avec le plus grand soin. La garantie accompagnant le produit ne couvre pas l’endommagement des broches. Si vous ne pensez pas pouvoir mettre en place le matériel, contactez un technicien qualifié.
En Support Note: Please familiarize yourself with the following instructions before beginning the installation. This product has fragile pins that can be easily damaged. Careful installation is required. Broken pins are not covered under warranty. If you feel you are unable to install the computer hardware, please contact a qualified computer technician. We recommend that you make a backup of important information on your hard drive prior to installing new hardware or software.
Es Fr installation). Cliquez sur le bouton Select (Sélectionner). Affichez les écrans suivants jusqu’à ce que vous atteignez la fenêtre Install Software (Installer le logiciel). Cliquez sur le bouton Customize (Personnaliser). Dans la fenêtre Custom Installation and Removal (Installation et suppression personnalisées), cliquez sur le menu déroulant en regard de Mac OS 9.x. Remplacez Recommended Installation (Installation recommandée) par Customized installation (Installation person-nalisée).
En installation.” The Select Mac OS 9.x Features to Install window will appear shortly. Change “Recommended Installation” to “Universal Installation” from the pop-up menu. Click OK, Start, then Continue to complete the installation. After the software is installed, quit the Mac OS Install application and restart your computer from the hard drive where Mac OS 9.x is installed. 2. Insert the Sonnet Installer CD into the CDROM drive. Double click the Crescendo/Encore Install icon.
Fr Arrêt et démarrage de l’ordinateur Es Apague y abra la computadora 1. Arrêtez votre ordinateur Power Macintosh. Si l’ordinateur est resté allumé pendant longtemps, laissez-le refroidir pendant quelques minutes avant de lancer l’installation. 1. Apague su computadora Power Macintosh. Si la computadora ha estado encendida por un periodo de tiempo largo, espere que se enfríe unos minutos antes de comenzar la instalación. 2.
En Shut Down and Open Computer security lock 1. Shut down your Power Macintosh. If the computer has been on for any length of time, wait a few minutes for it to cool before beginning the installation. 2. Disconnect the power and peripheral cables from the back of the computer and move it to an area where you can freely work. Figure 1; Figura 1 side panel 3. Locate the security lock at the back of the computer (Figure 1). If it is not already pressed in, do so now. raise release latch 4.
Fr Es Retrait de la carte de processeur Retire la tarjeta de procesador Pour débloquer le levier de l’emplacement ZIF (Figure 5), appuyez sur le levier vers le bas et poussez-le en dehors de la languette latérale. Une fois le levier éloigné de la languette, faites-le pivoter de 90° vers le haut. Retirez ensuite délicatement la carte de processeur existante de l’emplacement ZIF.
En processor card Remove Processor Card To unlatch the ZIF socket lever (Figure 5), push the lever down and then out to clear the side tab. Once the level is clear of the side tab, rotate the lever up 90˚. Gently lift the existing processor card up and out of the ZIF socket. ZIF socket lever ZIF socket Figure 5; Figura 5 Install Encore/ZIF Processor Upgrade Card 1. Remove the Encore processor upgrade card from the anti-static package, making sure to handle the card by the edges (Figure 6).
Es Fr 4. En appliquant une pression légère avec le doigt, maintenez la carte Encore en position horizontale sur l’emplacement ZIF et abaissez le levier de l’emplacement en appuyant sur celui-ci jusqu’à son blocage sous la languette latérale (Figure 9). 4. Con una ligera presión digital, sujete la tarjeta Encore a la altura del zócalo ZIF y baje la palanca de dicho zócalo presionando hacia abajo hasta que la palanca se enganche debajo de la lengüeta lateral del zócalo (Figura 9).
En use light finger pressure ZIF socket 4. While using light finger pressure, hold the Encore/ZIF level in the ZIF socket and lower the ZIF socket lever by pressing down until the lever hooks under the side tab on the ZIF socket (Figure 9). Reattach Heatsink Reattach the heatsink (Figure 10). Place the metal latch along the indented center of the heatsink. Secure the heatsink by attaching one end of the metal latch to one of the small ZIF socket tabs.
Chapitre 6 Capítulo 6 Mise à niveau vers le système Mac OS 9.x et vers une carte G4 Actualizar a Mac OS 9.x y G4 Ce chapitre présente les instructions d’installation du système Mac OS et du logiciel qui ajoute des bibliothèques et des extensions permettant d’utiliser les instructions AltiVec avec les cartes de mise à jour processeur Encore/ZIF G4.
Chapter 6 Upgrading to Mac OS 9.x and a G4 This chapter contains instructions for installing Mac OS and application software that adds libraries and extensions to use AltiVec instructions for Encore/ZIF G4 processor upgrade cards. Upgrading to AltiVec-Enhanced Software Mac OS 9.x Mac OS 9 is the earliest Macintosh operating system to include AltiVec libraries. The Encore/ZIF G4 fully supports AltiVec-enhanced software.
Es Fr Recommended Installation (Installation recommandée) par Universal installation (Installation universelle) à l’aide du menu déroulant. Cliquez sur OK, sur Start (Démarrer), puis sur Continue (Continuer) pour terminer l’installation. Une fois le logiciel installé, quittez l’application d’installation de Mac OS et redémarrez l’ordinateur à partir du disque dur sur lequel le système Mac OS 9.x est installé. 2.
En 2. Install Sonnet Software Insert the Crescendo/Encore Install CD into the CD-ROM drive. Double click the Crescendo/Encore Install icon. By default, with “Easy Install” selected from the pop-up menu, the required software will be installed into the active System Folder on the boot drive. If this is ok, click the Install button; otherwise, select “Custom Install” from the pop-up menu for more options or select another drive to install the software.
Es Fr Mac OS 9.x dans le lecteur de CD-ROM puis double-cliquez sur son application d’installation. Affichez les écrans suivants jusqu’à ce que le programme d’installation vous indique que le système Mac OS 9.x est déjà installé. Cliquez sur le bouton Add/Remove (Ajouter/supprimer) pour continuer jusqu’à l’affichage de la fenêtre Install Mac OS 9.x (Installation de Mac OS 9.x). Cliquez sur le bouton Customize (Personnaliser).
En box with a checkmark). Click OK, Start, then Continue to complete the installation. AltiVec-Enhanced Applications Many multimedia and graphics applications, such as Adobe Photoshop and Casady & Greene’s Sound Jam MP, support AltiVec plug-ins and libraries. The Encore/ZIF G4 fully supports these plug-ins and libraries. Refer to your software’s user guide (or manufacturerer’s website) for information about installing AltiVec-enhanced software.
Chapitre 7 Capítulo 7 Informations supplémentaires sur le logiciel Información sobre el software En fonction de la version du logiciel et du modèle de Macintosh utilisés, le programme d’installation Sonnet peut installer sur votre ordinateur les logiciels suivants : Dependiendo de su versión de software y modelo Macintosh, puede que el instalador de software de Sonnet instale los siguientes programas en su computadora: Sonnet Processor Upgrade Extension Sonnet Processor Upgrade Extension Le programme
Chapter 7 Learning About the Software Depending on your software and Macintosh model, Sonnet’s software installer may perform the following software installation on your computer: Sonnet Processor Upgrade Extension The Sonnet Processor Upgrade Extension is needed to attain maximum performance of your G3 or G4 upgrade card. It is installed into your Extensions folder. This extension is not required/installed on Power Macintosh G3 Blue & White and Power Macintosh G4 (PCI Graphics) computers.
Fr Es G4 Firmware Patch Remover G4 Firmware Patch Remover Le module G4 Firmware Patch Remover désinstalle le module G4 Firmware Patch d’un Power Macintosh G3 Bleu & Blanc. G4 Firmware Patch Remover desinstala la corrección informática G4 Firmware Patch de computadoras Power Macintosh G3 Blue y White. Metronome Metronome est un utilitaire de logiciel qui fournit des informations relatives à la nouvelle carte de mise à jour. Il est installé dans le dossier du menu Pomme.
En G4 Firmware Patch Remover The G4 Firmware Patch Remover deinstalls the G4 Firmware patch on a Power Macintosh G3 Blue & White. Metronome Metronome is a software utility that provides information about the new processor card. This utility is placed into the Apple Menu Items Folder. It provides useful information to you and our customer service staff should you need to call us for any reason. Figure 1; Figura 1 Metronome displays bus/processor speeds.
Chapitre 8 Capítulo 8 Guide de dépannage Guía de resolución de problemas Problème : Aucun bruit sonore ou écran vide. Problema: La computadora no emite ningún aviso, o aparece una pantalla negra. Solutions possibles : 1) Vérifiez que le cordon d’alimentation est connecté à l’ordinateur. 2) Retirez la carte Encore/ZIF de l’emplacement ZIF, puis réinstallez-la. Problème : Blocage de l’ordinateur sur l’affichage du bureau ou de façon aléatoire.
Chapter 8 Troubleshooting Guide Problem: No chime, or black screen appears. Possible Solutions: 1) Verify that the power cord is plugged into the computer. 2) Try unplugging the Encore/ZIF card and reseating it in the ZIF Slot. Problem: Computer freezes at desktop or at random. Possible Solutions: 1) Check to see that the Encore/ZIF card is level in the ZIF socket and the heatsink is level on the Encore/ZIF card.
Chapitre 9 Capítulo 9 Garantie limitée Garantía limitada Sonnet Technologies, Inc. garantit ses produits contre tout vice de matériau et de fabrication pendant une durée de trois ans à compter de la date d’achat d’origine. Au titre de cette garantie, la seule obligation qui incombe à Sonnet est la réparation ou le remplacement, au choix de Sonnet, du produit reconnu défectueux. Le seul recours au titre de cette garantie se bornera exclusivement au remplacement et à la réparation sus-mentionnés.
Chapter 9 Limited Warranty Sonnet Technologies, Inc. warrants that its product(s) shall be free from defects in materials and workmanship for a period of three years following the date of original purchase. Sonnet’s liability under this warranty shall be limited, at its option, to repairing or replacing product(s) shown to be defective either in materials or workmanship. The sole and exclusive remedy under this warranty shall be such repair or replacement.
Chapitre 10 Capítulo 10 Pour contacter le service clientèle Comunicación con el Departmento de Servicio al cliente Le site Web de Sonnet www.sonnettech.com met à votre disposition les informations les plus récentes en matière d’assistance technique et de la disponibilité des mises à jour.
Chapter 10 Contacting Customer Service The Sonnet website located at www.sonnettech.com has the most current support information and technical updates.
Sonnet Technologies, Inc. 15 Whatney Irvine, CA 92618-2808 USA www.sonnettech.com E-mail: support@sonnettech.