
Manual


Mac OS Users’ Instructions
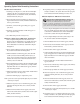
1. Assuming your computer is on, after the Fusion D400QR5
configures the drives a Disk Insertion window will appear
stating that there is an unreadable volume; click Initialize,
and then Disk Utility will open.
2. In the Disk Utility window, the RAID group will appear as a
single volume. Select the volume, and then click the Erase tab
at the top of the window.
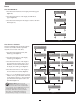
3. Click Erase; a window will appear asking you to approve
your choice.
4. Click Erase; the Fusion D400QR5 volume will appear on
your computer’s desktop.
5. Close Disk Utility; the drive is ready for use.
Windows 7/Vista/Server 2008 Users’ Instructions
1. Select Computer Management From the Windows Start
menu. If Computer Management is not available in the Start
Menu, select Start > Control Panel > Administrative Tools.
In the Administrative Tools window, double-click Computer
Management.
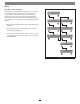
2. In the Computer Management window, click Storage on the
left, and then double-click Disk Management.
3. When the Initialize Disk window appears, select the RAID
volume you created. Select the MBR partition style if you
need to access your RAID storage from a computer running
Windows XP Professional or 32-bit Windows Server 2003;
otherwise, select GPT. Click OK.
4. In the Disk Management window, the Fusion D400QR5 RAID
group will appear (listed as “unallocated”) as a single volume.
Right-click where the word “unallocated” appears, and then
select New Simple Volume.
5. When the Welcome to the New Simple Volume Wizard window
appears, click next to start the process.
6. Follow the remaining steps to complete the process.
Note: If you do not select the quick format option, this process will take
much longer to complete.
7. When the Assign Drive Letter or Path window appears, select
Assign the following drive letter, choose a letter, and then
click Next.
8. When the Format Partition window appears, enter a new
name for the volume table if you’d like. Select Perform a quick
format, and then click Next.
9. When the next window appears, click Finish.
Operating System Drive Formatting Instructions
10. Depending on how you configured the RAID group, it may
already be available to the system. Once the RAID group has
been formatted and finishes building, it is ready to use.
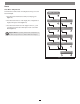
Windows XP/Server 2003 Users’ Instructions
1. Select Computer Management From the Windows Start menu.
If it is not available in the Start Menu, select Start > Settings >
Control Panel > Administrative Tools. In the Administrative
Tools window, double-click Computer Management.
2. In the Computer Management window, click Storage on the
left, and then double-click Disk Management.
3. When the Initialize and Convert window appears, click OK.
4. When the Select Disks to Initialize window appears, select the
RAID volume(s), and then click Next.
5. When the next window appears, click Finish.
6. In the Disk Management window, the Fusion D400QR5 RAID
group will appear (listed as “unallocated”) as a single volume.
Right-click where the word “unallocated” appears, and then
select New Partition.
7. When the Welcome to the New Partition Wizard window
appears, click Next.
8. When the Select Partition Type window appears, select Primary
Partition, and then click Next.
9. When the Specify Partition Size window appears, click next.
10. When the Assign Drive Letter or Path window appears, select
Assign the following drive letter, choose a letter, and then
click Next.
11. When the Format Partition window appears, enter a new
name for the volume table if you’d like. Select Perform a quick
format, and then click Next.
12. When the next window appears, click Finish.
Note: If you do not select the quick format option, this process will take
much longer to complete.
13. Depending on how you configured the RAID group, it may
already be available to the system. Once the RAID group has
been formatted and finishes building, it is ready to use.
7
Support Note for Windows XP Users: Windows XP
32-bit does not support volumes greater than 2TB.
Windows XP x64, Vista Ultimate/Enterprise, 7 (Professional,
Enterprise or Ultimate), and Windows Server 2008 and 2003 support
volumes greater than 2TB, but must be formatted using the GPT file
system, which is not accessible by Windows XP 32-bit systems.