
Integrator's Manual GR47/GR48


14. USING THE DEVELOPER’S KIT
82
LZT 123 7589 R1A
14.7 LED Indicators
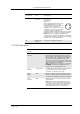
EXT VCC 3 pin
Circular
This connector carries three signals:
EXT VCC (1);
CHG_IN (3);
GND (2).
(These signals are wired into PCB
holes labelled EXT, CHG, GND
respectively).EXT VCC must be a
+3.6VDC source capable of
supplying up to 2.0A. This can be
a battery source.CHG_IN can be
a +5.0VDC source capable of
supplying 600mA maximum.GND is the ground
reference to be used by the external supplies.
Note: If battery charging is enabled the
charging source must be capable of supplying
the required charging current but the charging
current must not exceed 500mA.
RF SMA Panel
Socket
Connect the supplied antenna.
LED
(Colour)
Location Description
Status
(Green)
Front Panel This LED is enabled by fitting the “LED”
jumper link (located between the internal
power supply and the keypad header).The
LED is driven on by a signal from the radio
device pin 33 (LED/IO6).When the radio
device connection “LED/IO6” is configured
as the LED driver this LED signifies the module
and network status as follows;
ON - Module cannot connect to a network.
FLASHING - MODULE has SIM fitted and is
locked onto a valid GSM network.
VIO
(Yellow)
Front Panel This LED is illuminated when the radio device
is switched on. The module outputs
+2.75VDC on signal VIO (pin 34).
SRVC
(Red)
PCB When the SRVC jumper link is fitted and the
DK has +3.6VDC power, this LED illuminates
to indicate that SERVICE mode is activated.
3V6
(Green)
PCB When the DK has +3.6VDC power, this LED
will illuminate.
Note: The DK +3.6V and the radio device
VCC inputs are connected through switch
VCC (SW1) on the front panel. The 3V6 LED
does NOT indicate that the module has
power applied to its VCC connections.
Connector Type Description
2
1
3